Activity List
What is an Activity?
The sequence of work to be followed in the construction of a building is the at most important
procedures of construction. The major sequences of construction are marking, excavation,
concreting, brick masonry, roof laying, flooring and finishing.
Select the Activity option from the menu. Based on categories, the activity list will be visible if already added.
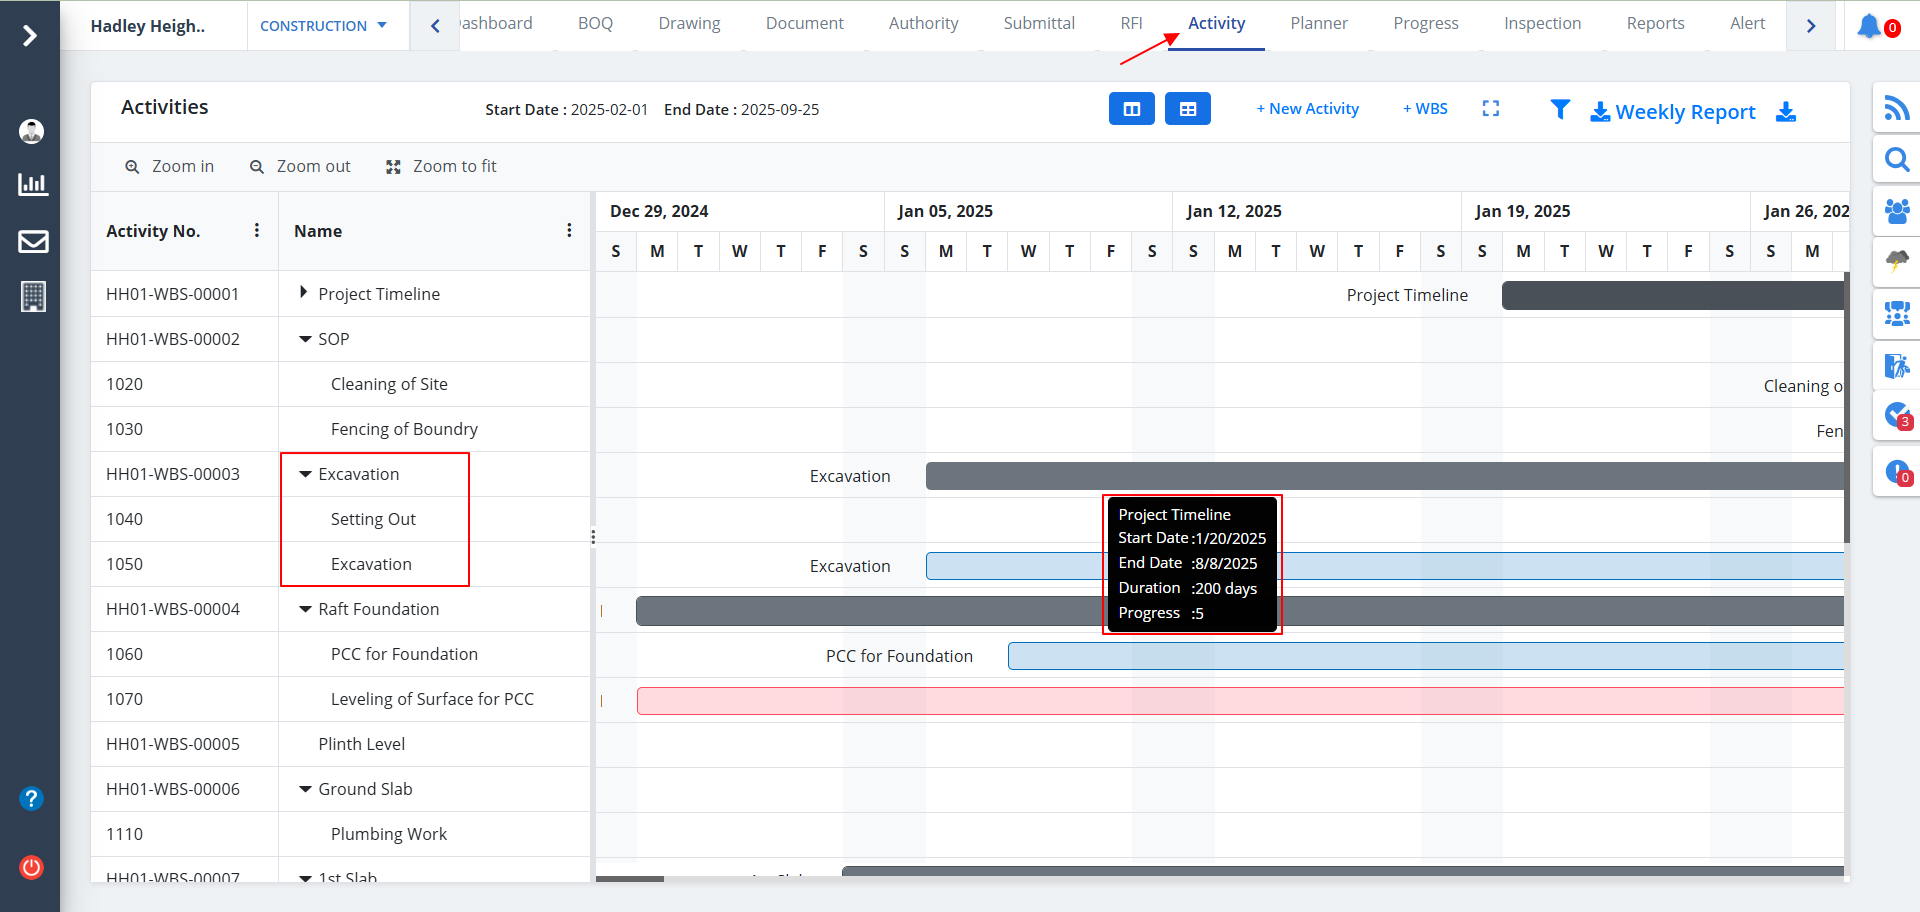
- Click on any of the activity names to view the segregation of the activity as shown in the below diagram.
- Hover on any of the bars to view the WBS details as shown.
- When you click on any of the bars you would be able to add a new WBS. We will discuss how to add a WBS shortly.
- You will also see the overall start and end dates on the same lines as the New Activity & WBS buttons.
- When clicked on any sub-activity you will be able to edit activity details which will we discuss later.
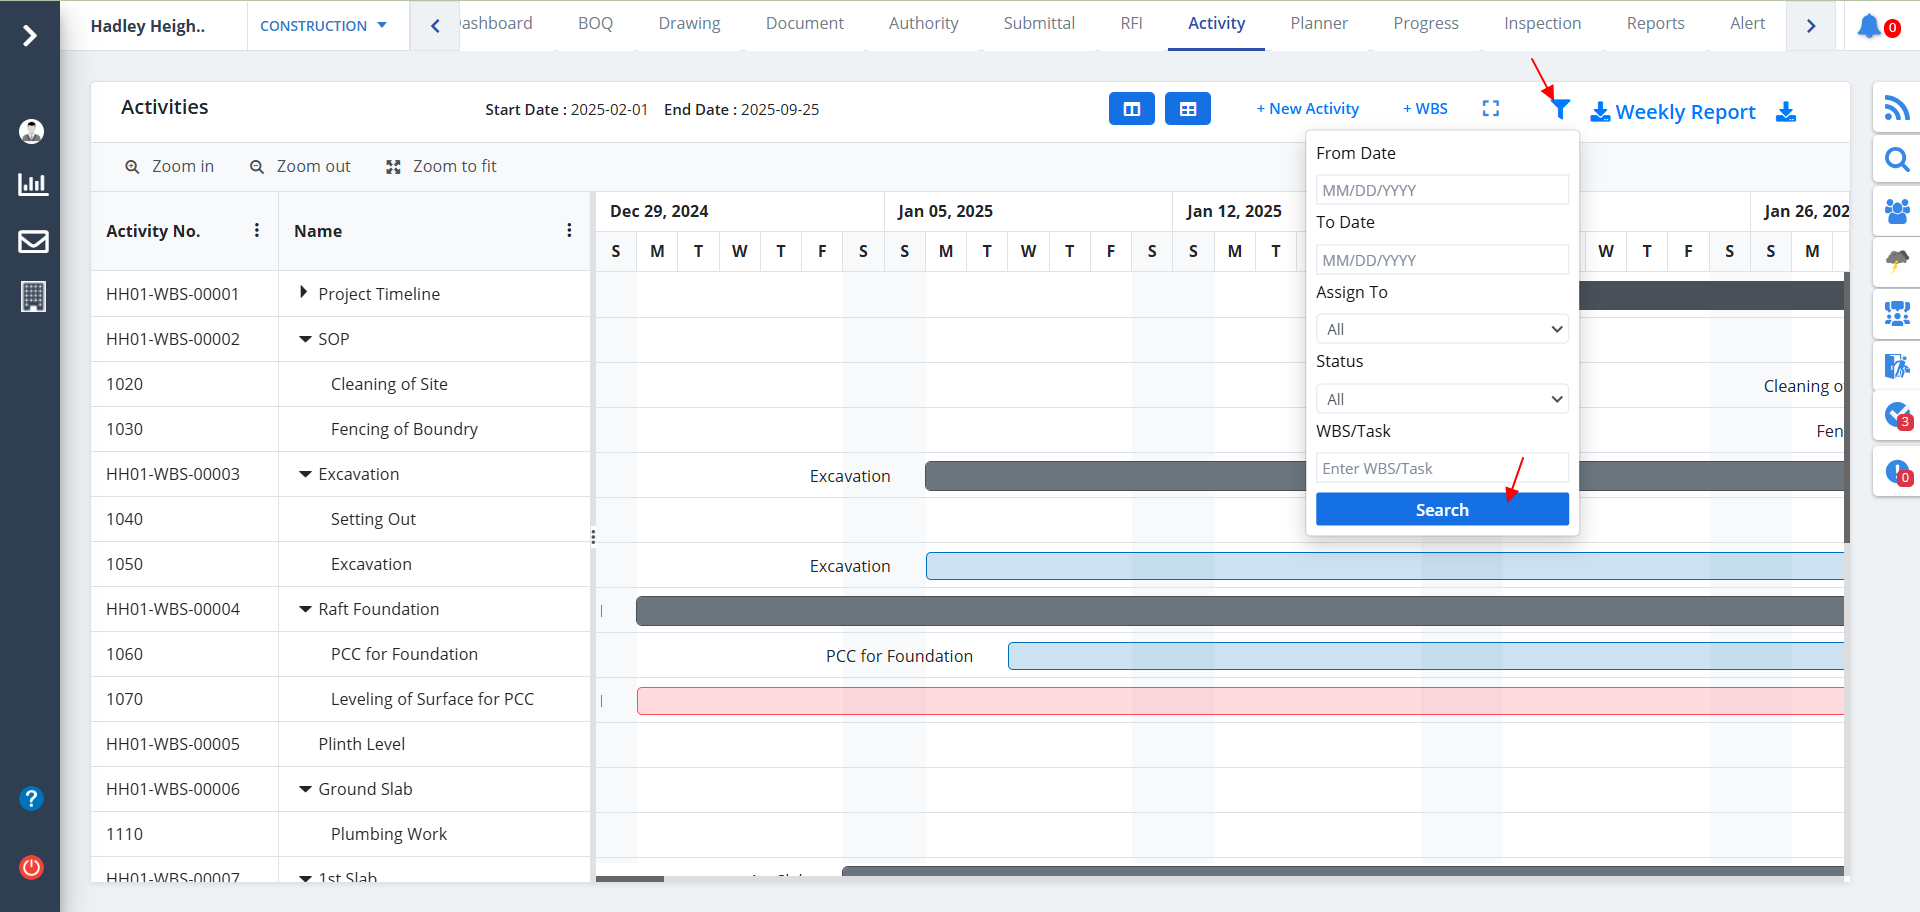
A Filter is added that allows you to filter data as shown below. Mention proper filter field values and click on Search.
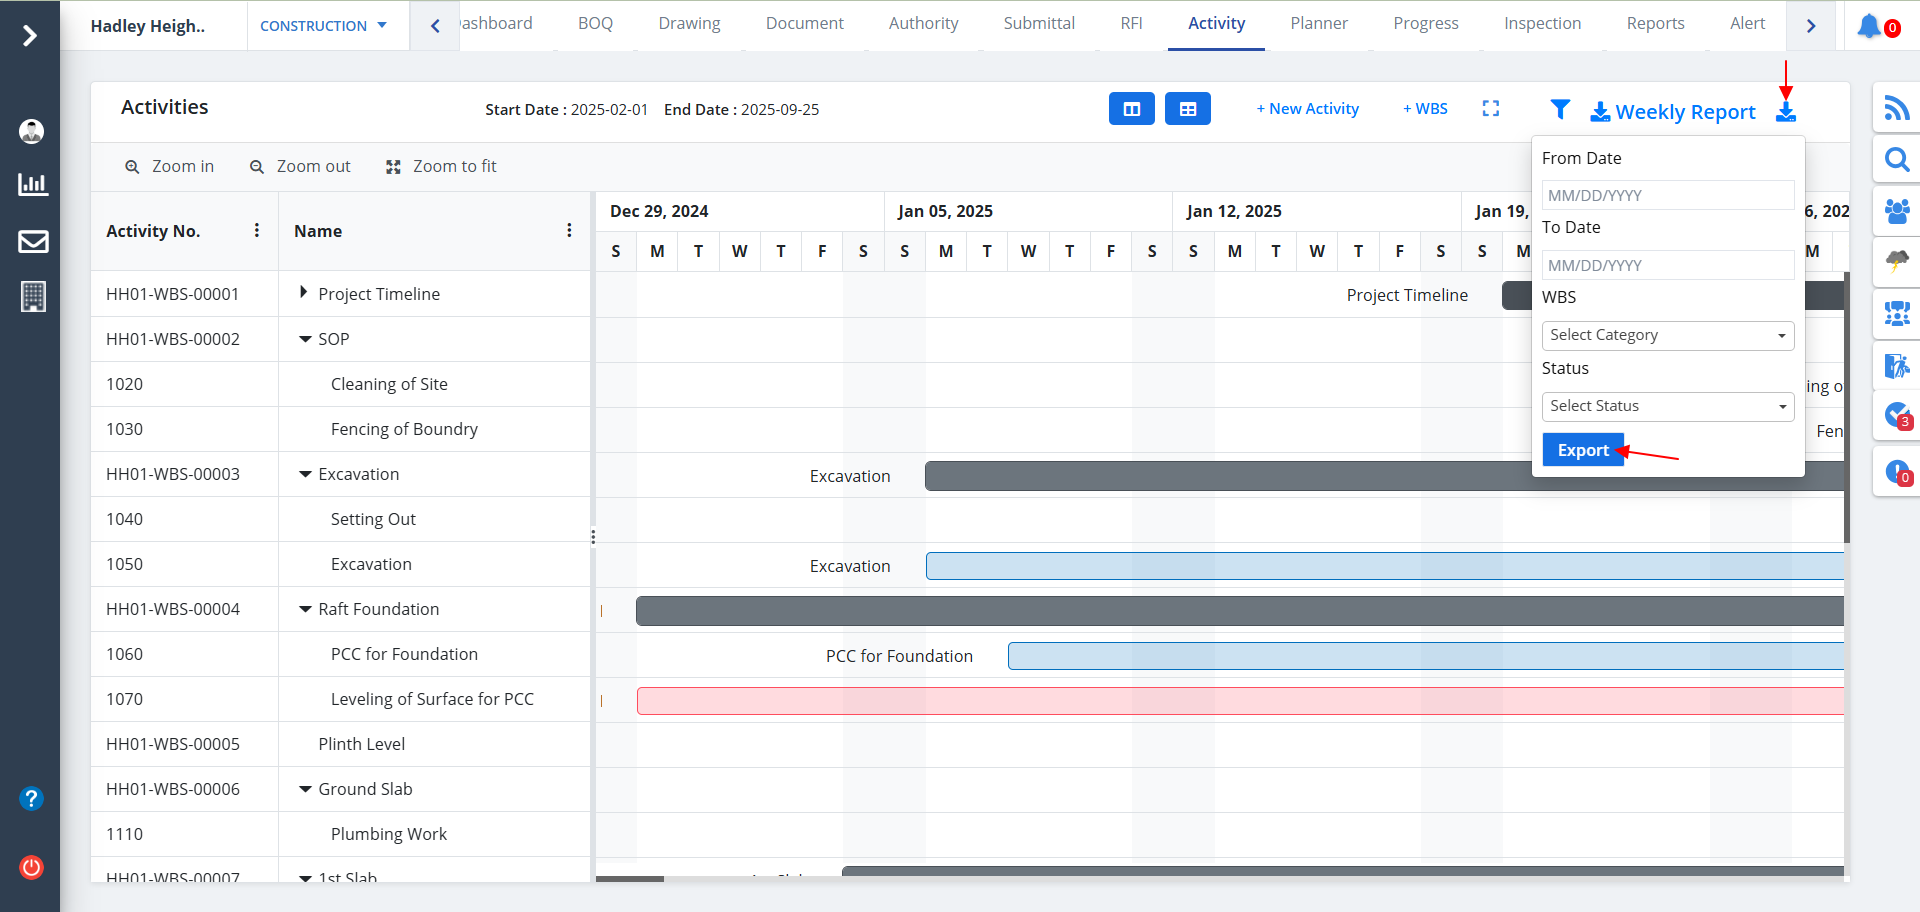
Activity Export
- You can download any Activity; just click Download as shown.
- Give proper inputs and use the button below.
- A .xlsx file with all the details will be downloaded.
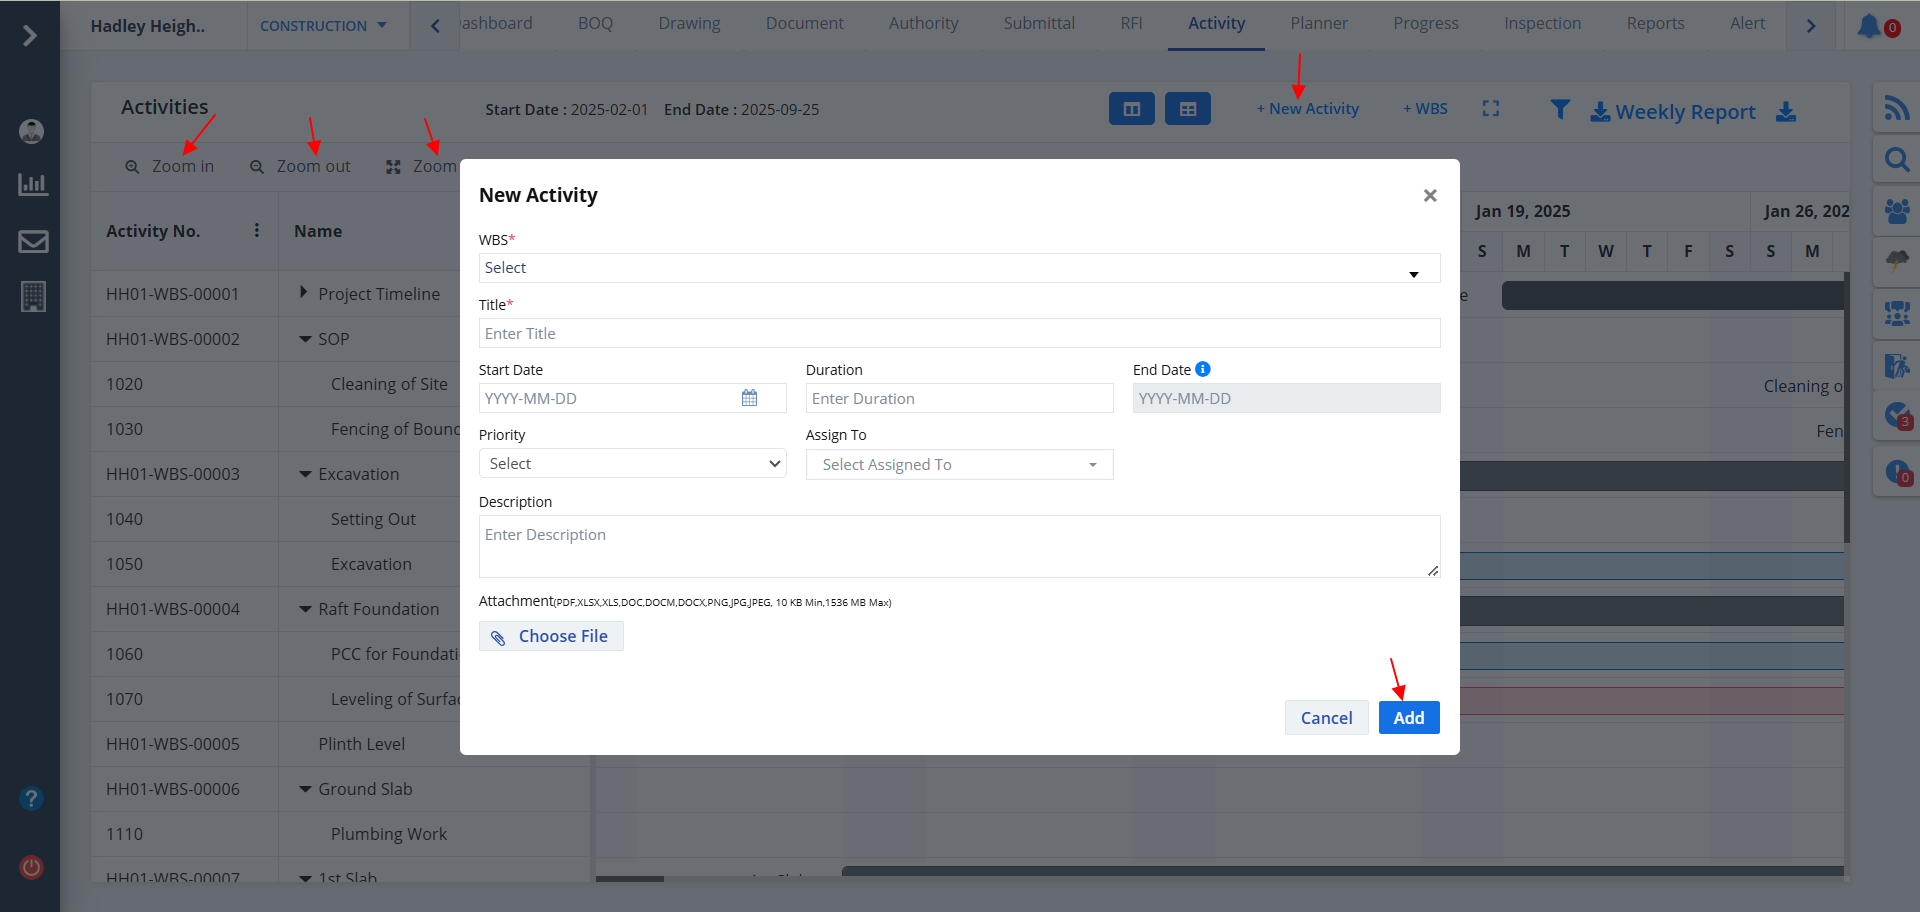
New Activity
To add a new activity:-
- Click New Activity and provide details.
- Ultimately click on Add button.
While adding activity:-
- Set the type to Milestone if the tasks are enormous.
- Set the type to Activity if the tasks are not that tedious or time consuming.
Assign As is basically a restriction. Its values are:-
- If you want to refrain from third party involvement, then set it to Restricted
- Else set it to Non-Restricted
- Set the status as In Progress if the activities are under way.
- Set the status as Not Started if the work has not commenced yet.
- Set the status as Completed if the agenda or scheduled tasks are finished.
- You have 3 different options for viewing the Gantt Chart; Zoom In, Zoom Out, Zoom to fit.
- The Gantt will adjust itself automatically according to the selected option.
Activity Full Screen
- You can click on the icon shown in the below image to experience a full screen view of the Gantt Chart.
- Once clicked, it switches to full screen as shown.
- To exit full screen just hover on the top-right of the screen, you will see a close icon (X). Click on the button. Alternatively you can press Esc button.


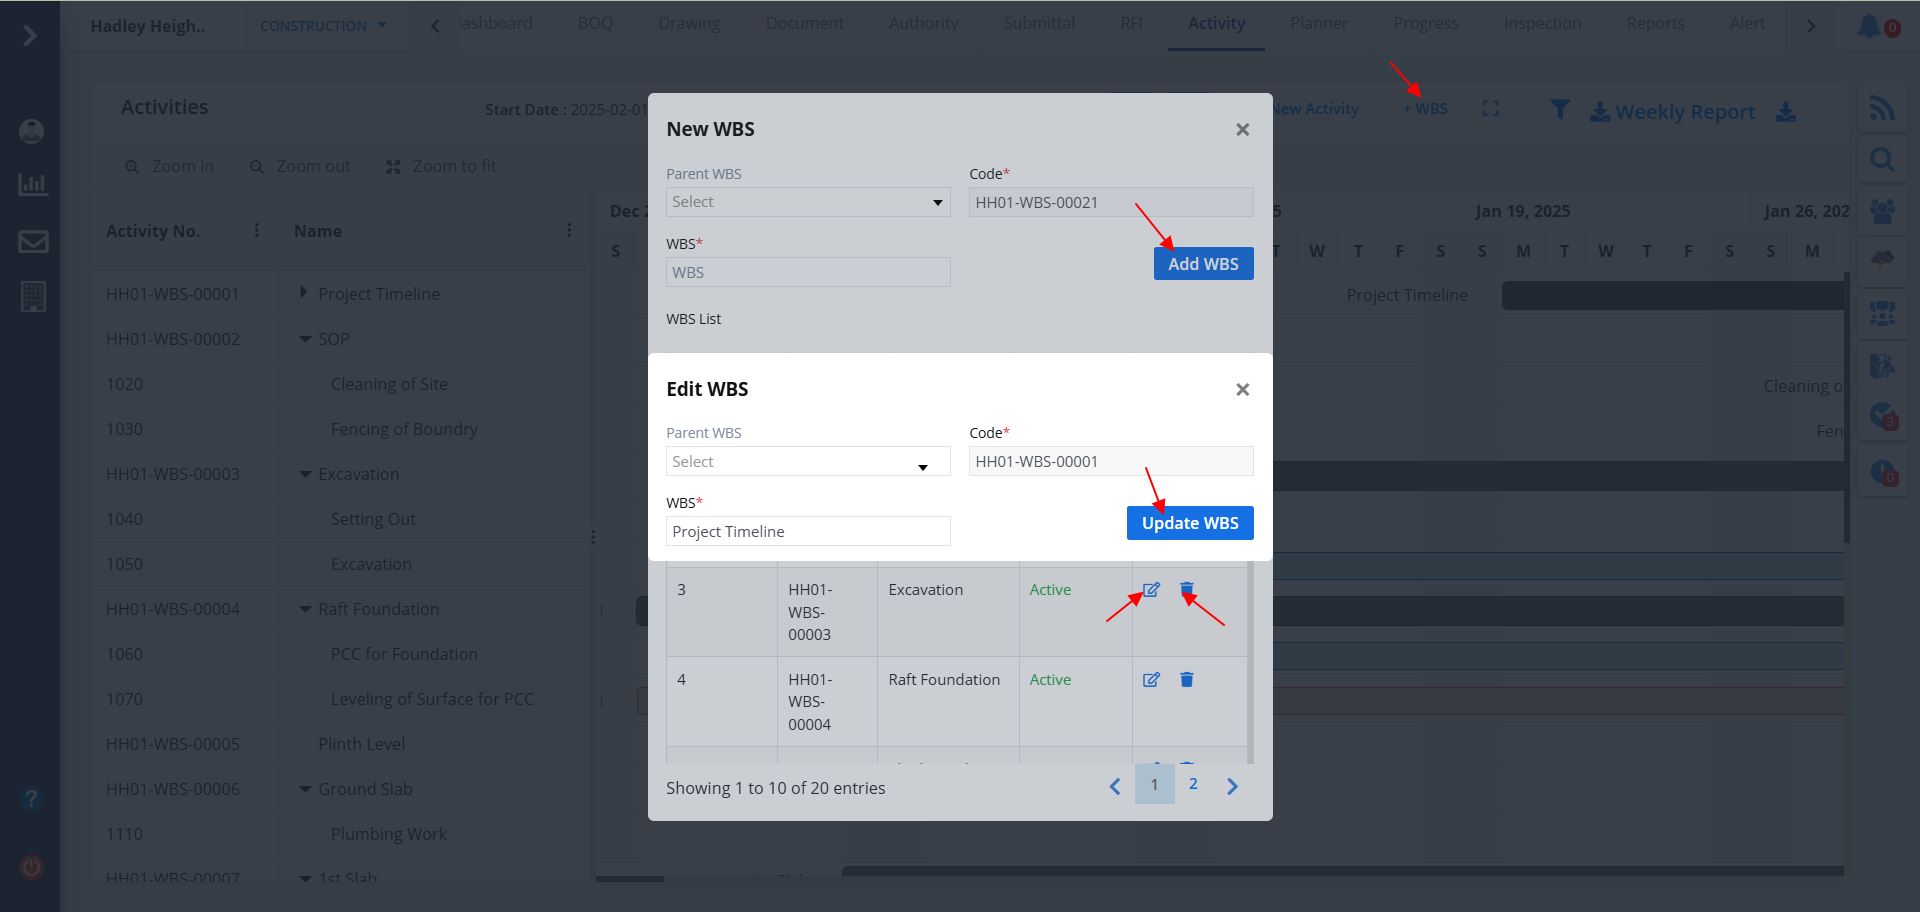
Add WBS
- Click on +WBS to add a new Work Breakdown Structure.
- Now select the parent WBS. Add a new one directly as an input and click on Add WBS.
- Use the first button under Action column to edit a particular category and use the 2nd button to delete the same.
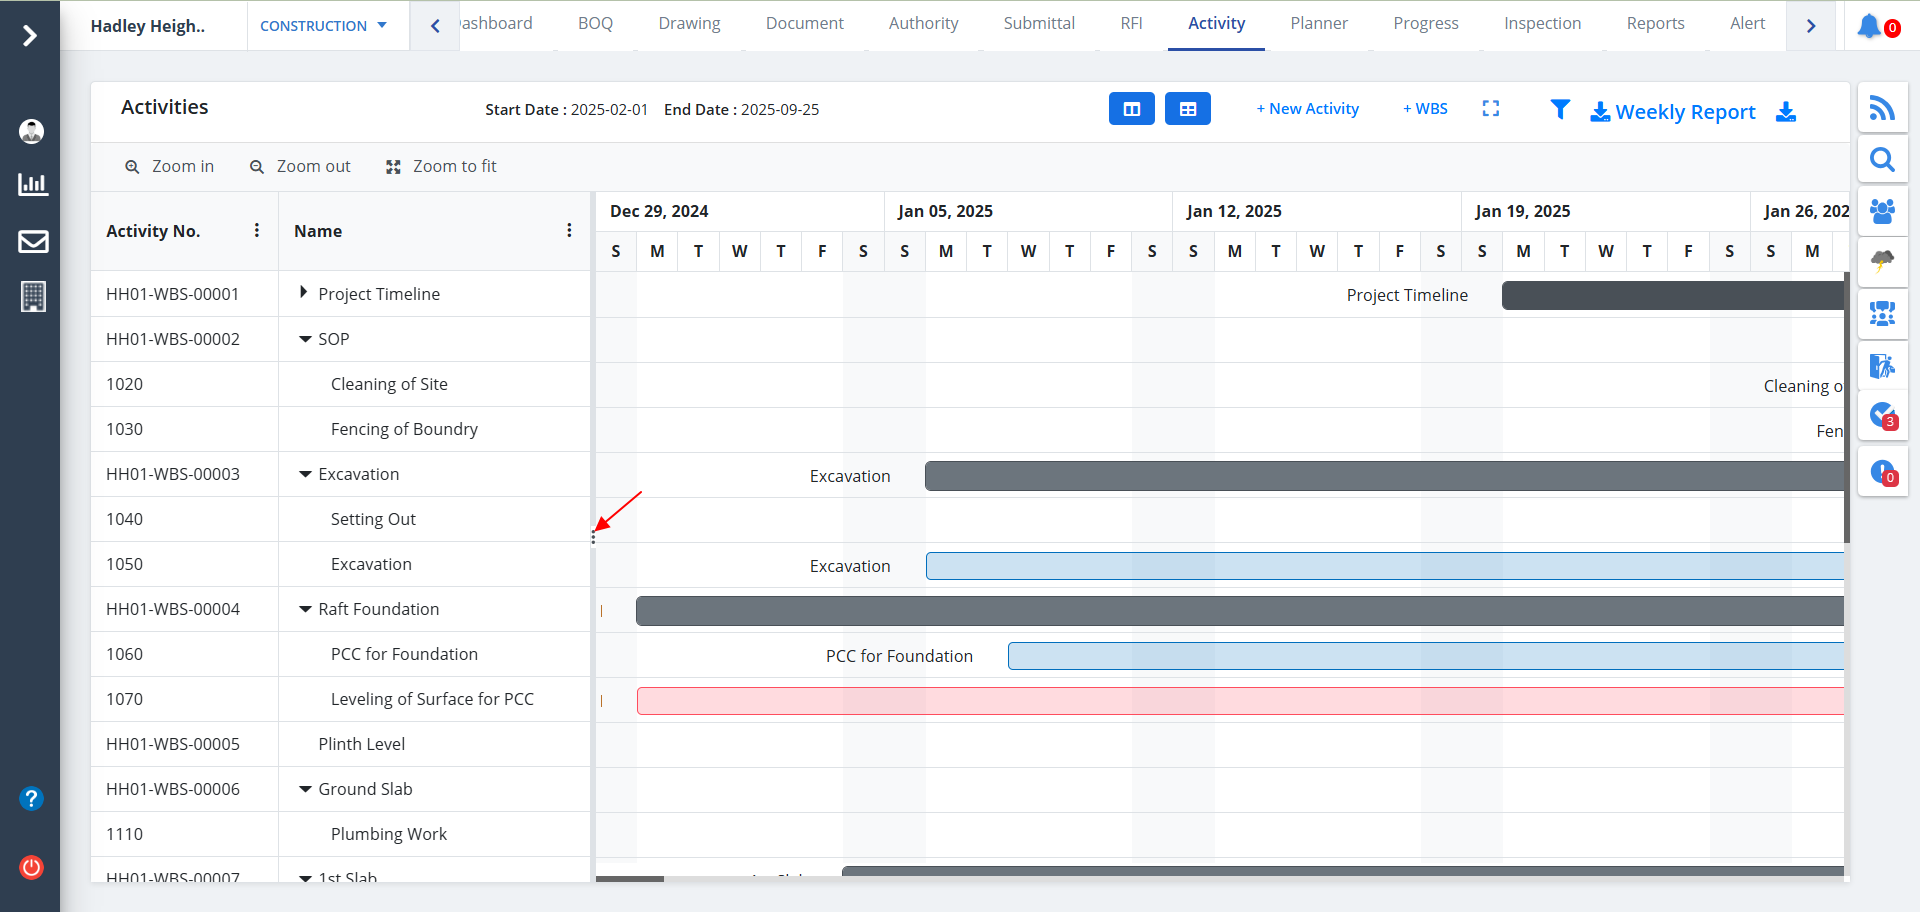
Activity Drag
- Use the icons as depicted to use the drag functionality.
- Drag the columns to view the Gantt chart exhaustively without switching to full screen.
- You can drag the Gantt vertically as per requirement.
Column Options
- You can choose to autofit the the selected column or autofit all columns. Just click on the Kebab menu as shown.
- Use the sub-column Columns to switch to column visibility. You can select and deselect the columns as per your choice.
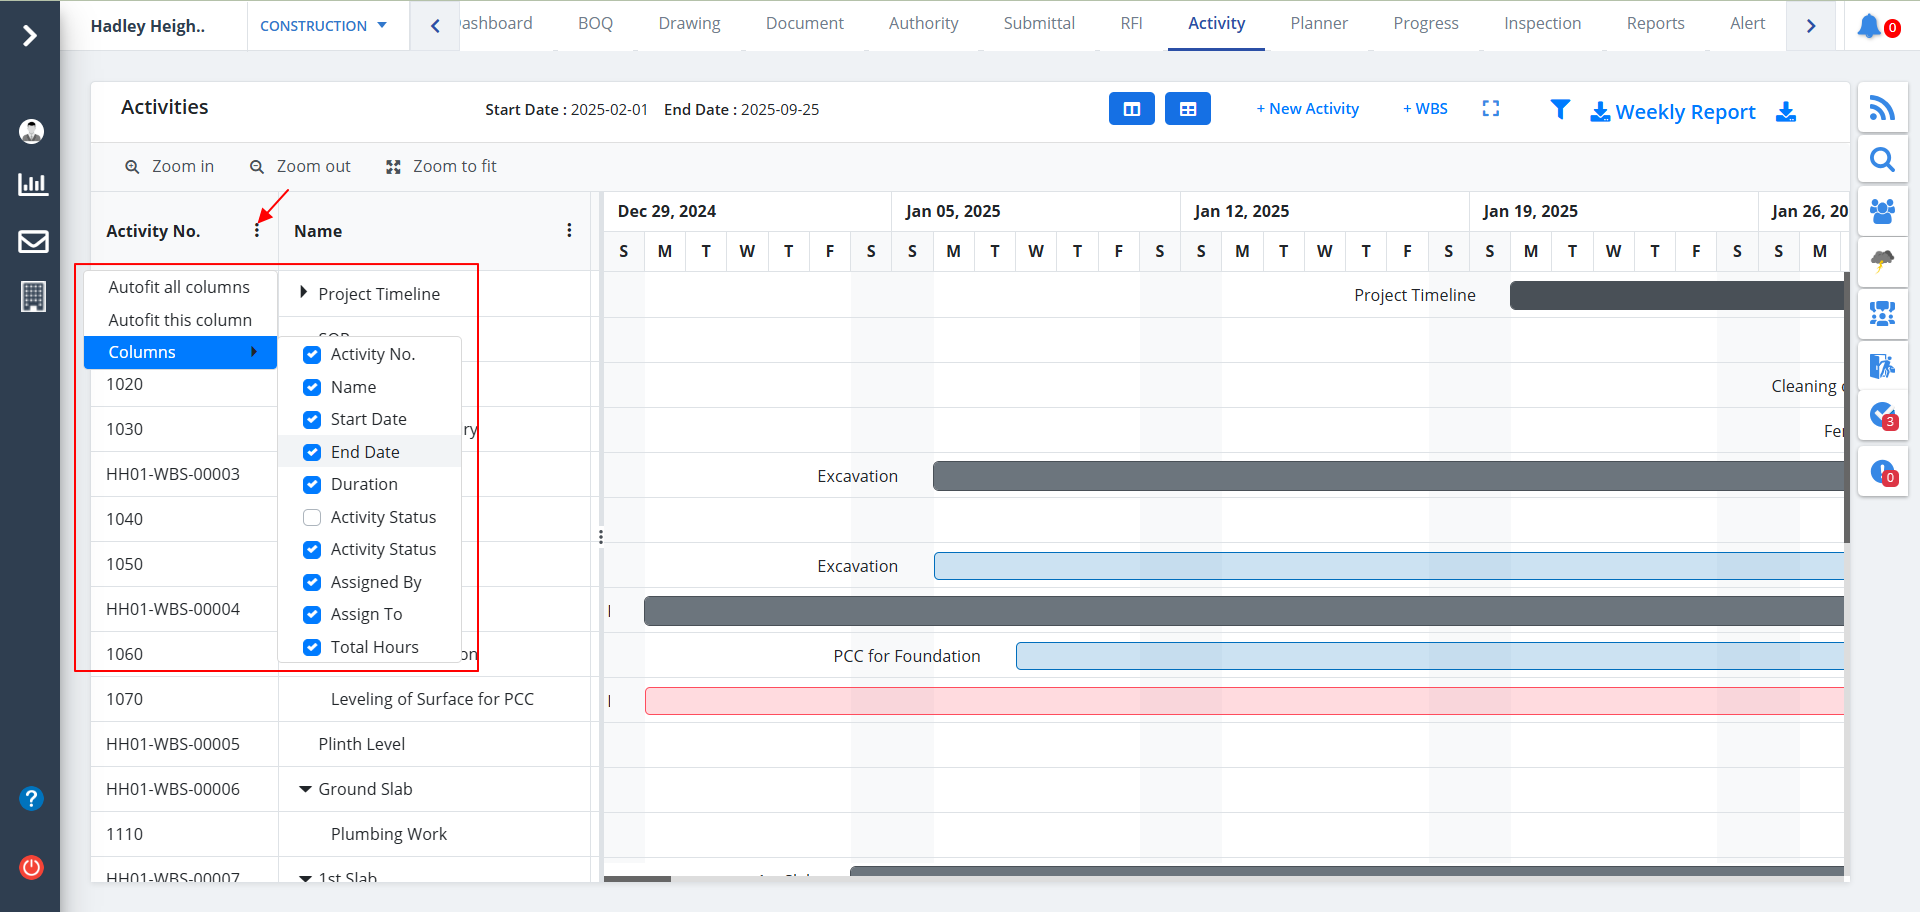
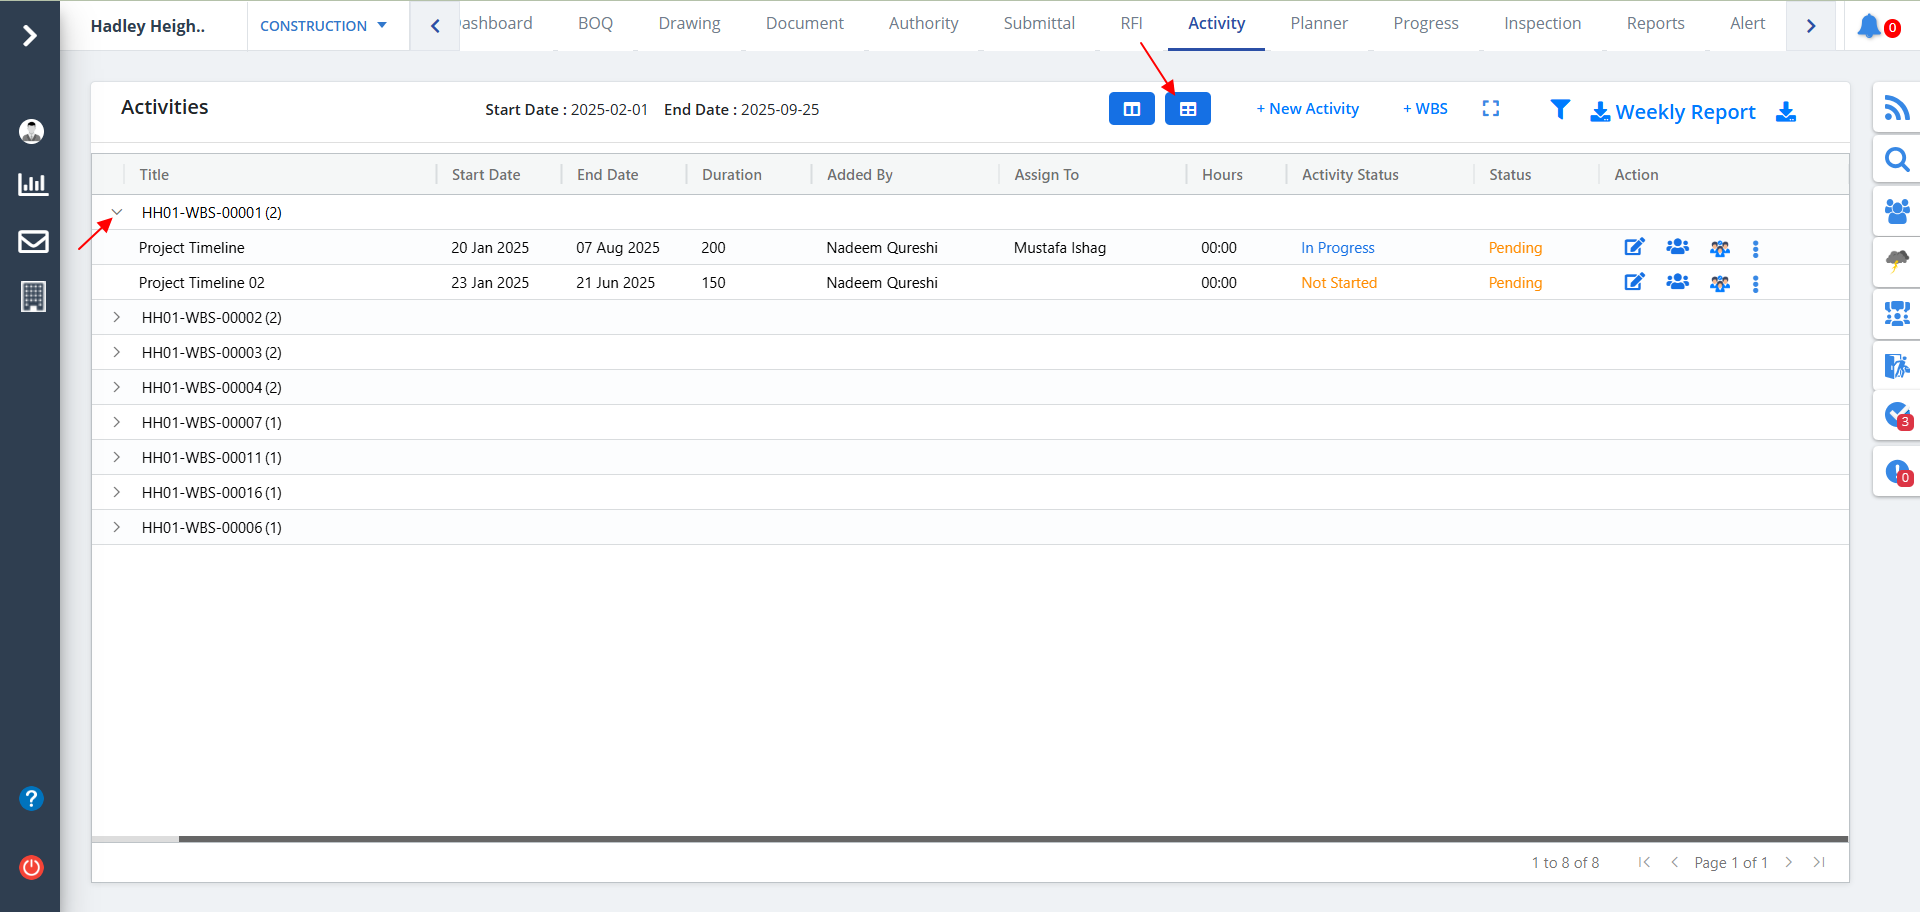
Table View
- Click on the Table button as shown. You would see a tabular format of the entire Activity Gantt Chart.
- You can open an activity individually to view the same exhaustively. Just click on Arrow icon as shown.
- Click on Edit button as shown. Now you can edit data as required and click on Update Details.
- There are different categories as shown in the diagram. Click on any of the desired category to view the data briefly.
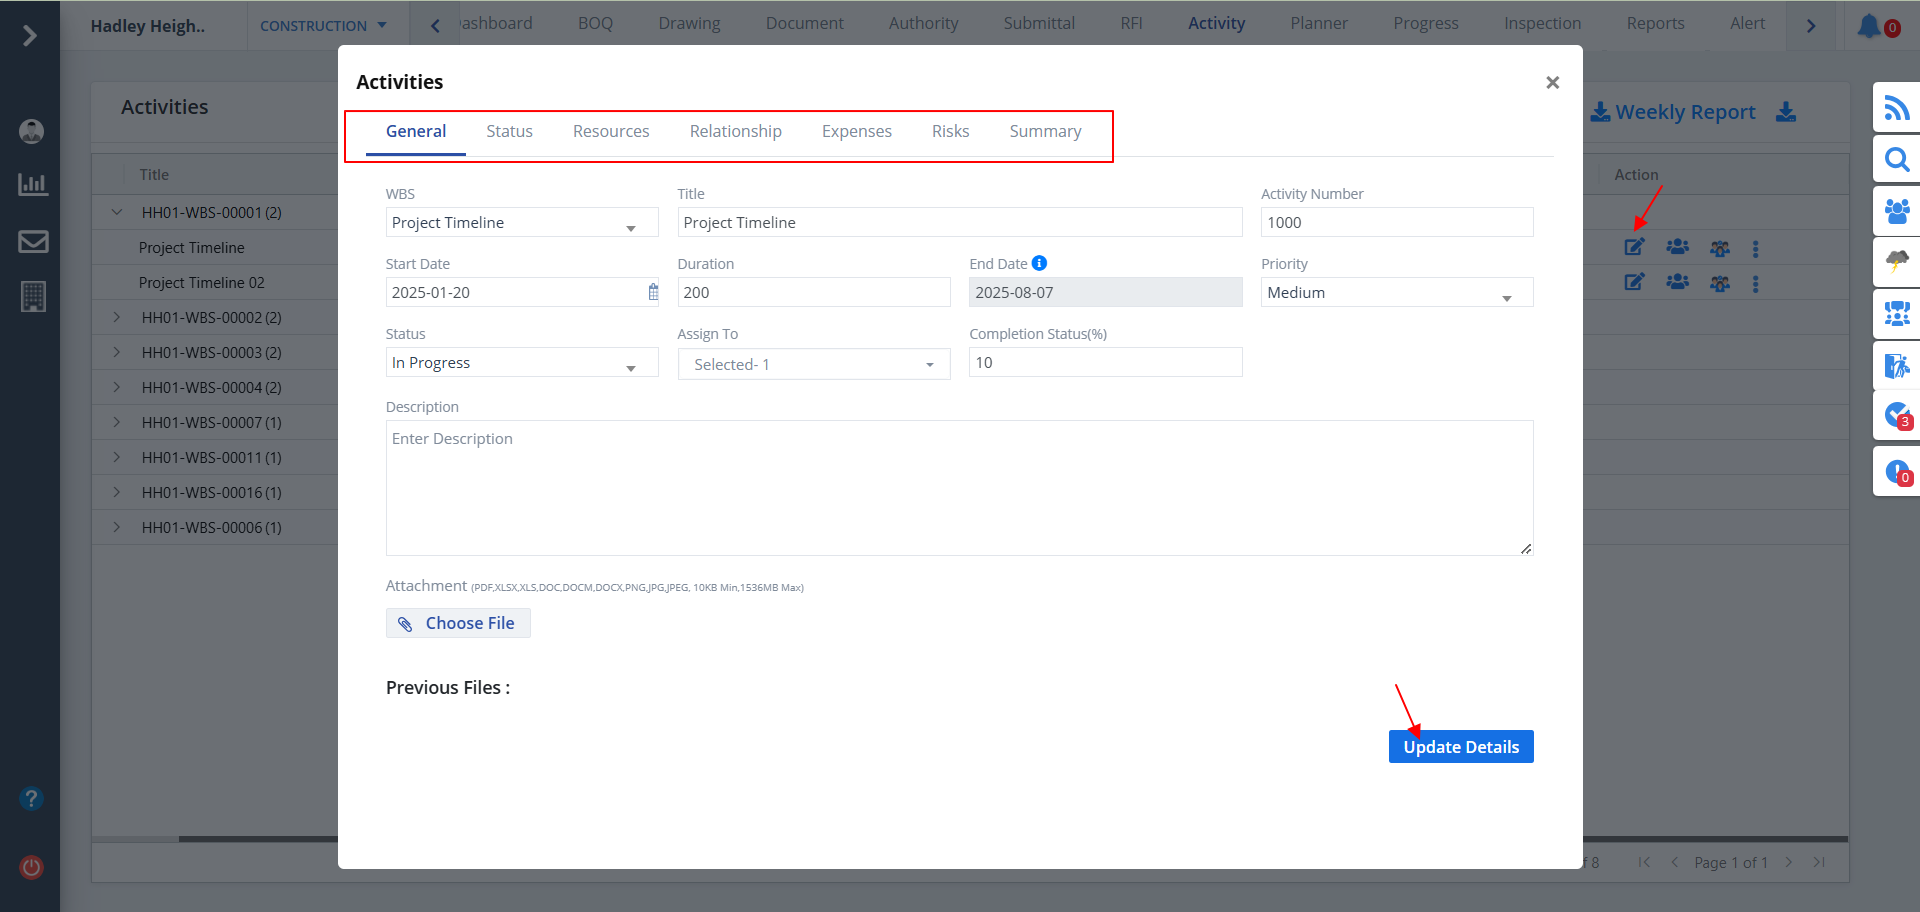
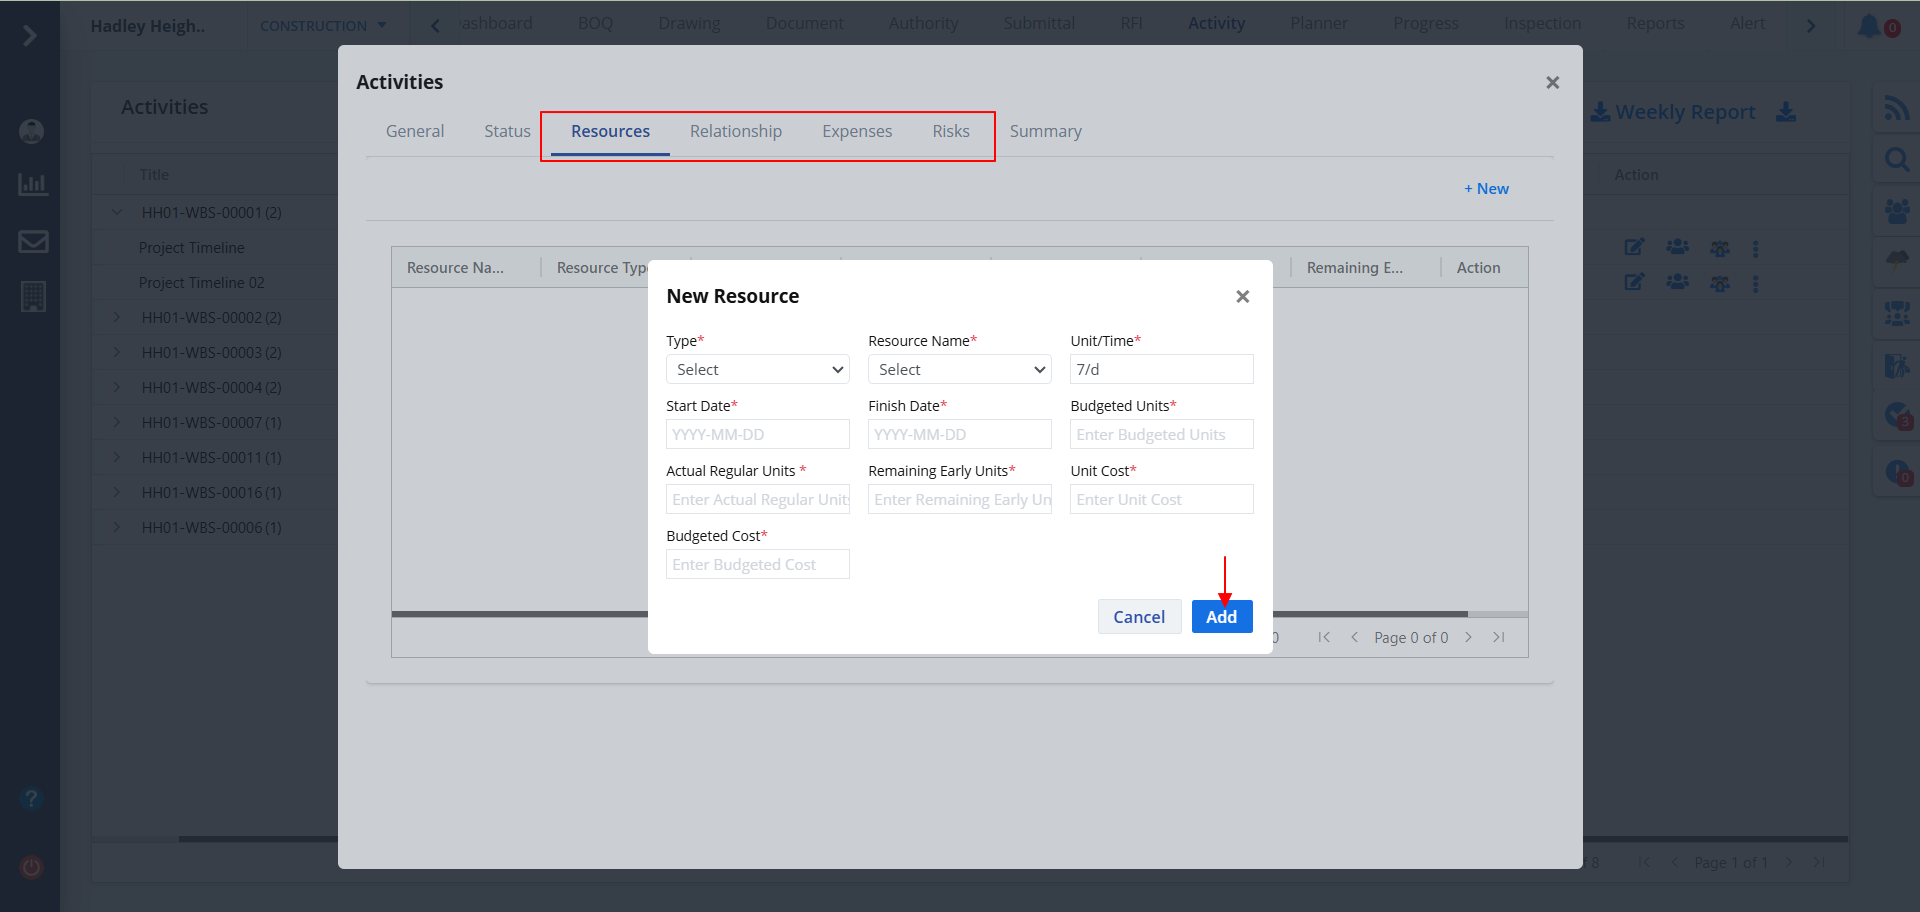
- You can add data for Resources, Relationship, Expenses & Risks. Just click on the New button of the respective category.
- Enter proper details and ultimately click on Add.
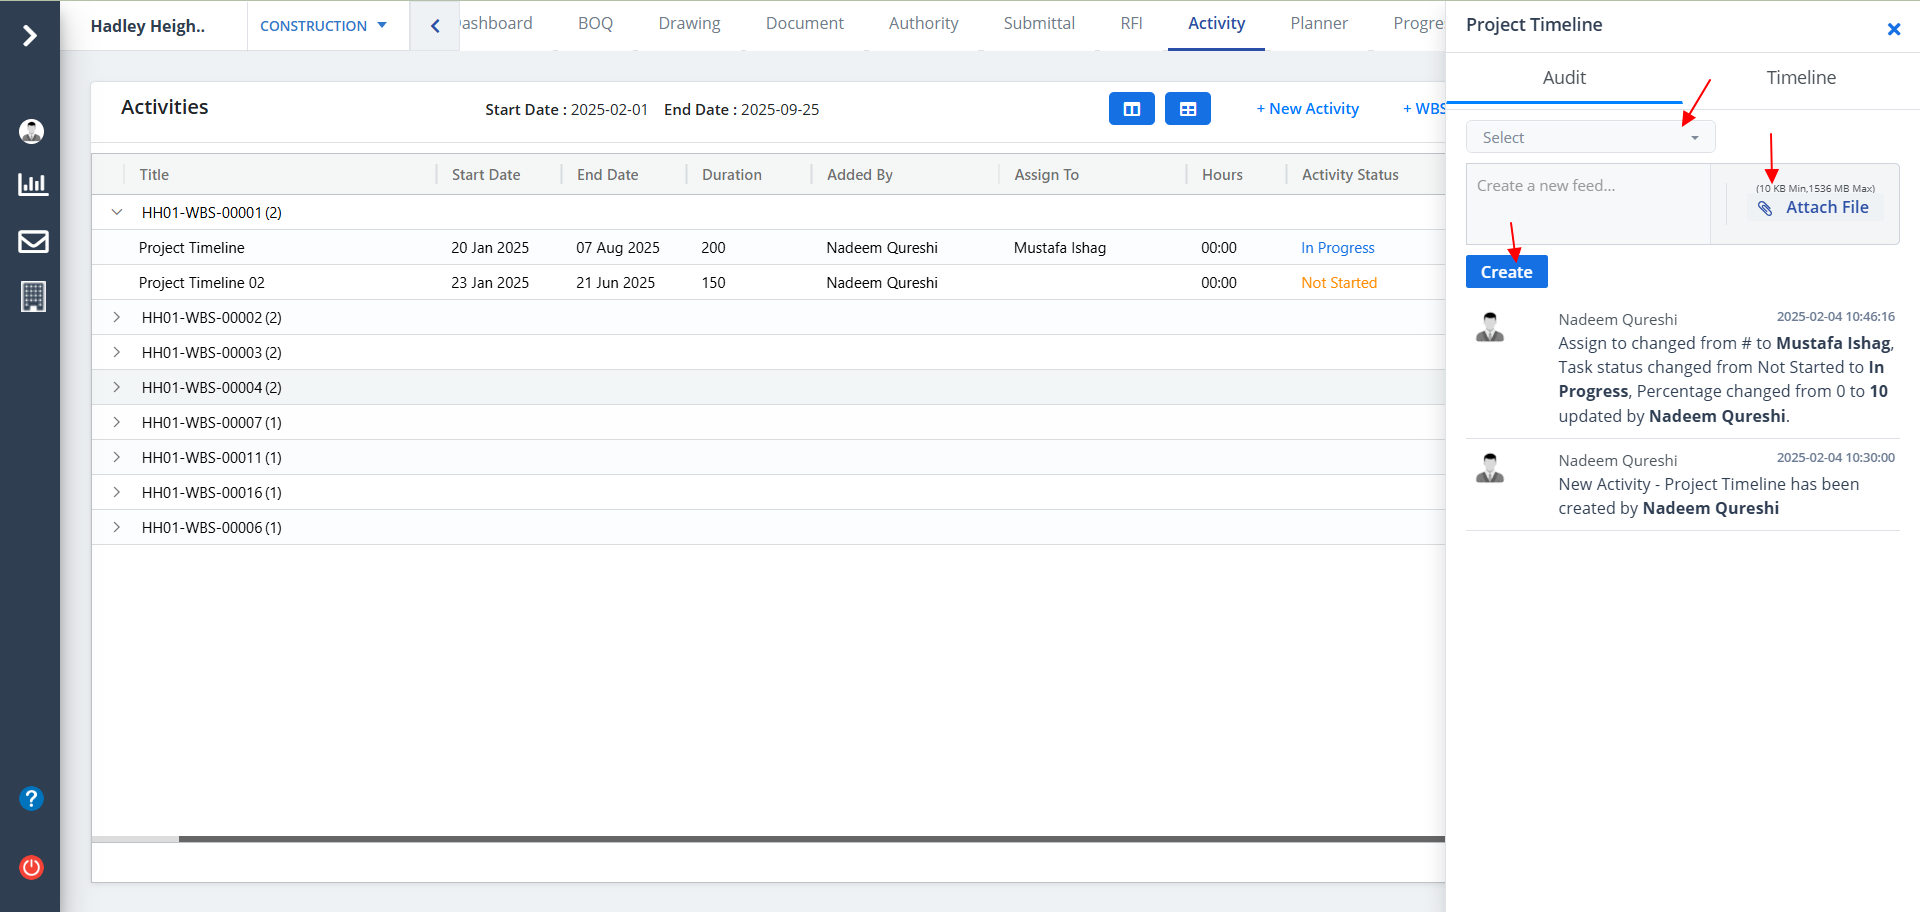
Audit Activity
- Click on the icon as shown to view Activity Audits.
- You will see all the recent changes on Activity with the user names and activity name.
- To create a new feed, select user/users, mention as name, attach a file and Ultimately click on Create.
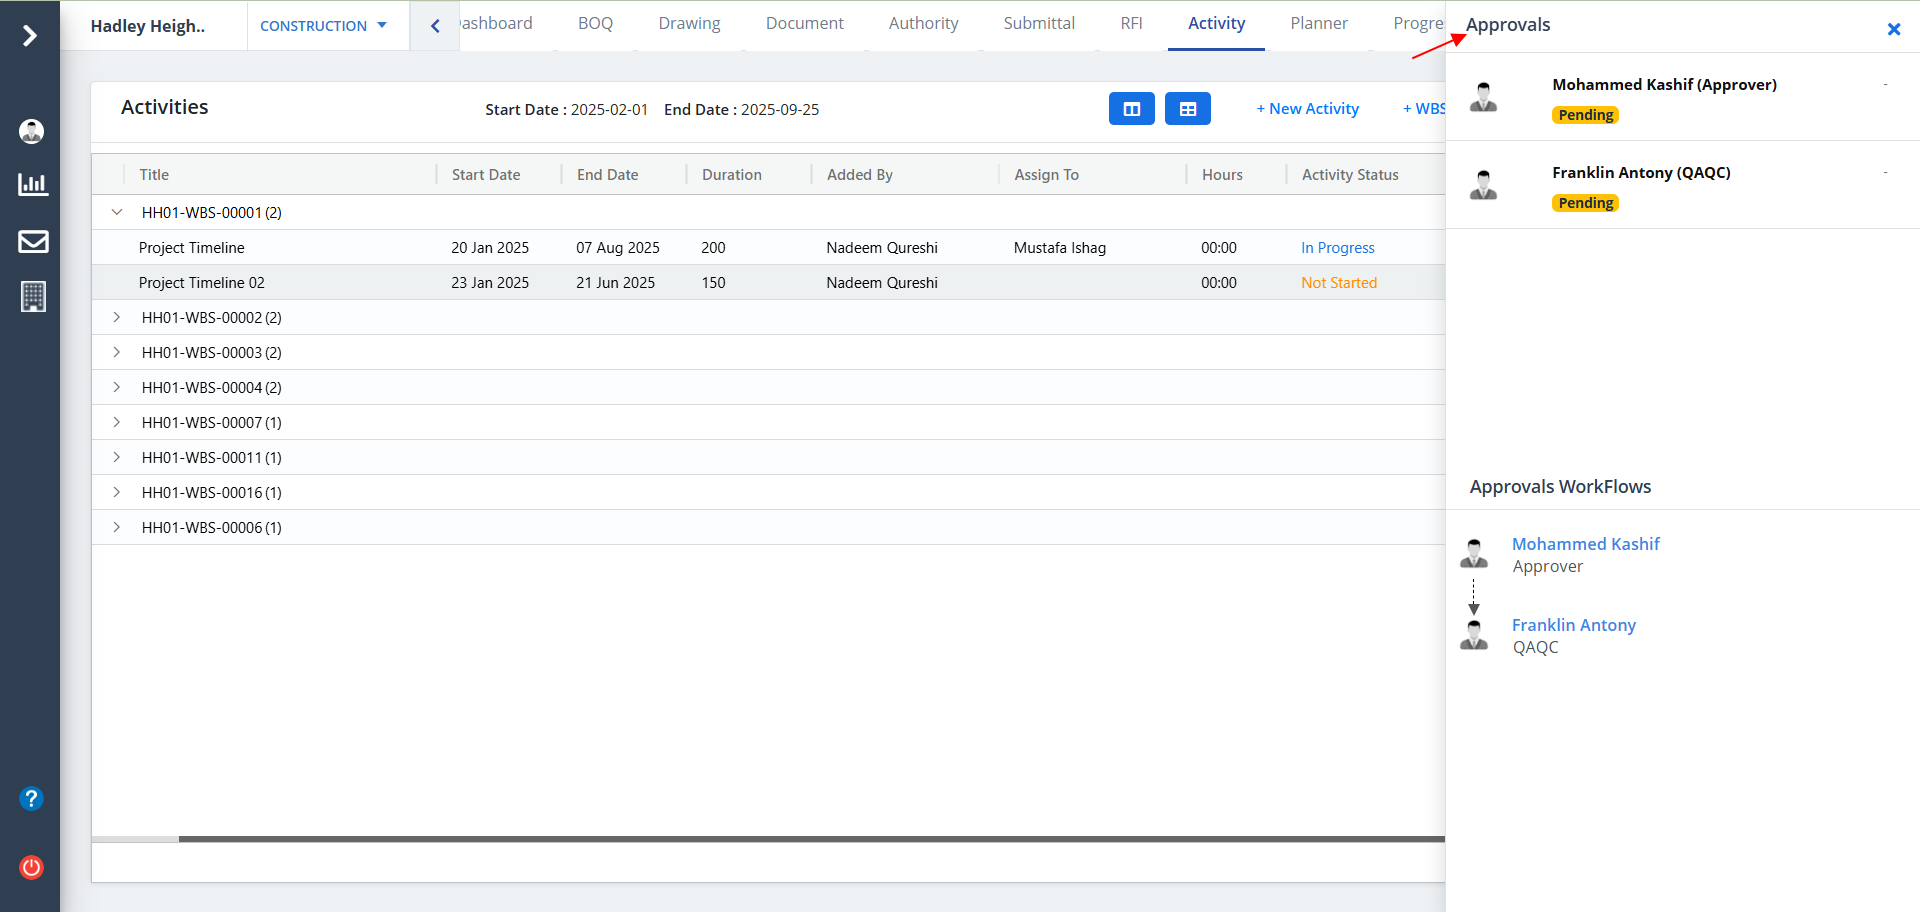
Approvals
- Click on the Approvals button (next to audit) as shown if you want to view the approval sequence.
- You will be able view the Approval workflow from multiple user and the activities of the users.
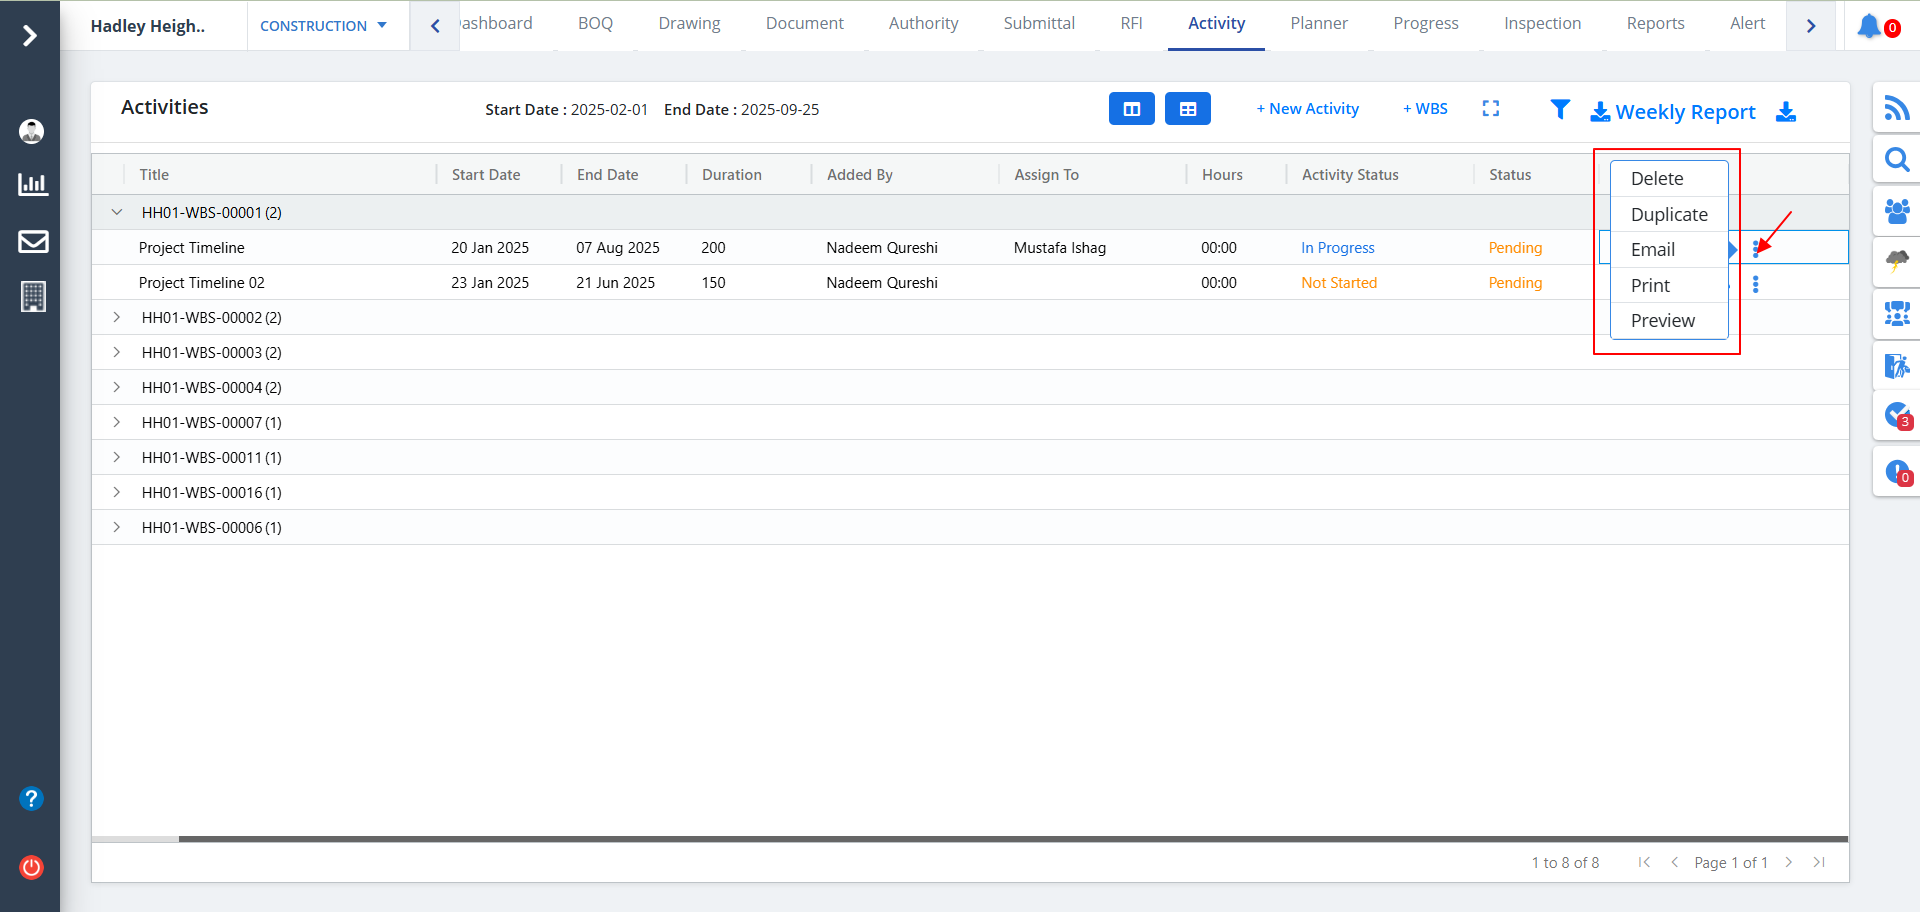
Kebab Menu
- Click on the Kebab Menu as shown if you want to view different operations that can be performed.
- You will be able view the Approval workflow from multiple users and the activities of the users.
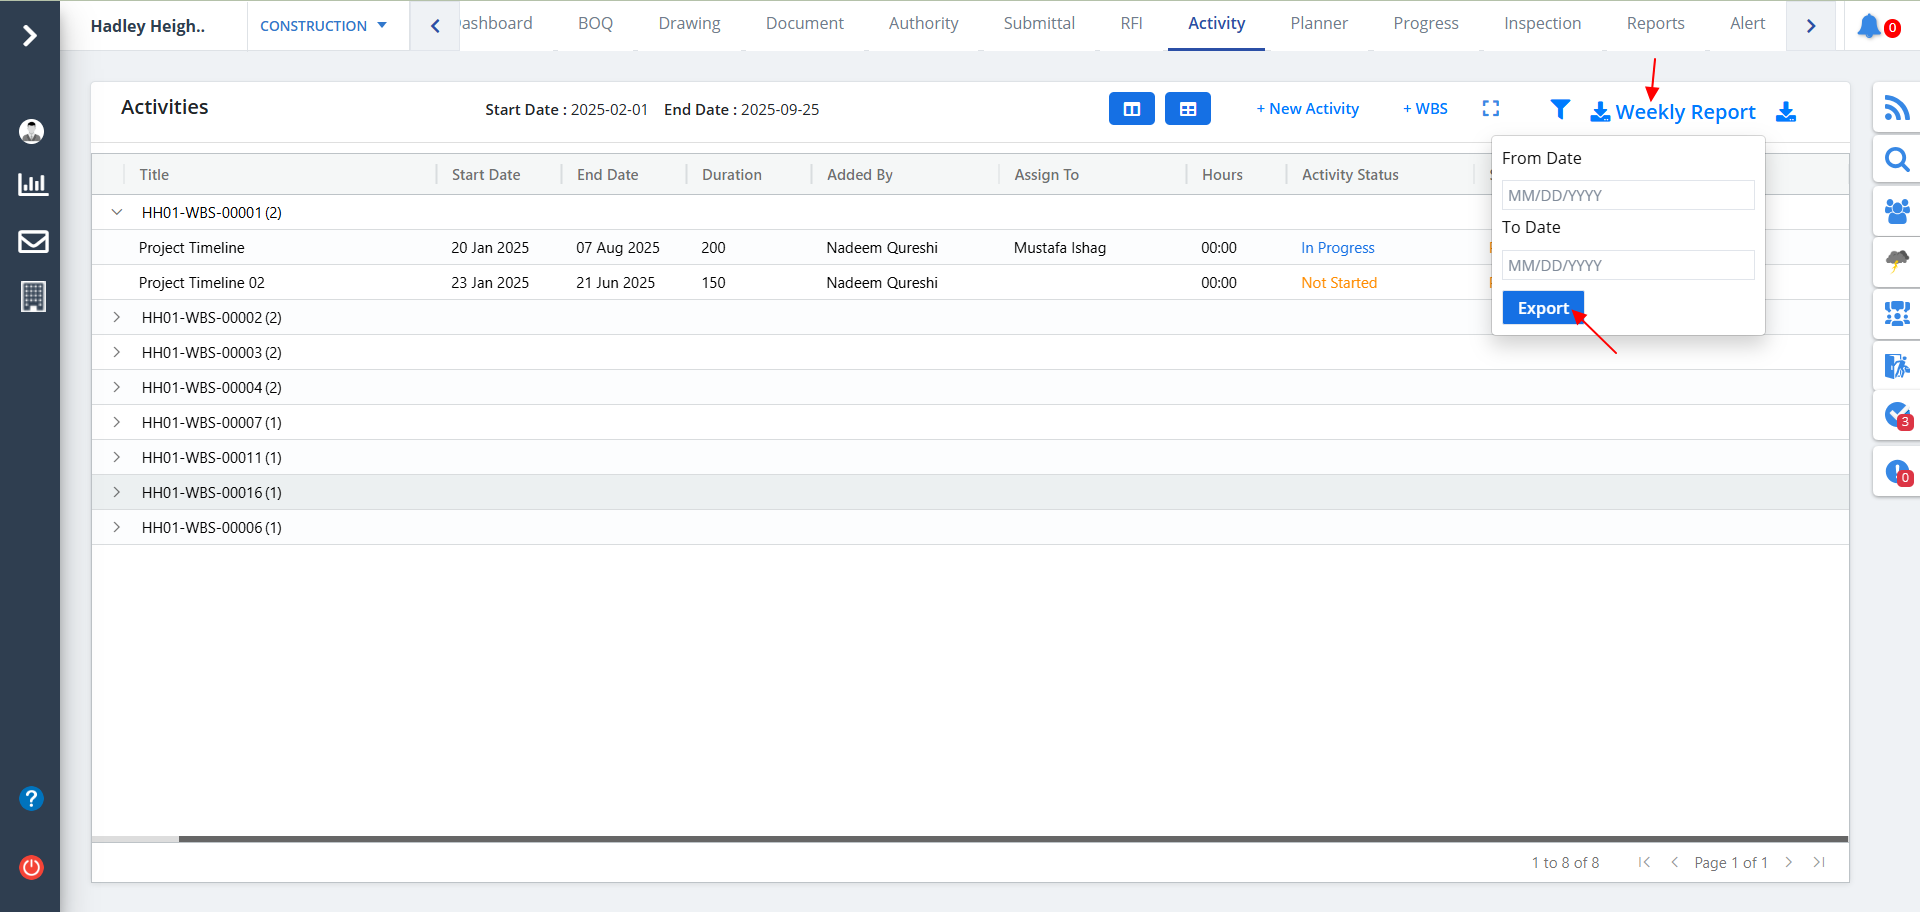
Report
- Click on Weekly Report as shown.
- Select dates and click on Export.