Document List
- Select Document from menu.
- Proper folder architecture will be visible, if already added as shown below.
- All the available folders will be listed with their names.
- There is a search bar wherein you can search the folder you desire to open.
- A document with the name Application would always be there by default. You cannot change that.

New Document Category
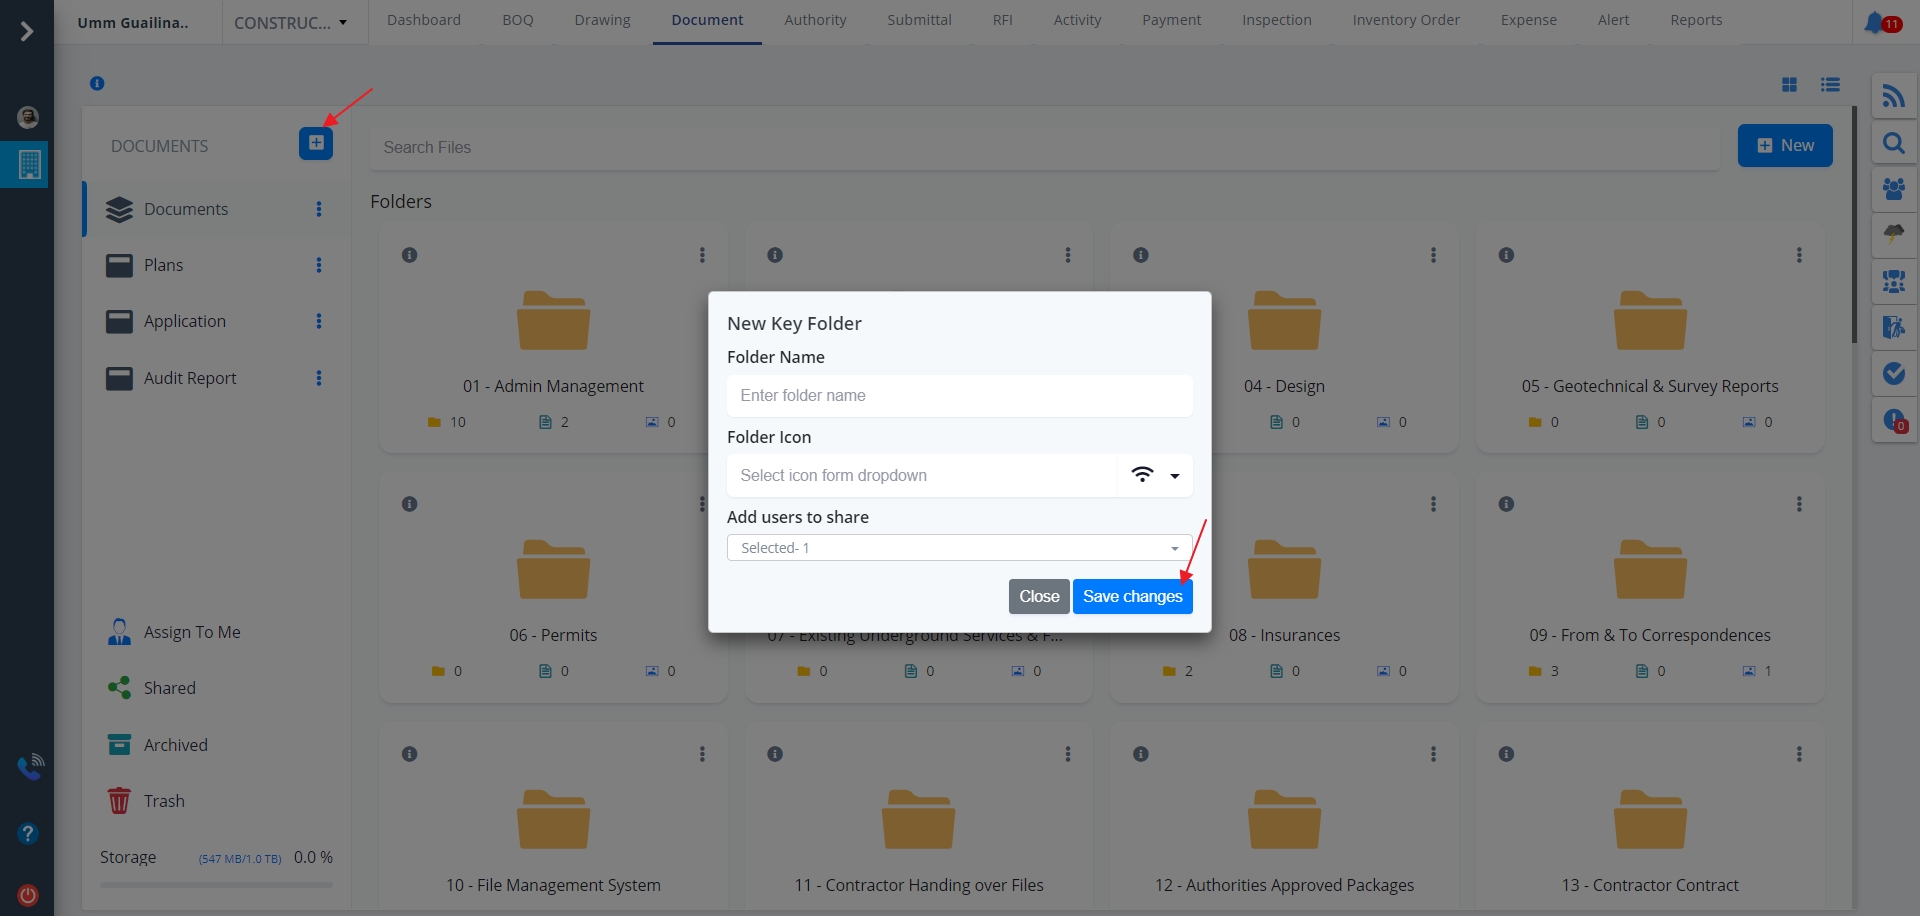
- To add a new document click the “+” icon on the left-side of the screen.
- You can choose the icon of your choice for your folder.
- Add necessary details and click on Save Changes.
- Select the user/users with whom you want to share the document.
- Now you can see the newly added document on the left side of the screen below documents heading.
New Folder
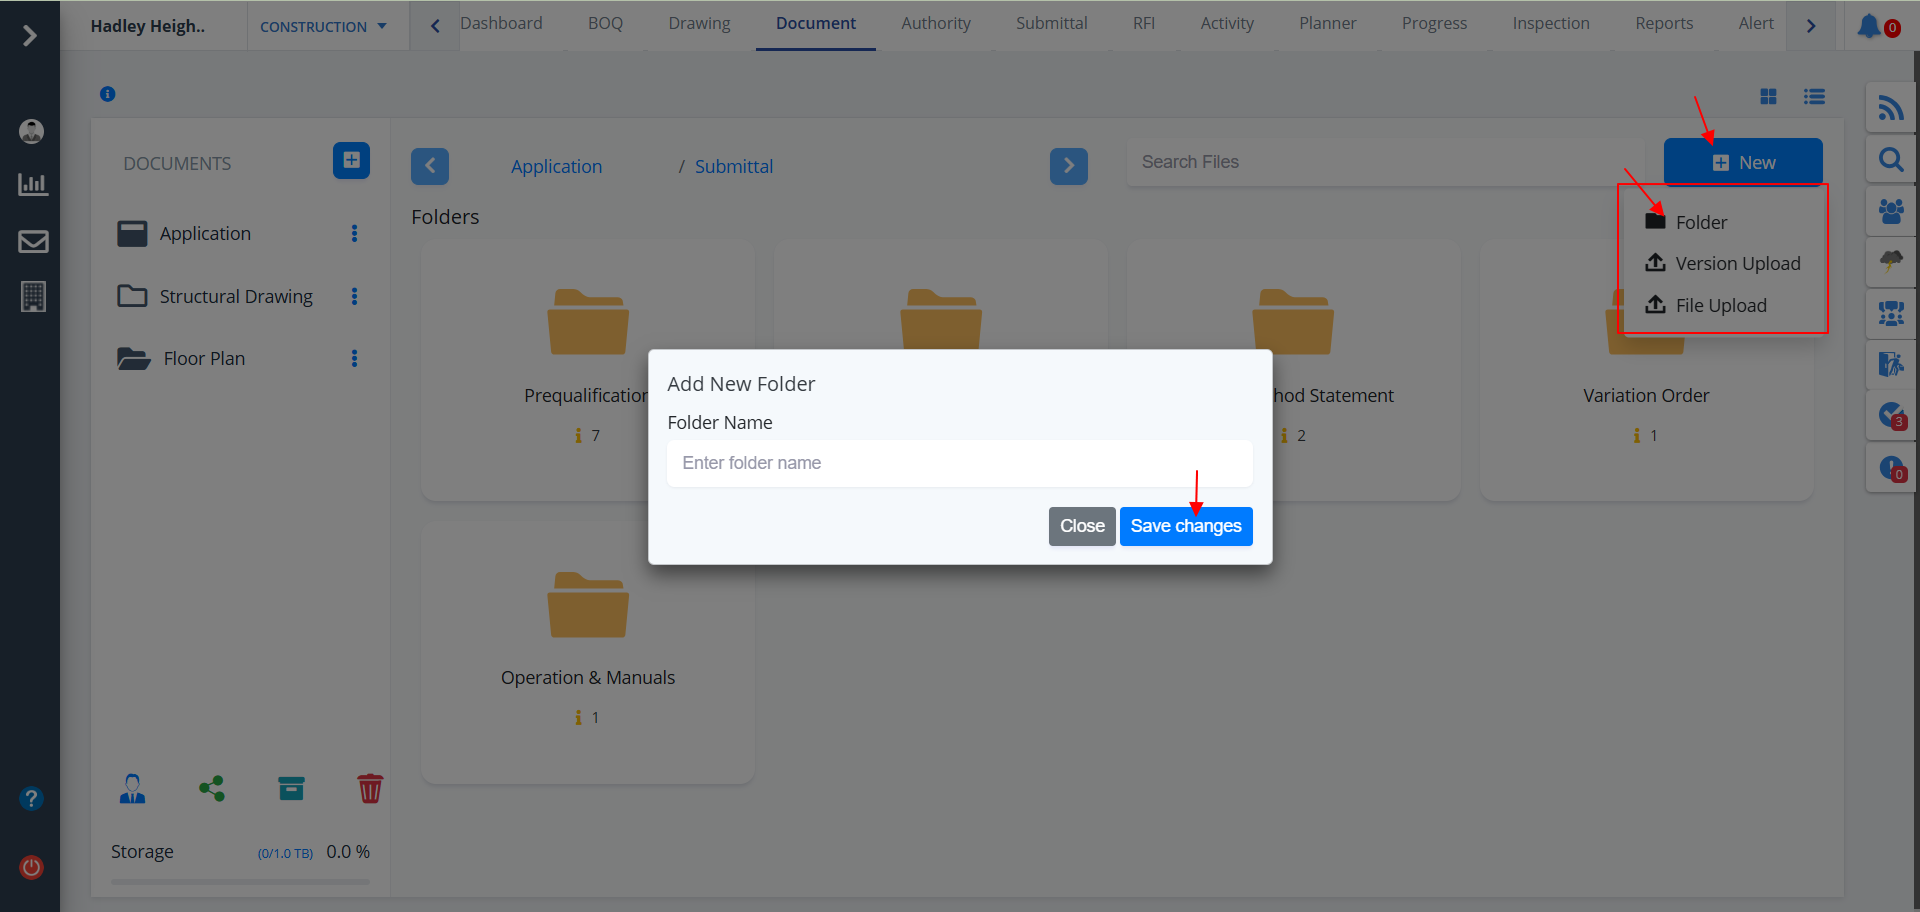
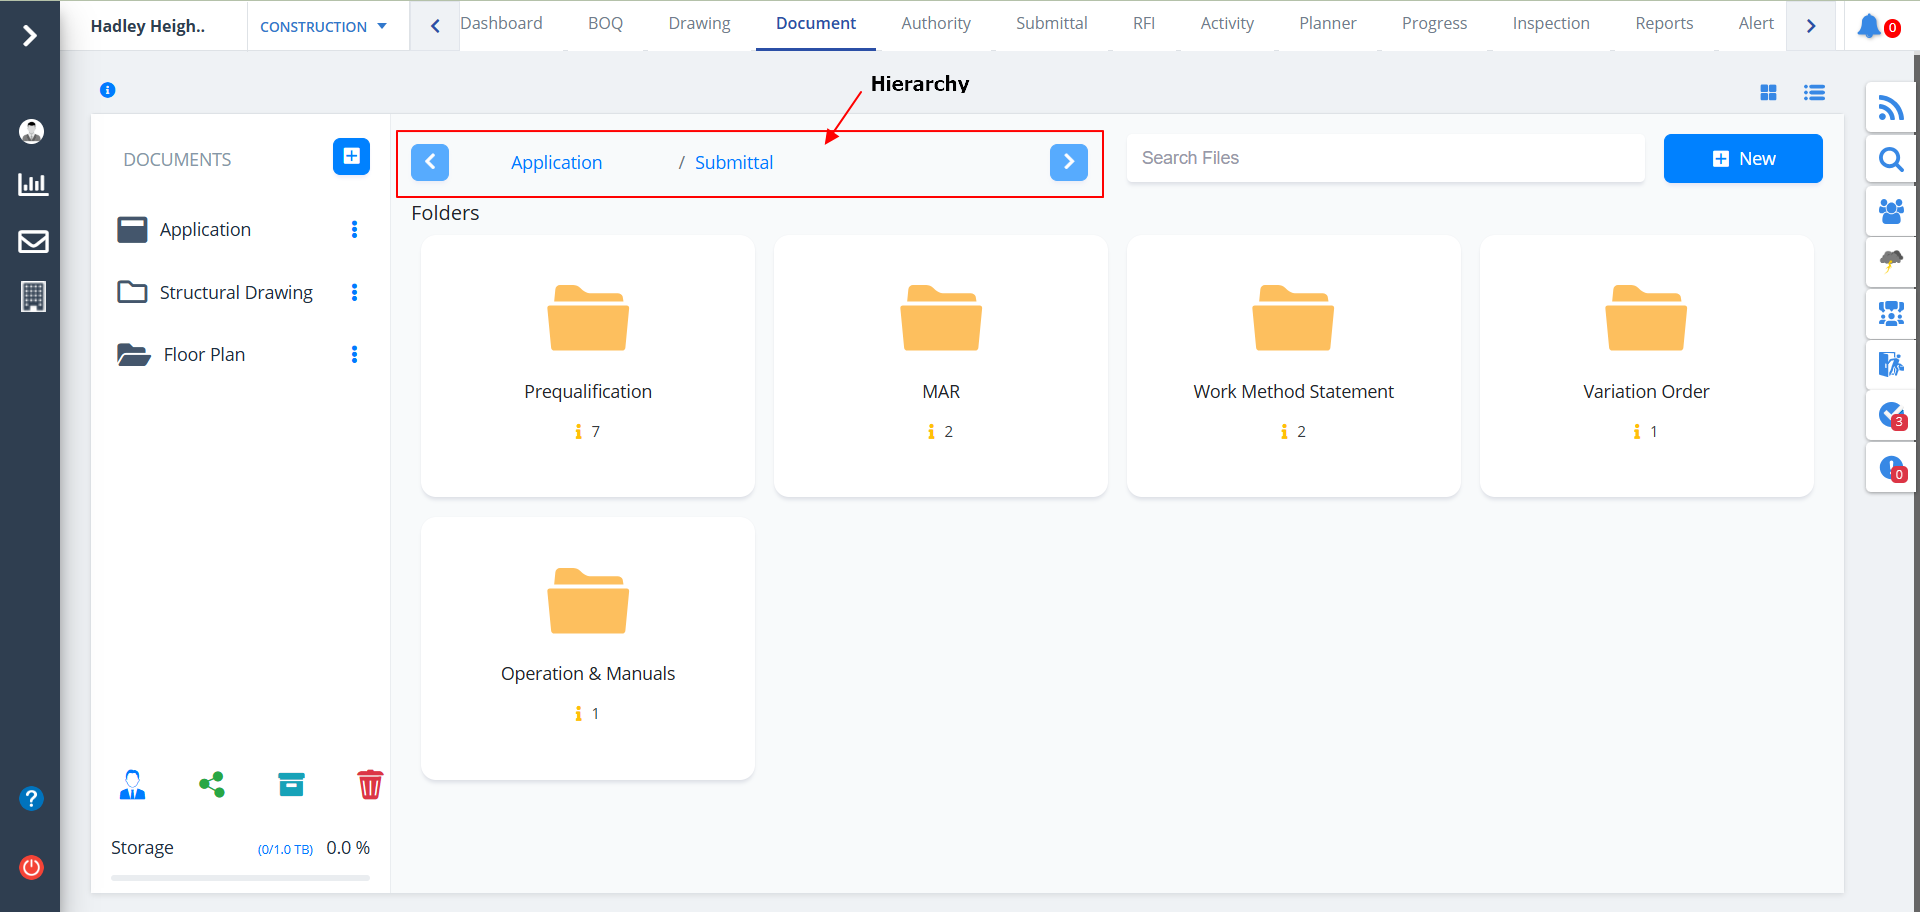
To add a new folder or to upload a file click on New button on the right-side of the screen. For the Folder option to be visible you need to enter inside a particular folder. As you can see in the image below we have entered inside Submittal folder from Application folder. Additionally, you can alsoYou can also upload a particular version of a document with in depth detailing as described below.
- 3 options come into picture after clicking New;Folder Version Upload and File Upload.
- Specify the Folder Name and click on Save Changes if Folder is clicked.
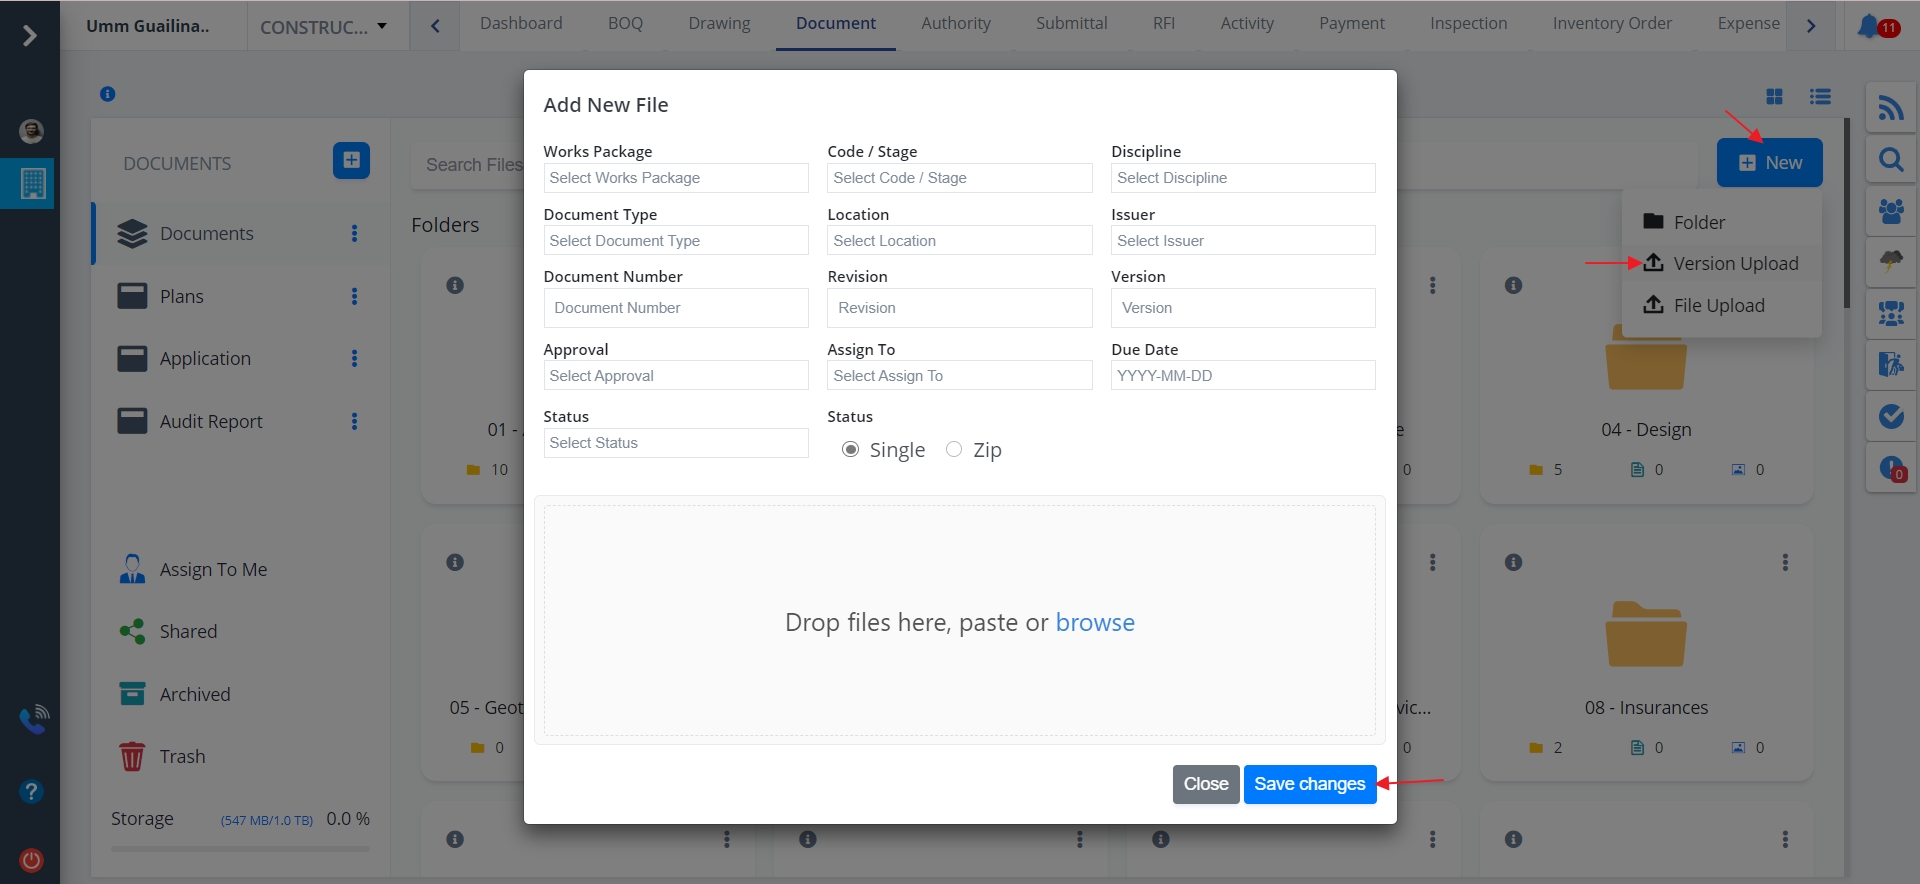
- If File Upload is clicked the screen is as shown below.
- Select the files locally that you want to upload or you can drag the files from local storage and drop it here
- Click on Save Changes once proper file is chosen.

- If Version Upload is clicked the screen is as shown below.
- Specify proper information as asked.
- Click on Save Changes once proper data is entered.
- Added/Uploaded documents/files are added to the end with the title Files as shown below:
- For proper segregation of the file types, document files and pdf files are shown with separate colors.
- Icons are changed too and the size of each file type is incorporated too.

Available Storage
- Click on the bottom left of the screen if you want to view the Available Storage.
- Total Storage and memory used (in percentage) is shown.

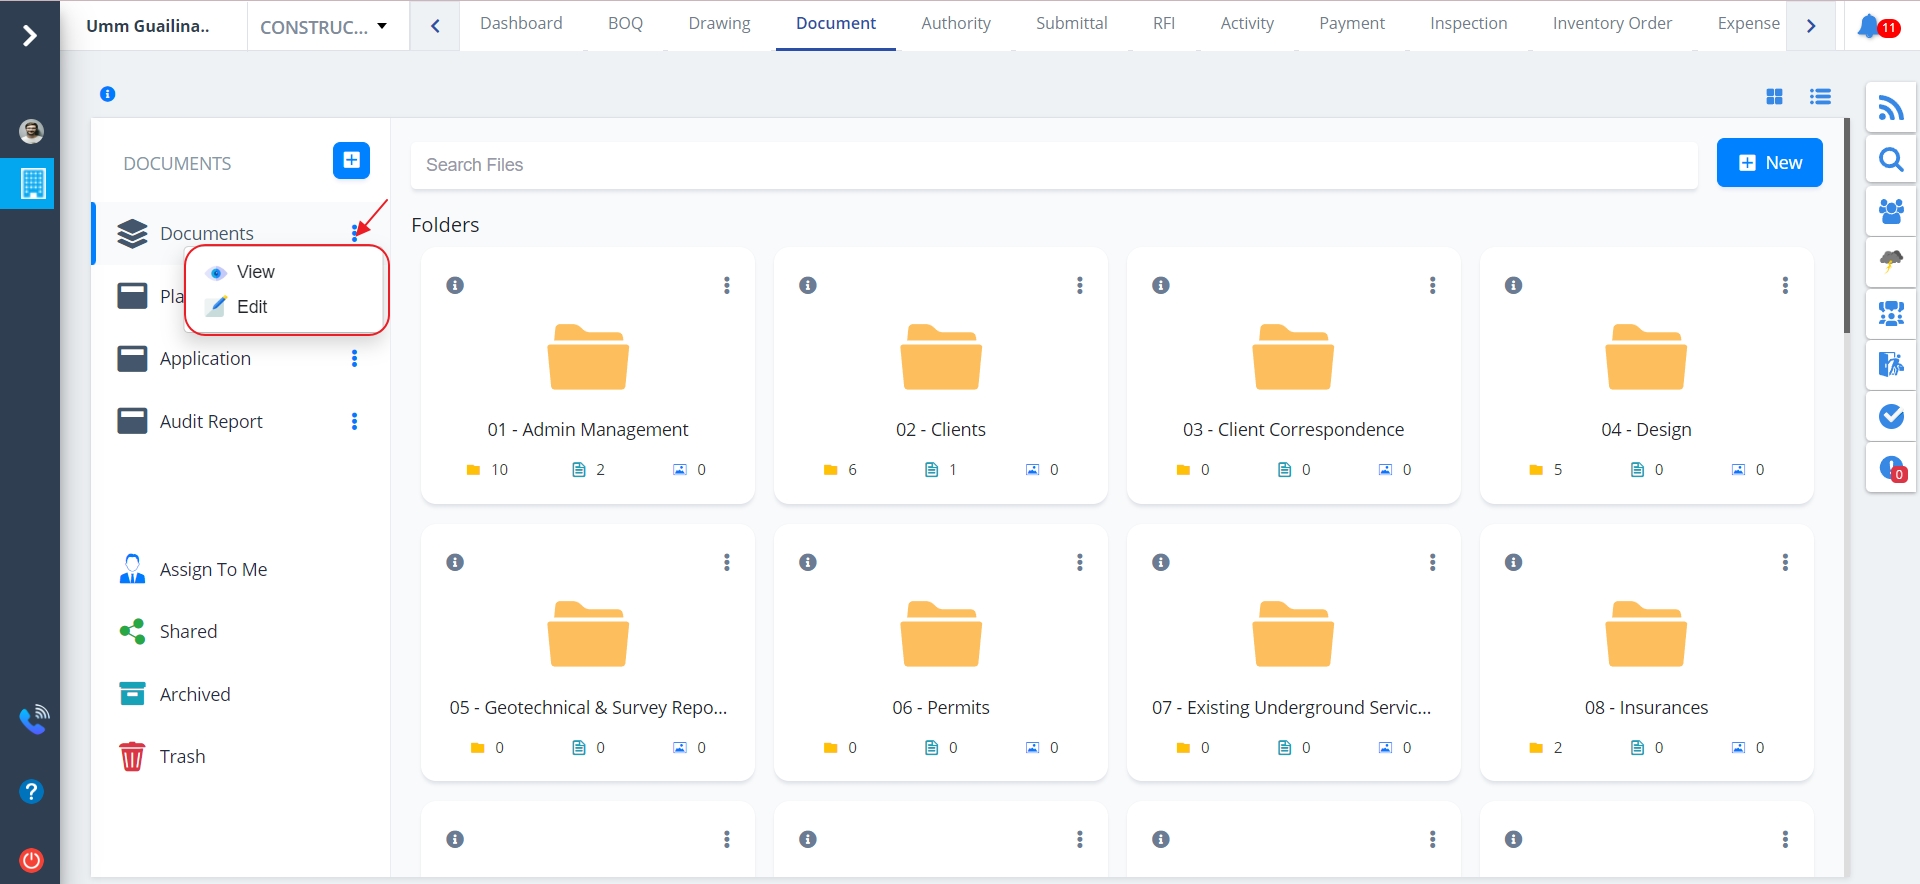
Drive Actions
You can perform different drive actions by clicking on the 3 dots; also known as Kebab Menu for share, public share archive, delete and rename options to appear.
- The user will be able to view the folders assigned to him/her in Assigned to me section.
- All the shared folders will be available in the Shared section.
- Archive section indicates the folder which have been archived.
- If a user selects delete option as discussed in drive actions the folder gets stored in trash. So, those folders can be seen in Trash section.

Document Hierarchy
This shows what all things are possible when it comes to Document Hierarchy:-
- You can add a folder inside a folder or a folder inside a sub-folder and so on.
- Just click on the folder in which you want to add multiple folders in a hierarchy pattern.
- Suppose, we traverse inside Design folder. If, sub-folders are already present then those would be visible, else click on New and do likewise as mentioned above.
- You can also add sub-folders inside sub-folders in the same manner.
- Use the left and right arrows to move backward and forward respectively.
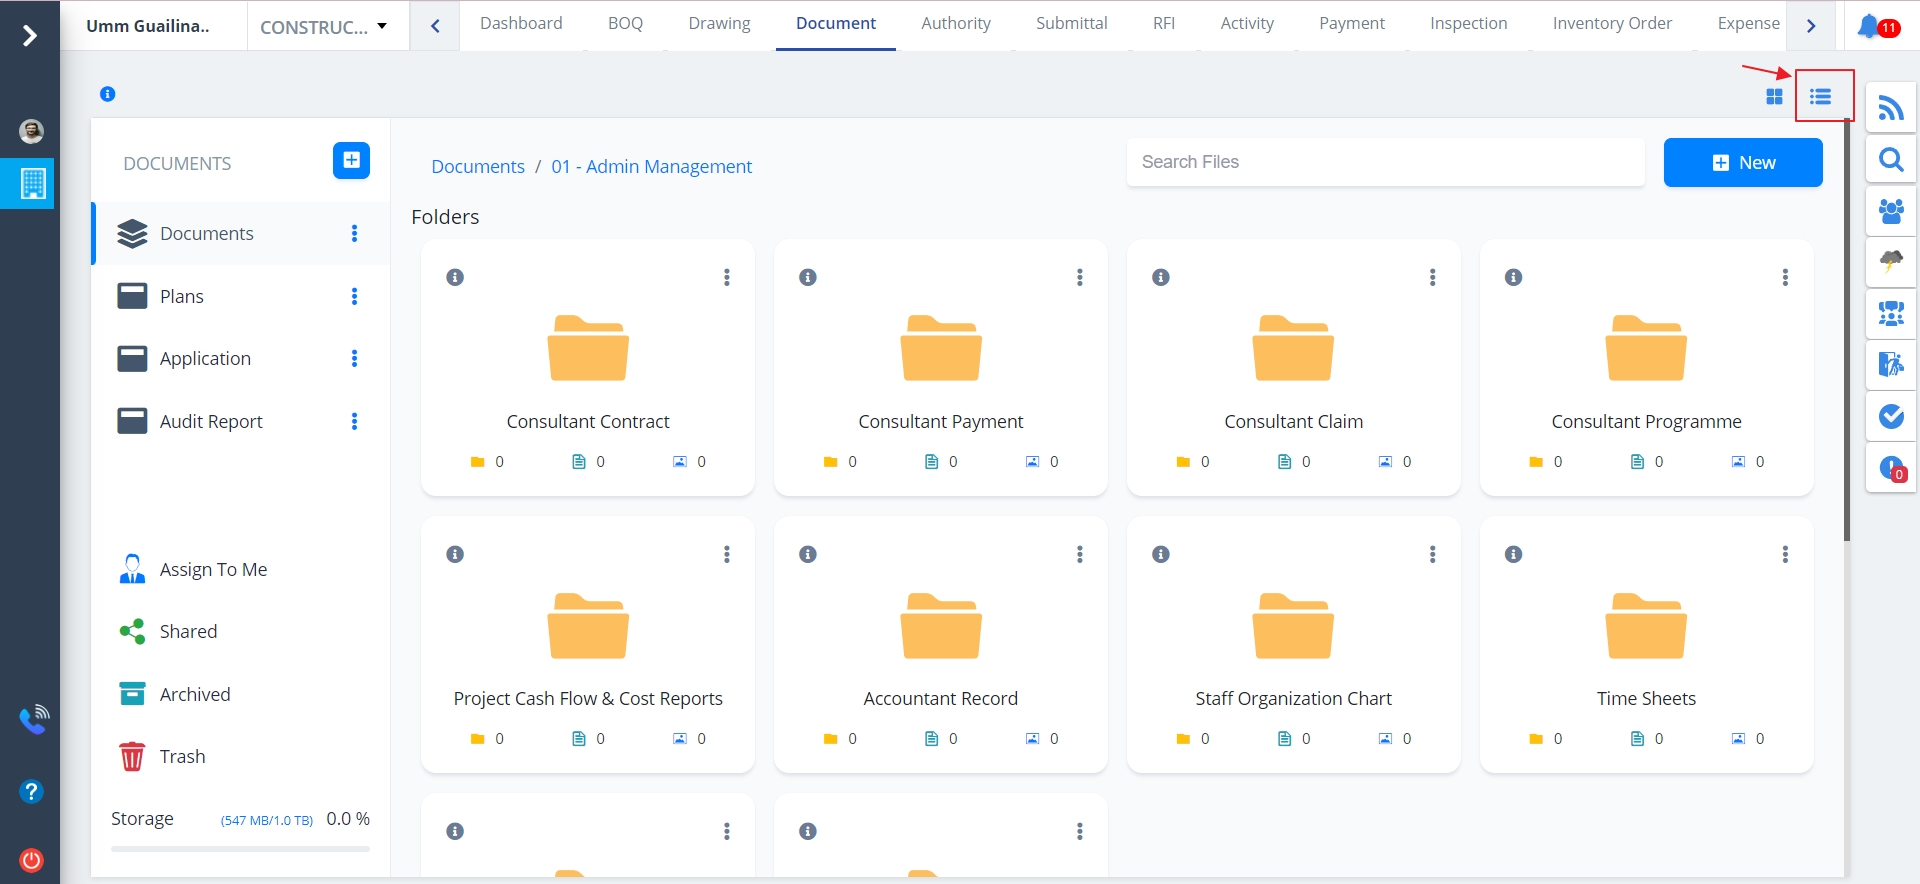
Toggle Format
- View format can be changed to grid view/list view as depicted:
- By default the view is Grid View.
- A grid view or a datagrid is a graphical control element that presents a tabular view of data.
- A typical grid view also supports some or all of the following: Clicking a column header to change the sort order of the grid.
- Dragging column headers to change their size and their order.
- Refer Document List page to know more about Grid View.
- Refer Document List View page to know more about List View.
View Folder Structure
- Click on the “Eye” icon highlighted in the above figure.
- Entire folder architecture/structure can be viewed thereafter with the title Folder Structure as shown below.
- It shows the entire hierarchy consisting of folders and sub-folders and sub-folder inside a sub-folder.
Document List View
View format can be changed to grid view/list view as depicted:
- If you change the view to List View, the view would be something as shown in the below diagram.
- To filter by any of the column values click on any/all of the filter icons as highlighted in the below figure.
-
Hover over any of the columns for column autosize, reset and pin options to appear. It is as shown in the below diagram.
- If you autosize a particular column, the column will be resized in such a way as to display an almost entire cell value.
- If you autosize all columns, the same will be applied to all columns.
- If you reset columns, applied autosize will be revoked for all the columns.
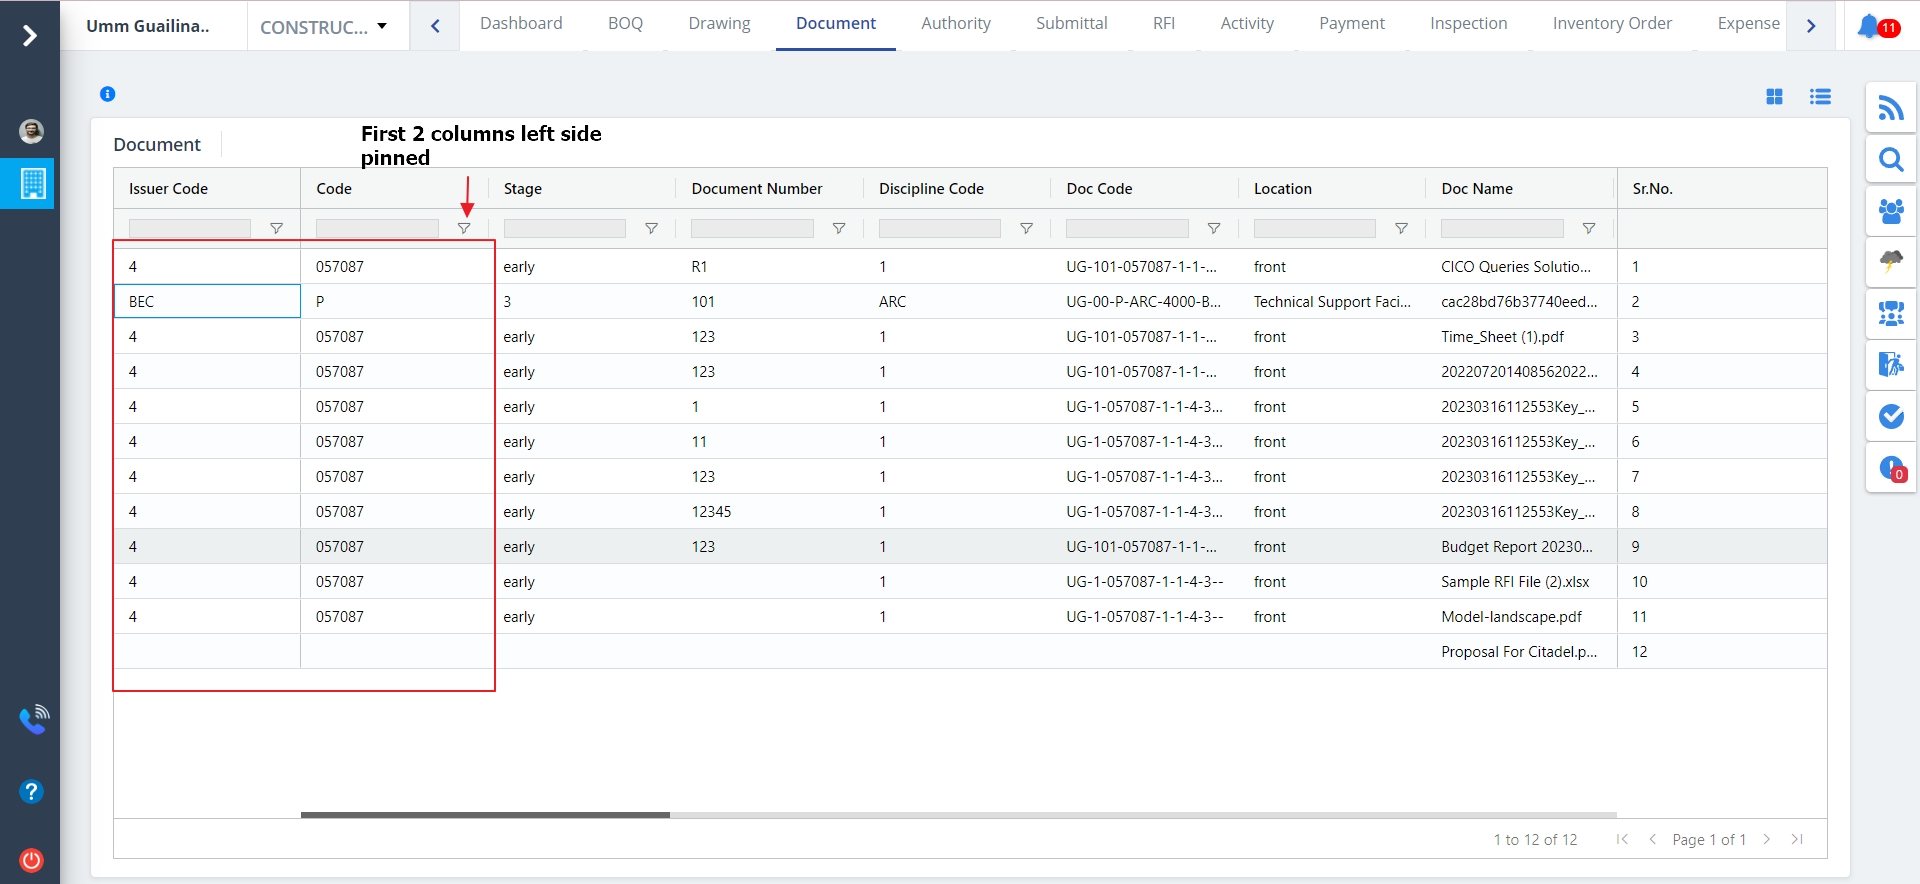
- Pin column has 3 options; Pin Left, Pin Right, No Pin. It is as shown below.
- Consider that we left pin the Issuer Code column.
- This moves the column to the leftmost position.
- Likewise, if you left pin more columns, those will be moved next to the leftmost column. The result will be as shown.
Likewise, if you right pin a column/columns, those will be moved to the rightmost position. No pin option just specifies that there is no pin for that column.
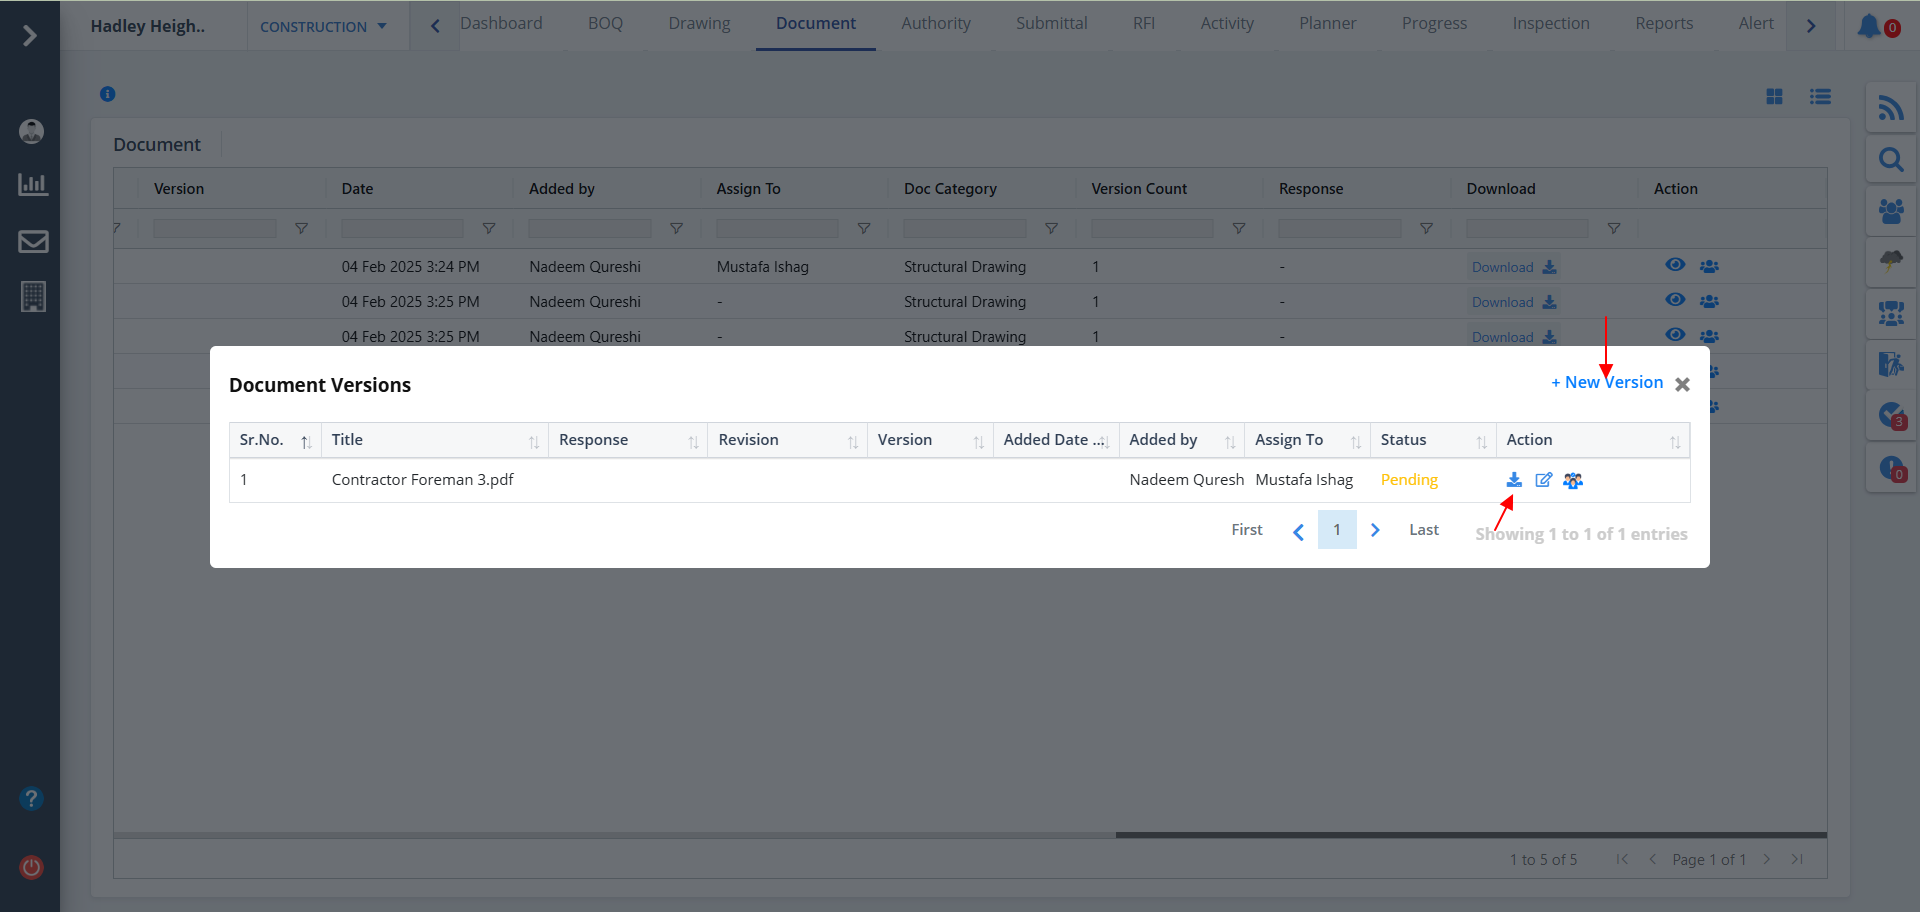
Document Versions
To view different versions of a particular document do the following:-
- click on the “eye” button under the Action column.
- Can be viewed if different versions of a particular document is already present.
- To download a particular document click on Download button as shown.
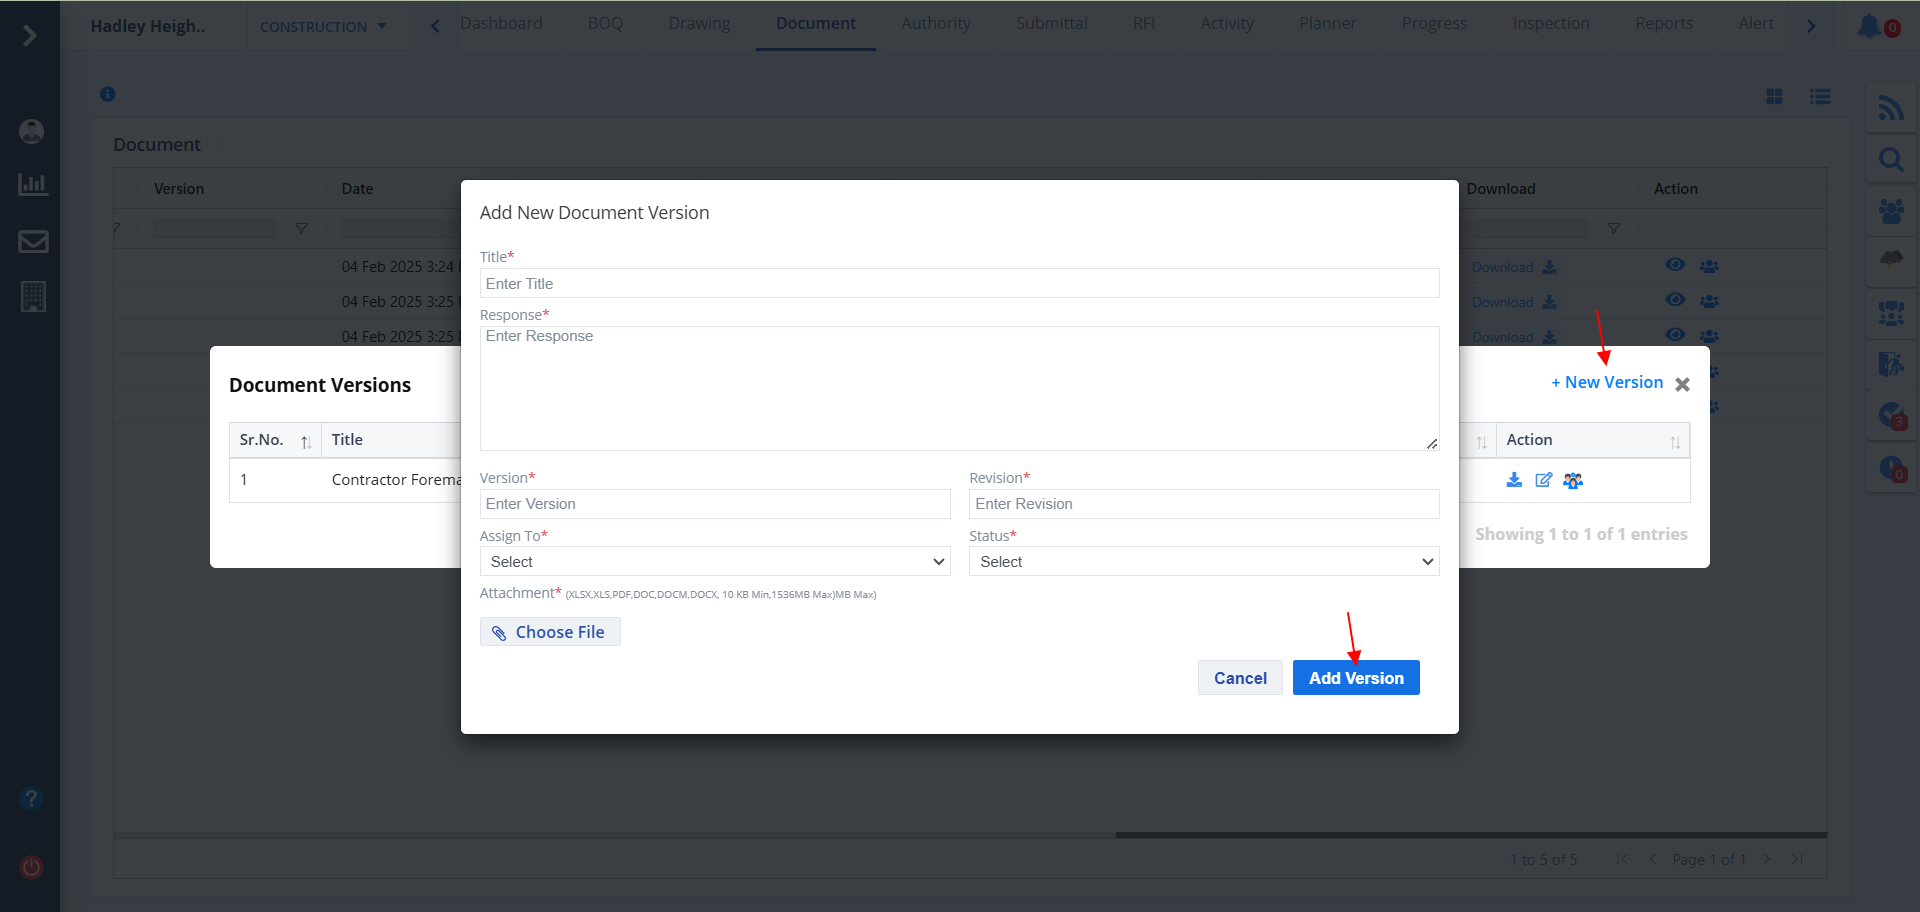
- To add a new version click on New Version.
- You can download the versions too as shown.
- Specify the details including the new version for the document.
- Click on Add Version. After successful addition the version list will be shown at the back of the highlighted popup box.
- While uploading a file make note of the allowed extensions.
- Click on Edit as shown to modify/change an existing verion.
- Specify the details including the new version for the document.
- Click on Update Version. After successful updation the version list will be shown at the back of the highlighted popup box.
- While uploading a file make note of the allowed extensions.
- Click on the last button under Action column to view the approval workflow.
- Also shows the status of approval for each entity.
Document Audit
- Click the Audit as shown if you wish to audit a particular document.
- You can viw the document details as depicted. Status of the same is shown too.
- To download this document just click on the Download button.
Document Properties
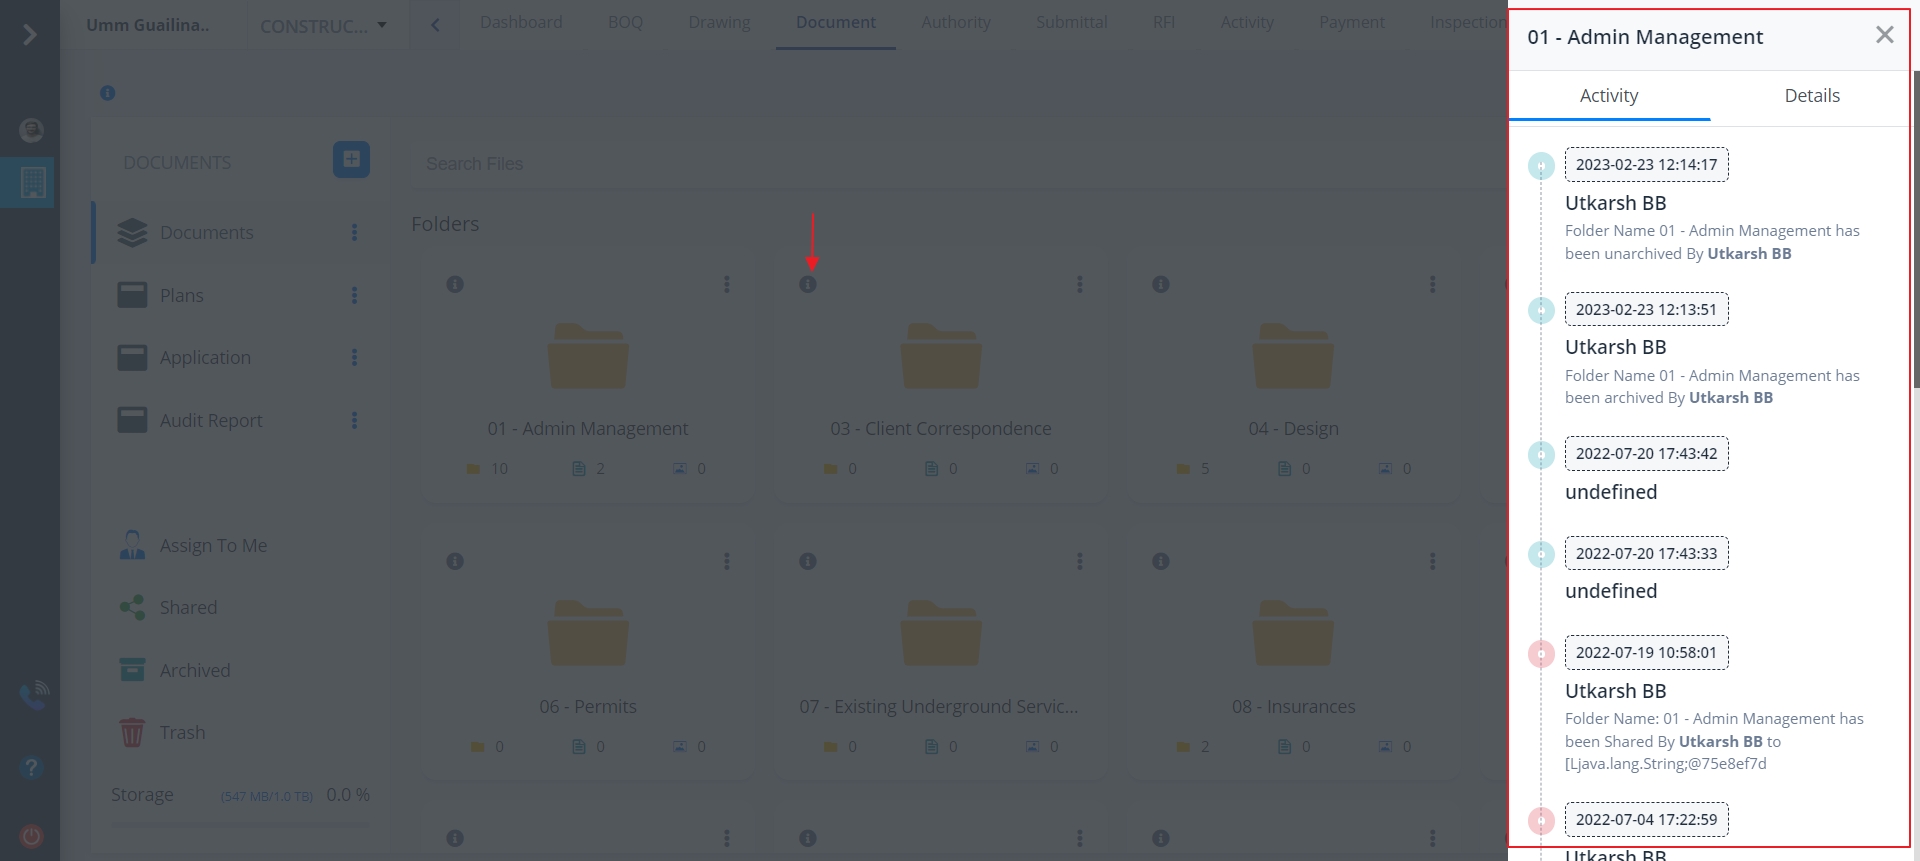
- Click the “!” provided for every folder if you want to view the folder properties.
- Shows the detailed description including activity.
- It is divided into 2 categories; Details and Activity.
- Details shows the properties which include:-
- Type
- Location
- Owner
- Modified
- Opened
- Created
- Activity includes the name of the user, date and time.
- It also includes the activity status such as who created which folder.
- when someone shares a folder/folder it will be described in this section.