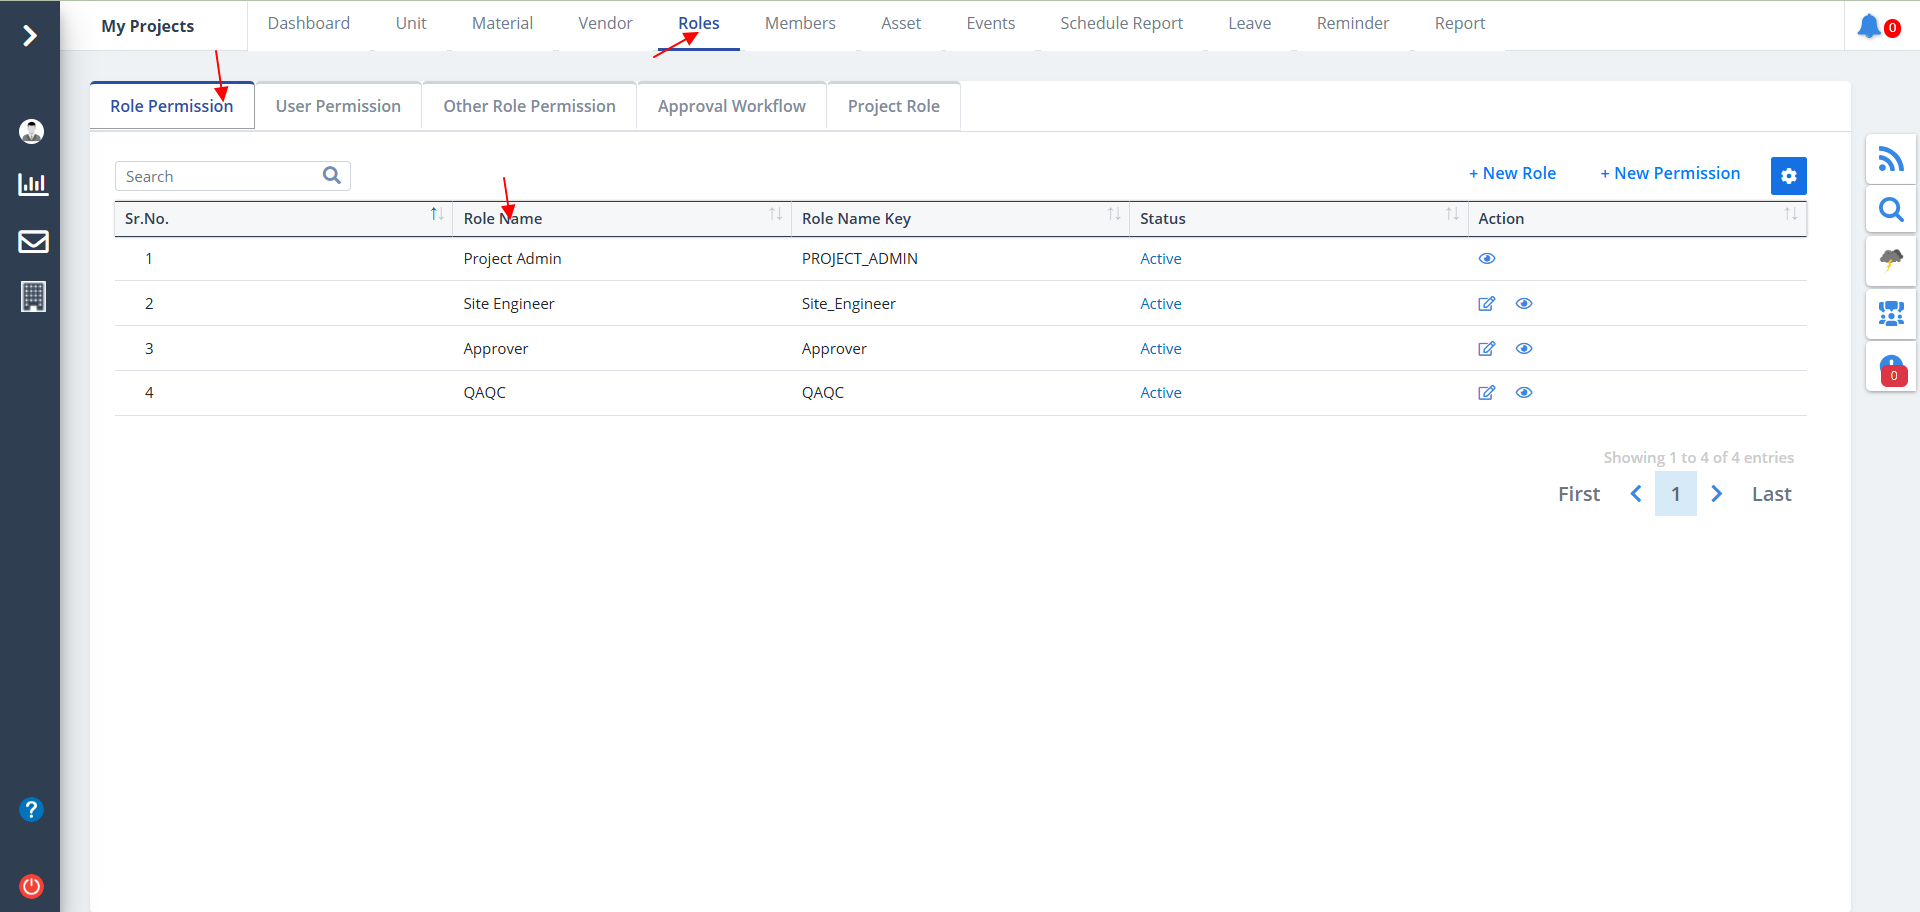
Role List
- Select Roles from menu.
- Shows the various roles that can be assigned to members.
- Use the buttons under Action column to perform operations.
- Use the search bar to find a particular data. Search is provided for each of the categories.
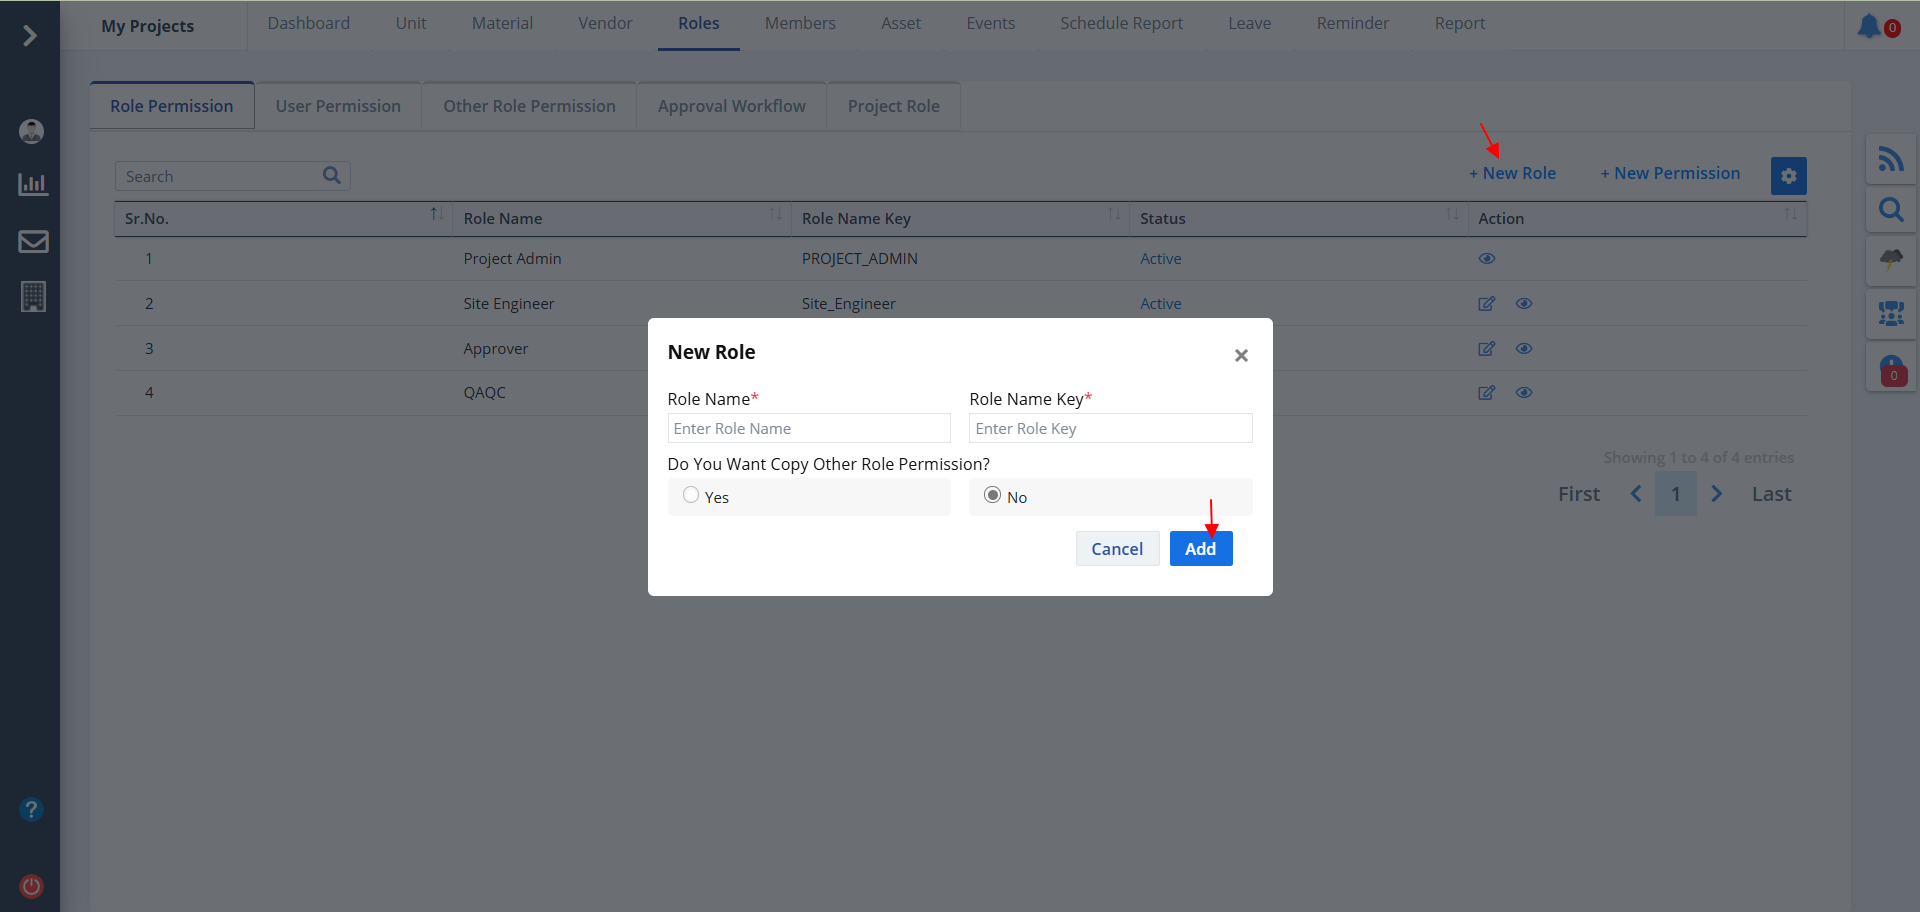
New Role
- To add a new role, click on New Role.
- Enter name and key; key is the number by which the user will be identified.
- Here you select if you want to copy some other role's role permission. If you select yes, you need to select the role and that role permission will be copied here.
- Ultimately click on Add.
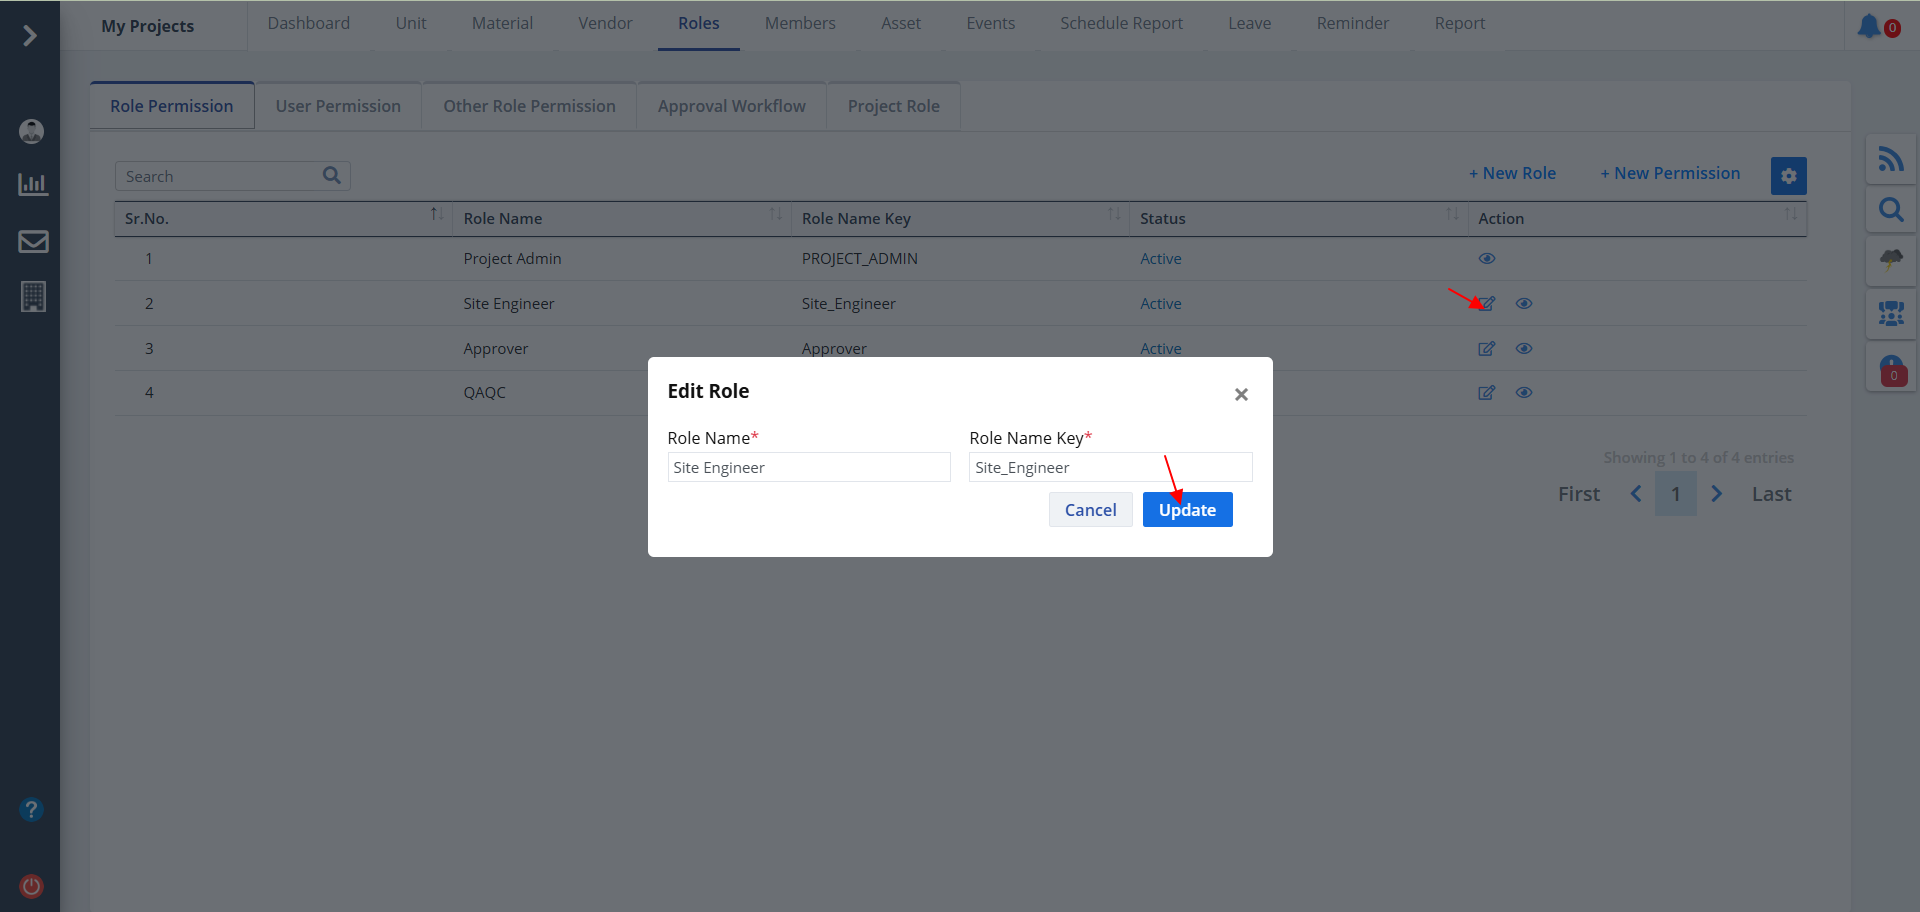
Edit Role
Edit process includes:-
- Click on the Edit button under Action column to edit access rights as shown below.
- Untick the ones whose access you want to deny.
- Choose All if you wish to show all records, else select Specific, if you want to show only a select set of records.
- Ultimately click on Update.
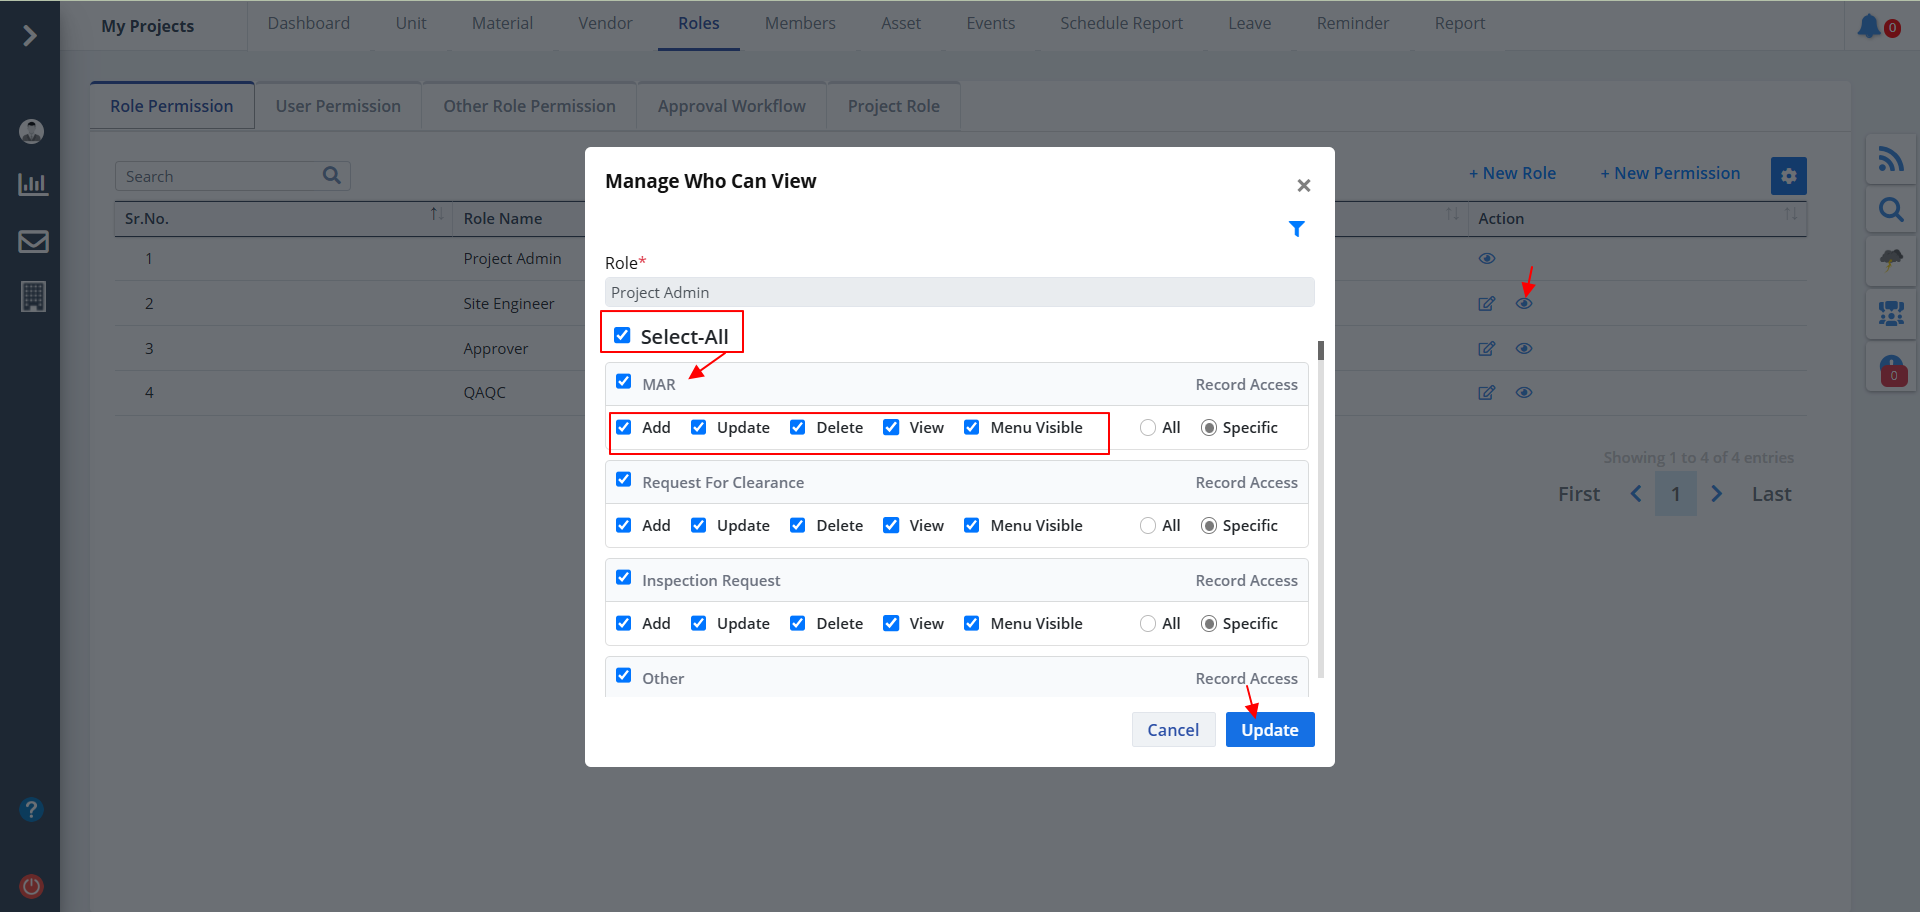
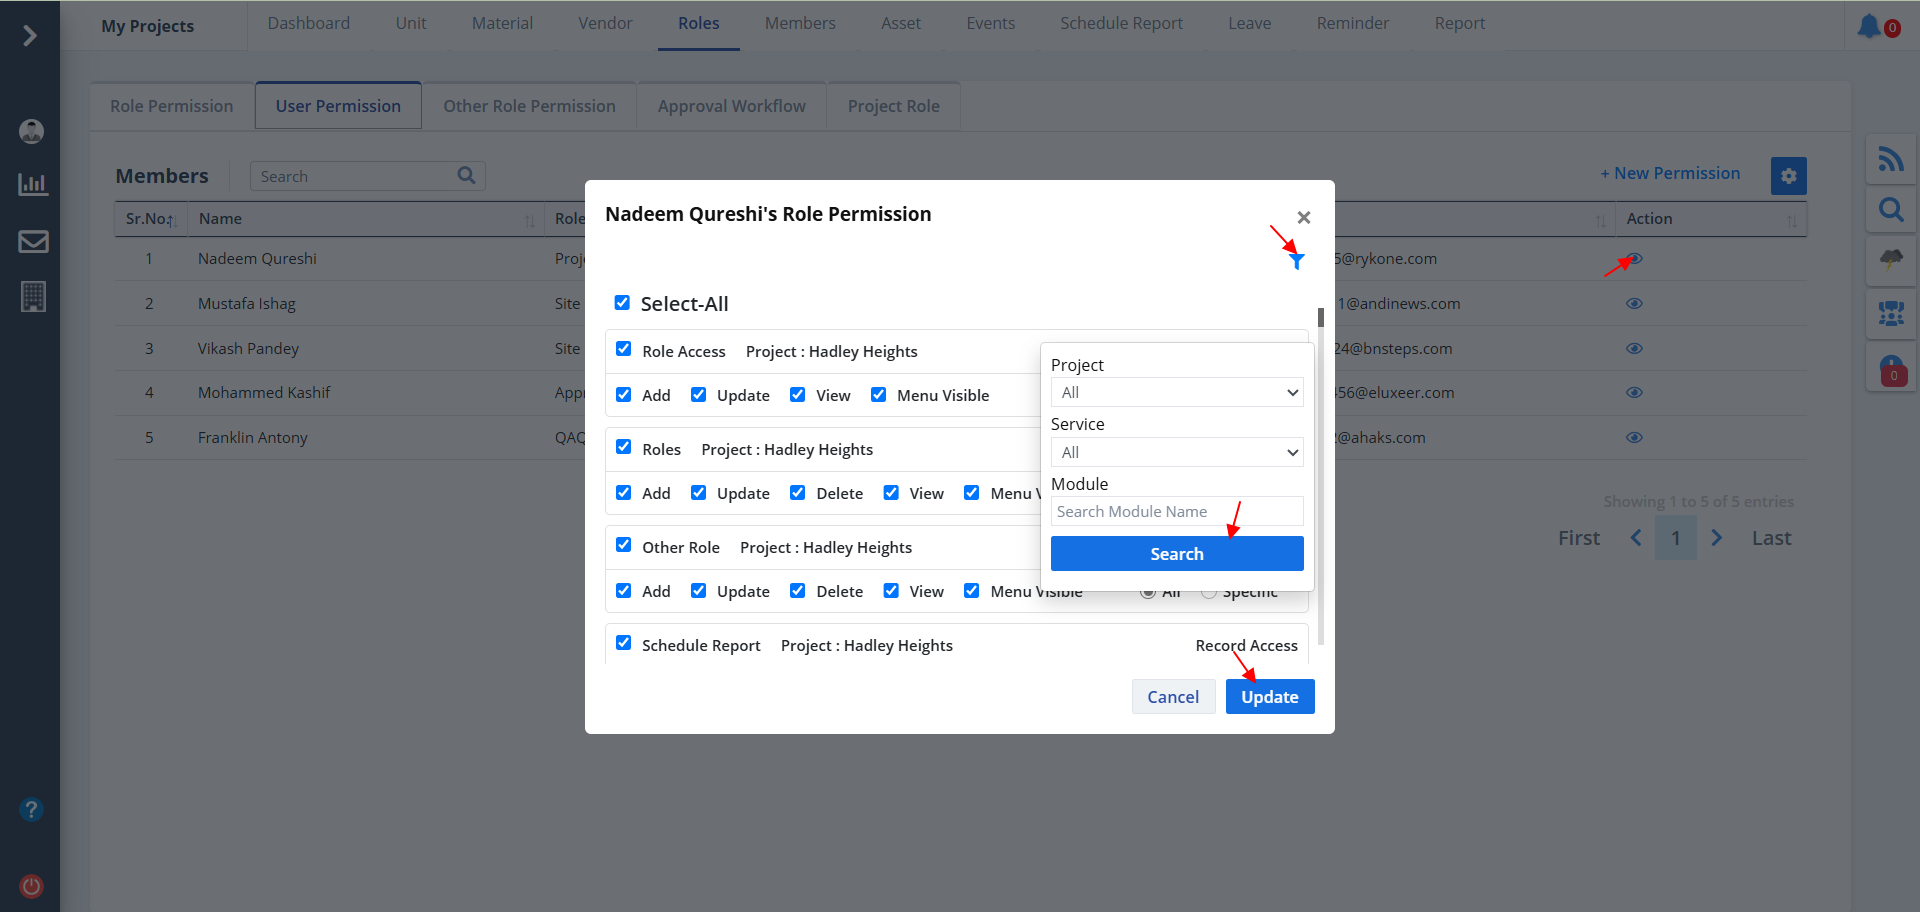
Manage View
- Click on the Eye button as shown if you want to open view management.
- Check Select All if you want to select all categories from available modules. Untick/uncheck the same if you don't wish to do so. Unchecking the same allows you give permissions of Add, Update, Delete, view & Menu Visibility.
- Just check/uncheck the box on the left side of the permission.
- Similarly if you want to select all permssions for a particular caregory you can check the box with the category name. Uncheck the same in case you change your mind.
- Ultimately click on Update.
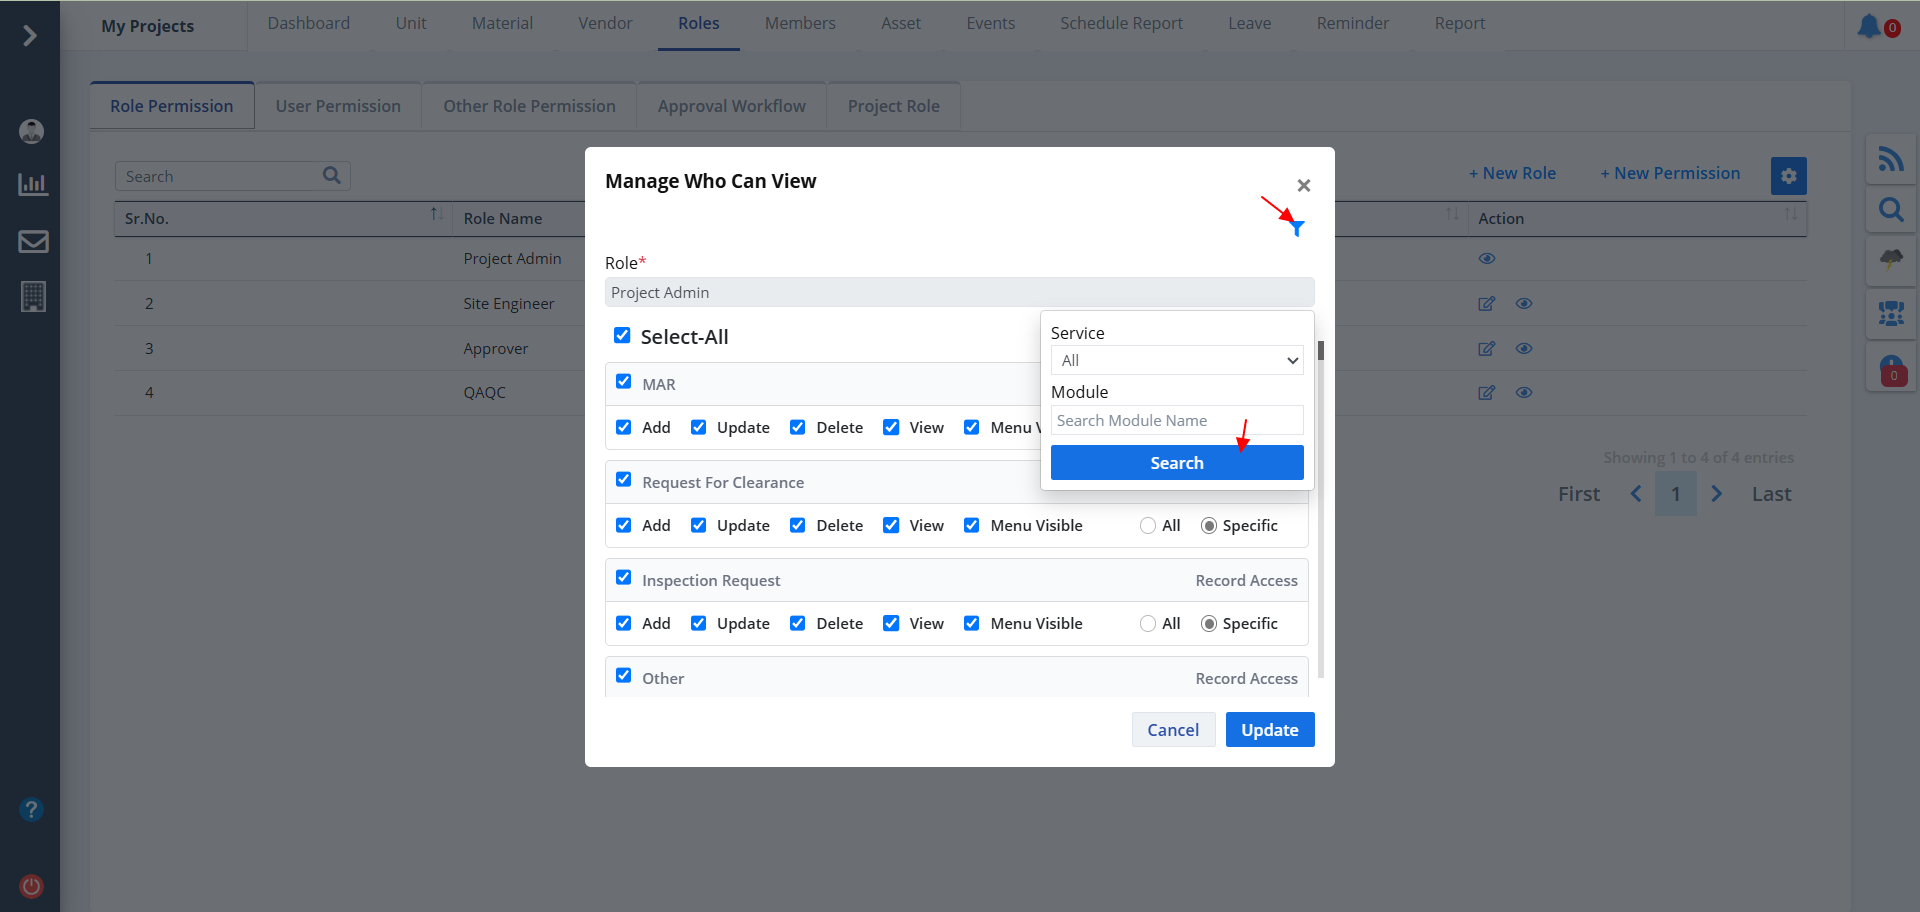
- Click on the Filter button as shown to view role management based on Service (Construction, Inventory, Labour, Cost Management) and module name.
- Just click on Search thereafter.
- Now you will see only the categories and permssions that you wish to see. You don't need to keep scrolling up and down to find a particular category.
- Click on Search once done.
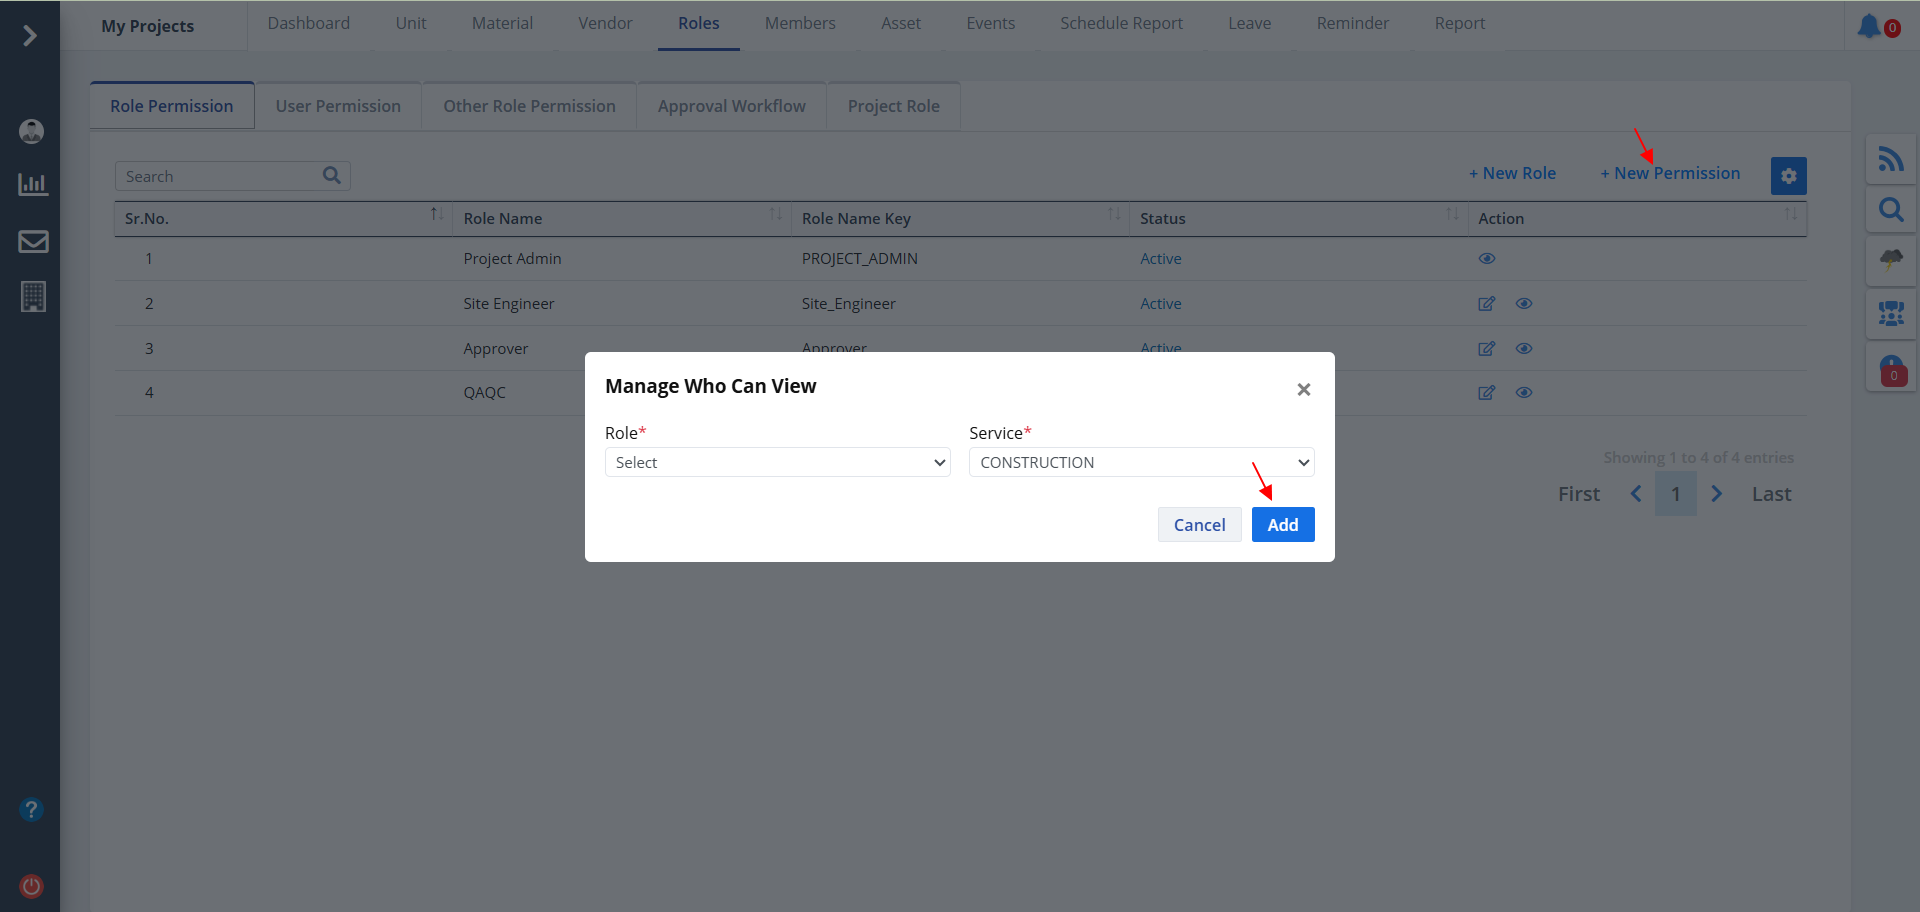
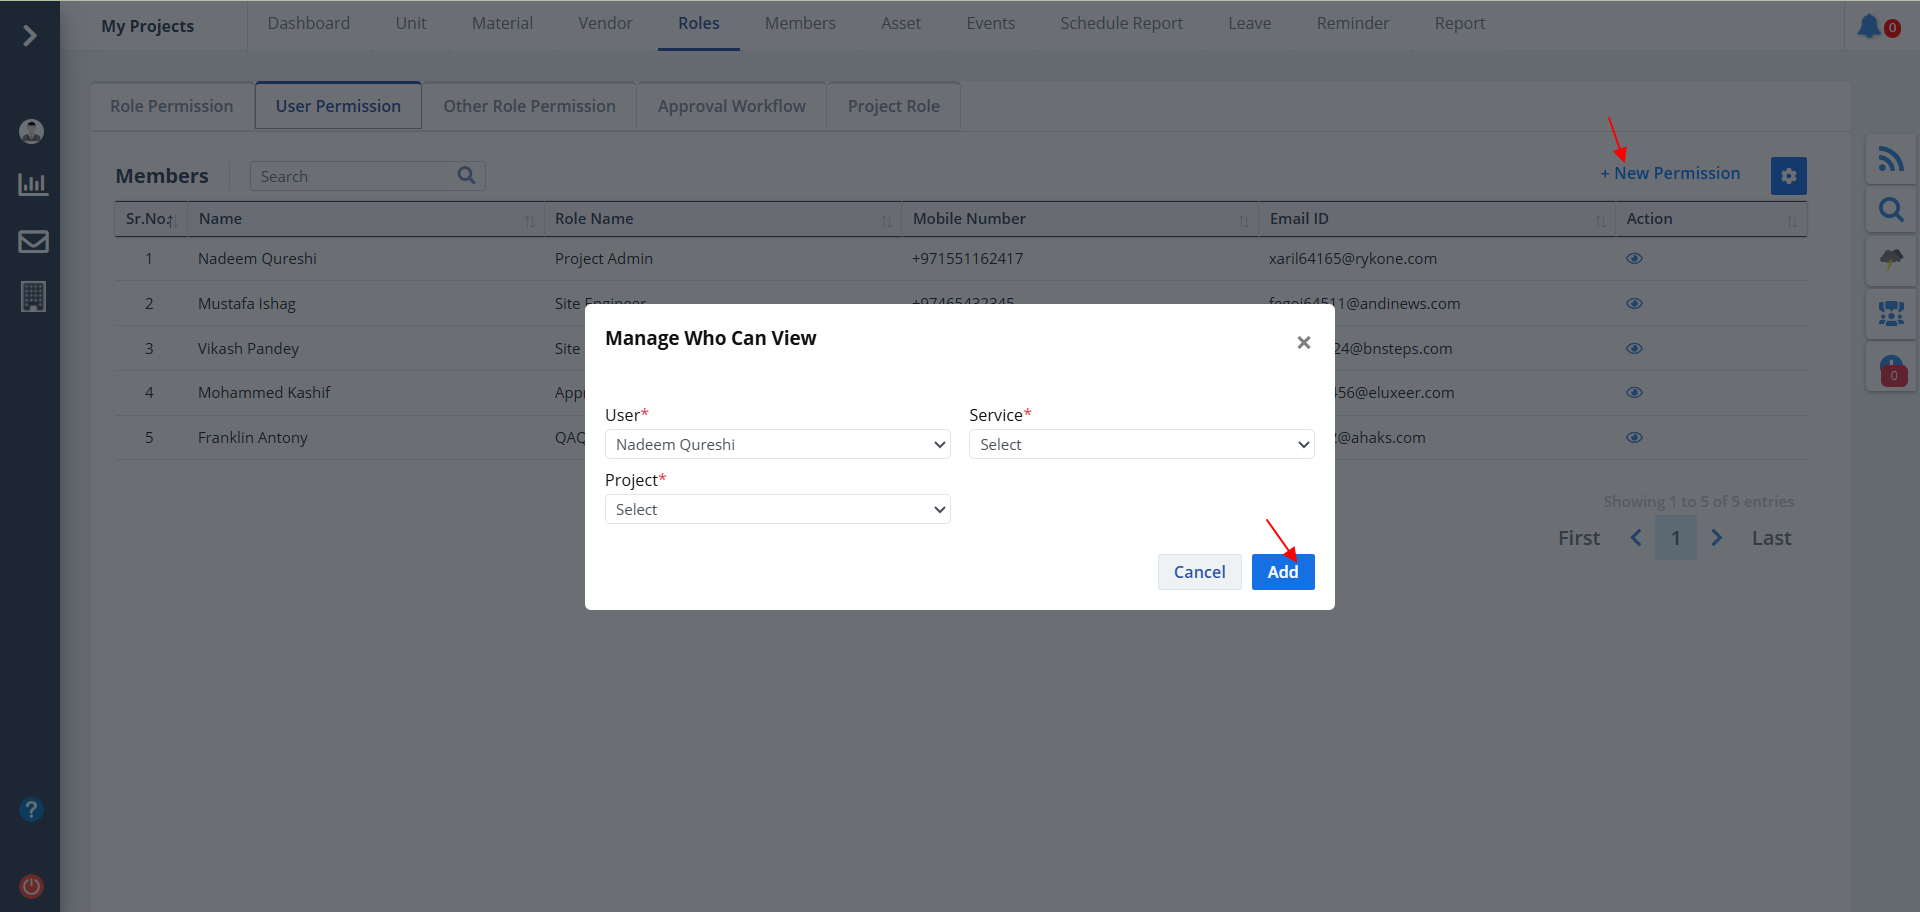
New Permission
- Click on New Permission to create a new role permission.
- Select roles such as Project Admin, Site Engineer, etc, and service.
- Now click on Add.
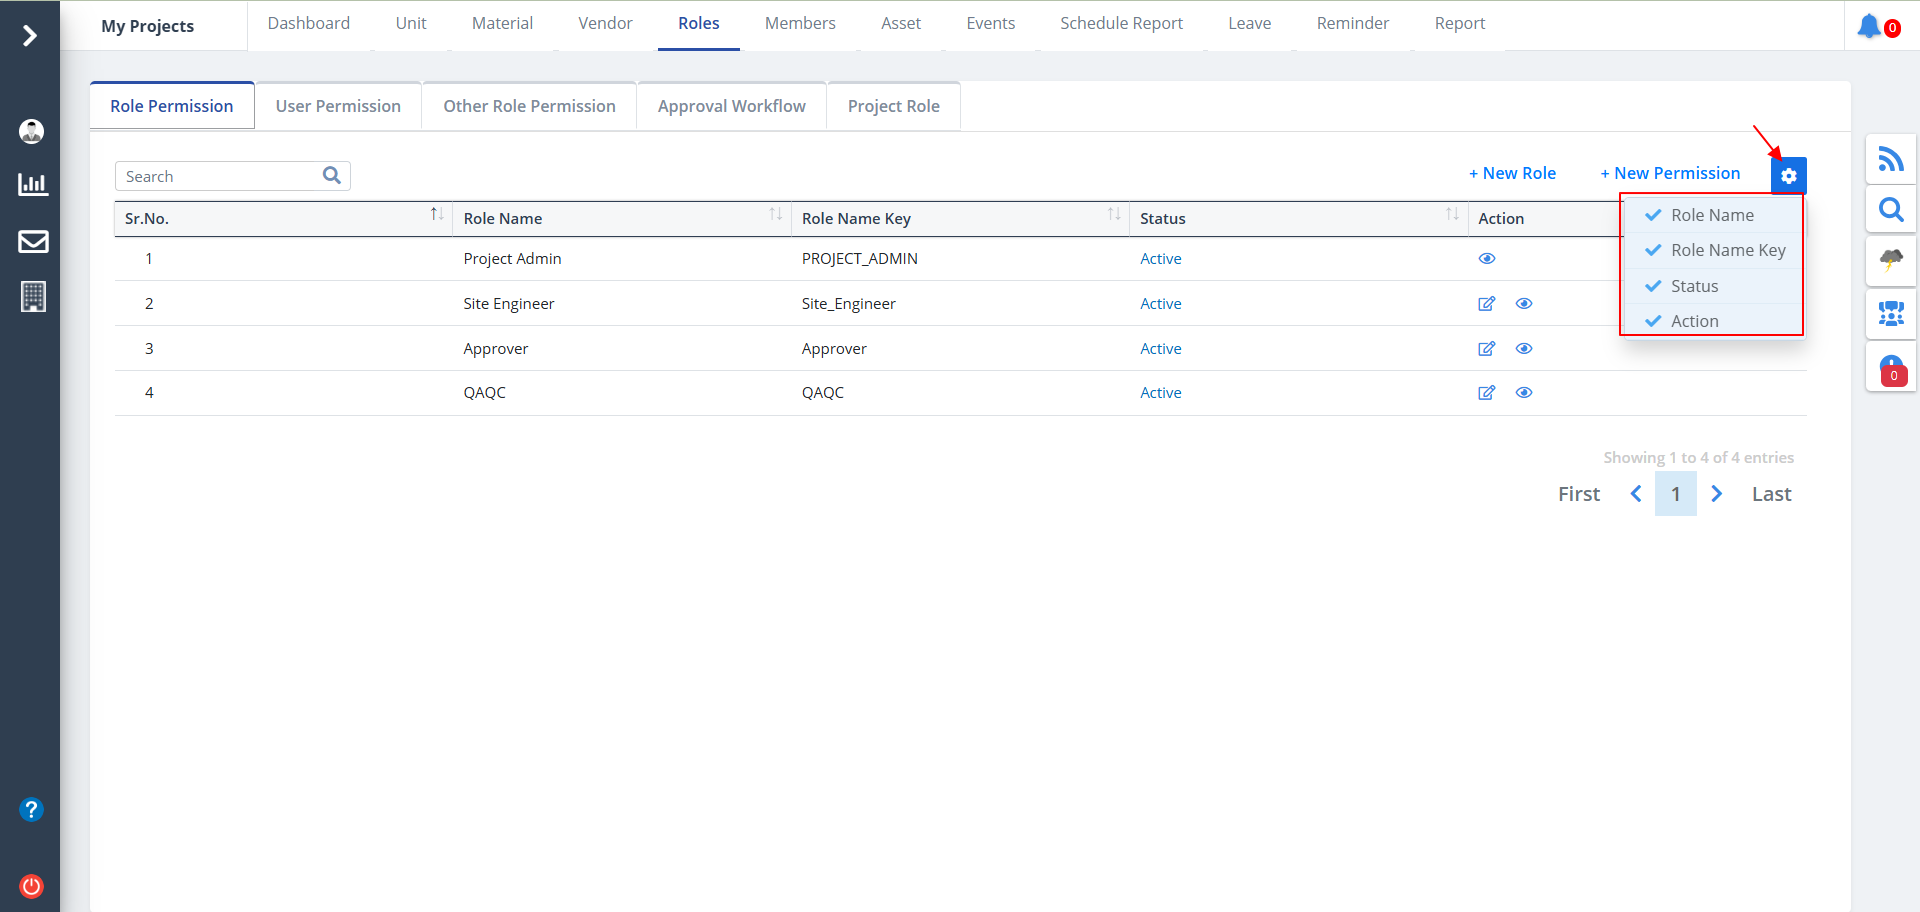
Column Visibility
- You can control what column you prefer to be seen.
- Just click on the Settings icon as shown in the below image.
- Tick the columns that you want to view and untick the ones you don't desire to view.
- In case you change your mind, you can tick the untick ones and vice-versa.
Role Categories
Role module is divided into 5 categories:-
- Role Permission
- User Permission
- Other Role Permission
- Approval Workflow
- Project Role
- As discussed earlier here every permission is for user. So, instead of categories here you have projects.
- Entire functionality is same as for Role Permission. Only change here is project instead of category.
- Filter here allows you to search by product as well for better results. Click on Search for the results to appear.
- Just click on Update once done.
- Now the Other Role Permission tab. This is specially for Dashboard permission.
- Use the Eye to open Other Role Permission popup.
- Untick the actions whose permission you want to deny.
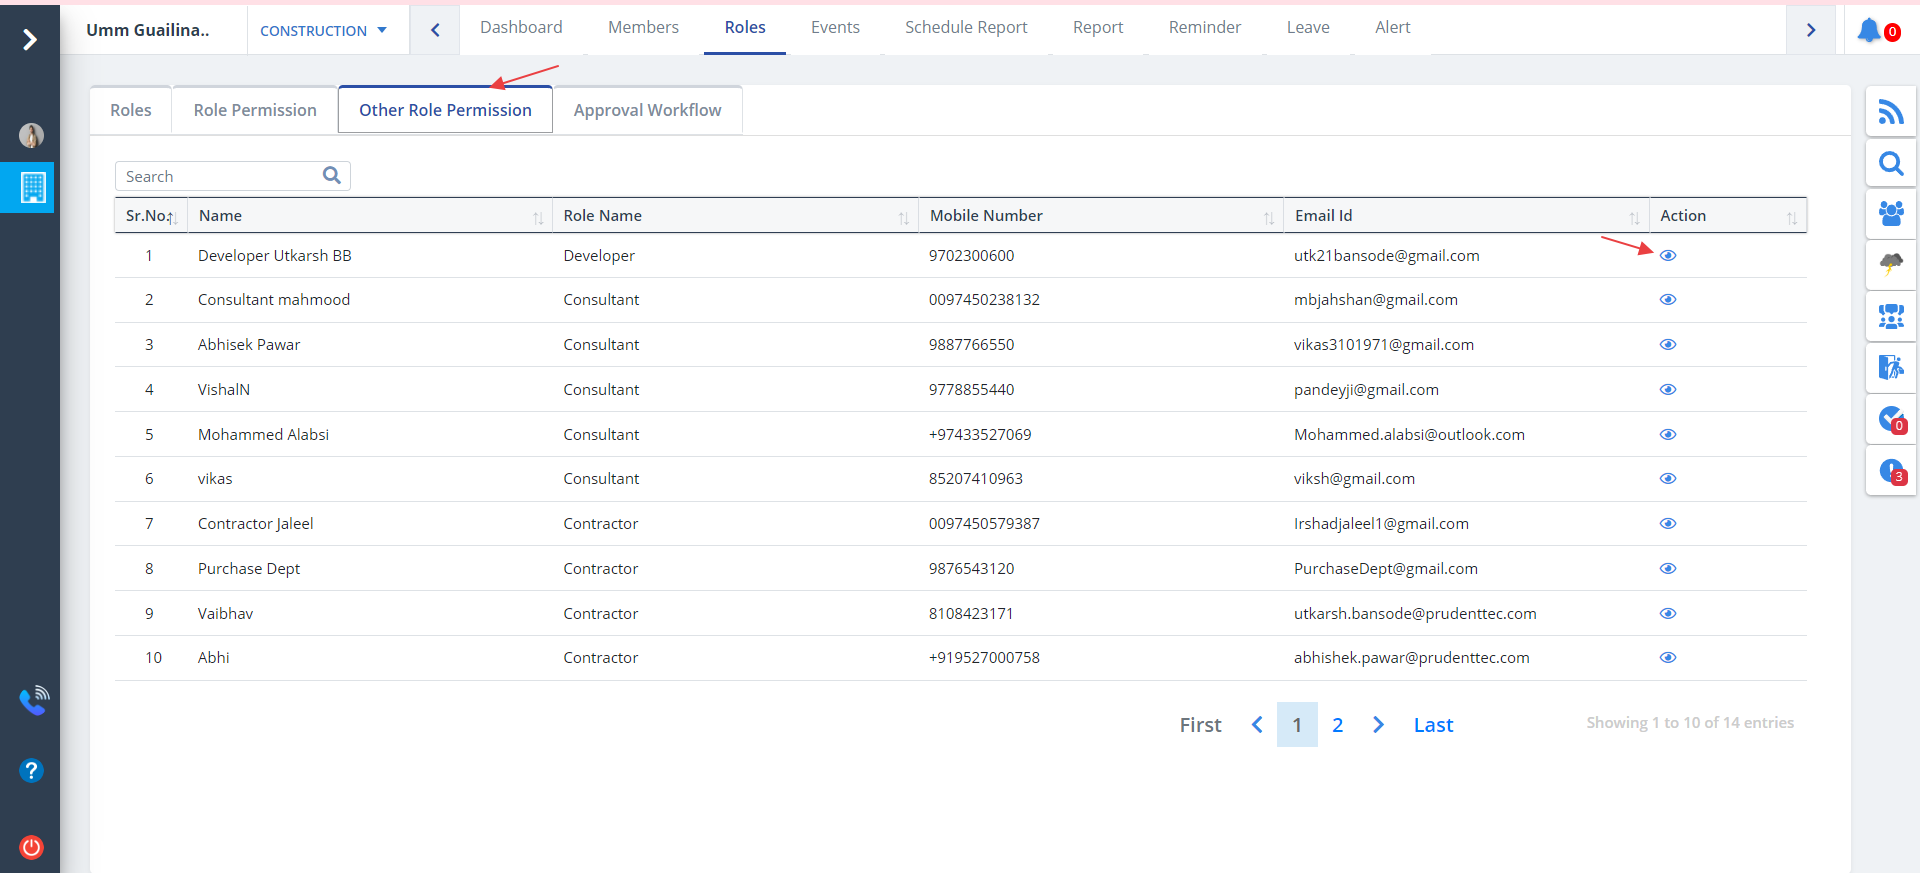
- Since, its Dashboard, instead of add, update, delete, view, menu we have the sections of Dashboard which can be viewed based on access rights.
- Just as before, click Update.
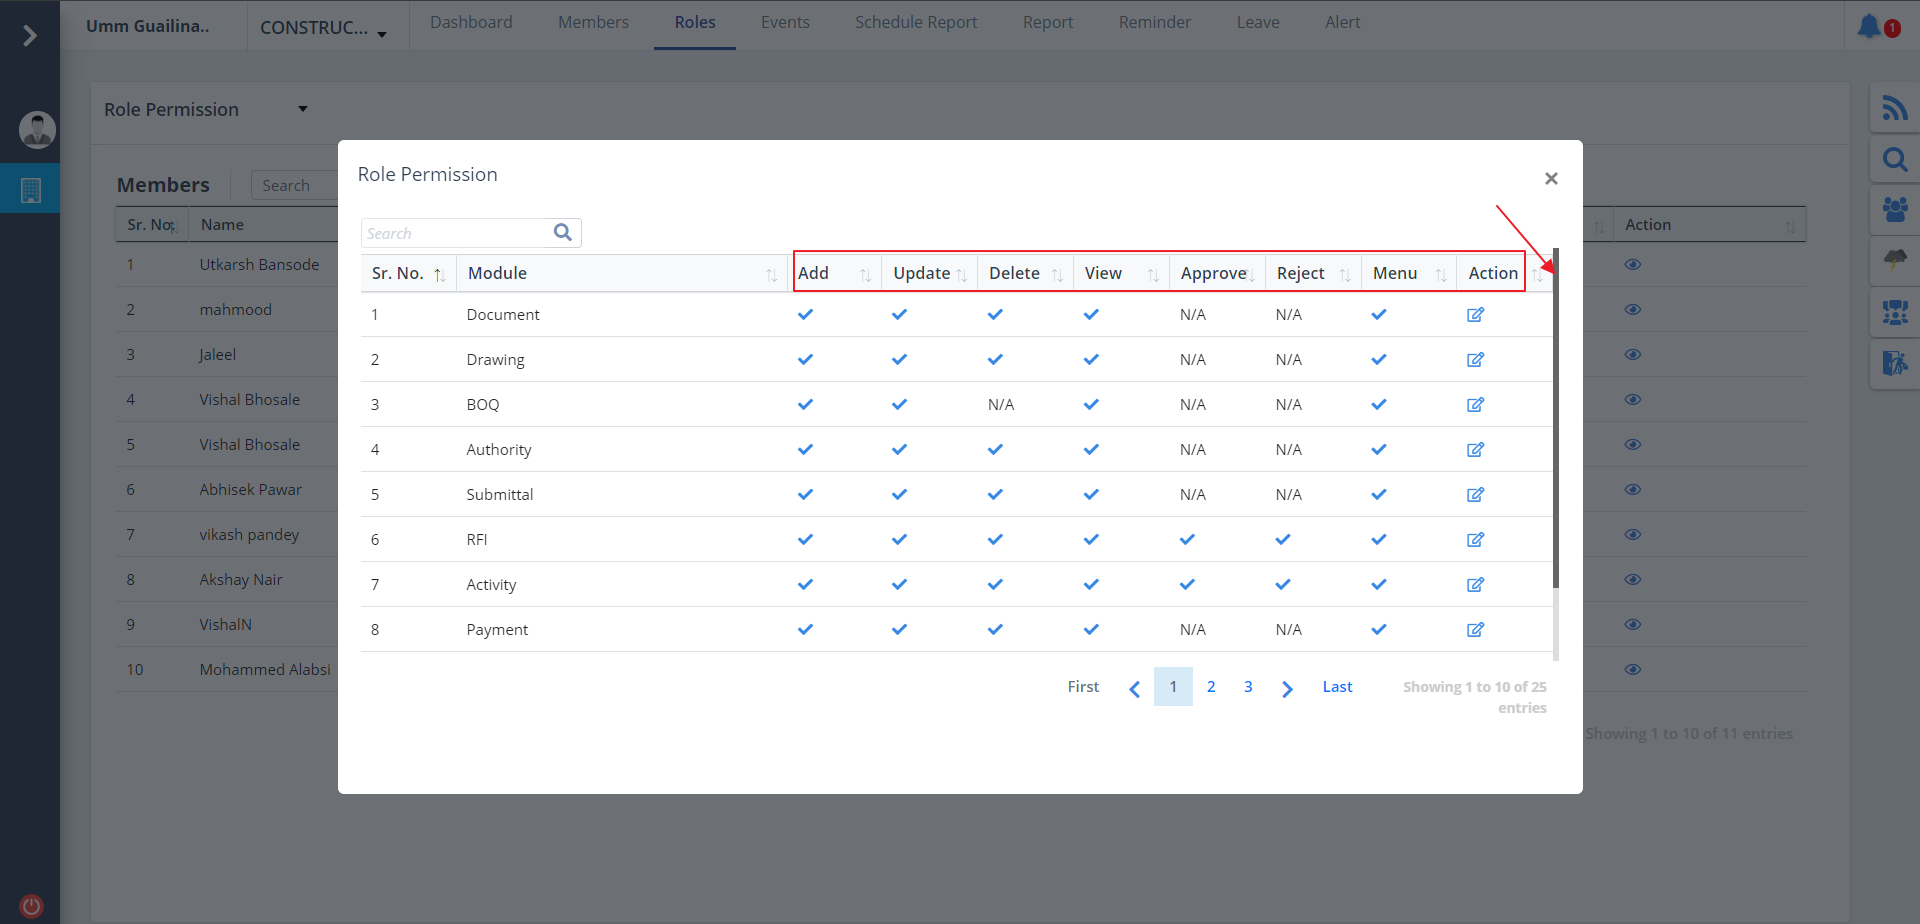
Preview Role
- Under the Action column, use the Eye to modify or give access rights to user/users.
- It covers add, update, delete, approve, etc.
- If permission is granted, then it is ticked, else crossed.
- Shows all the modules in the project including access rights for the user for add, update, delete, view and menu.
- You can edit the permissions. Just click on Edit underv Action column.
- Use the scrollbar to view more.
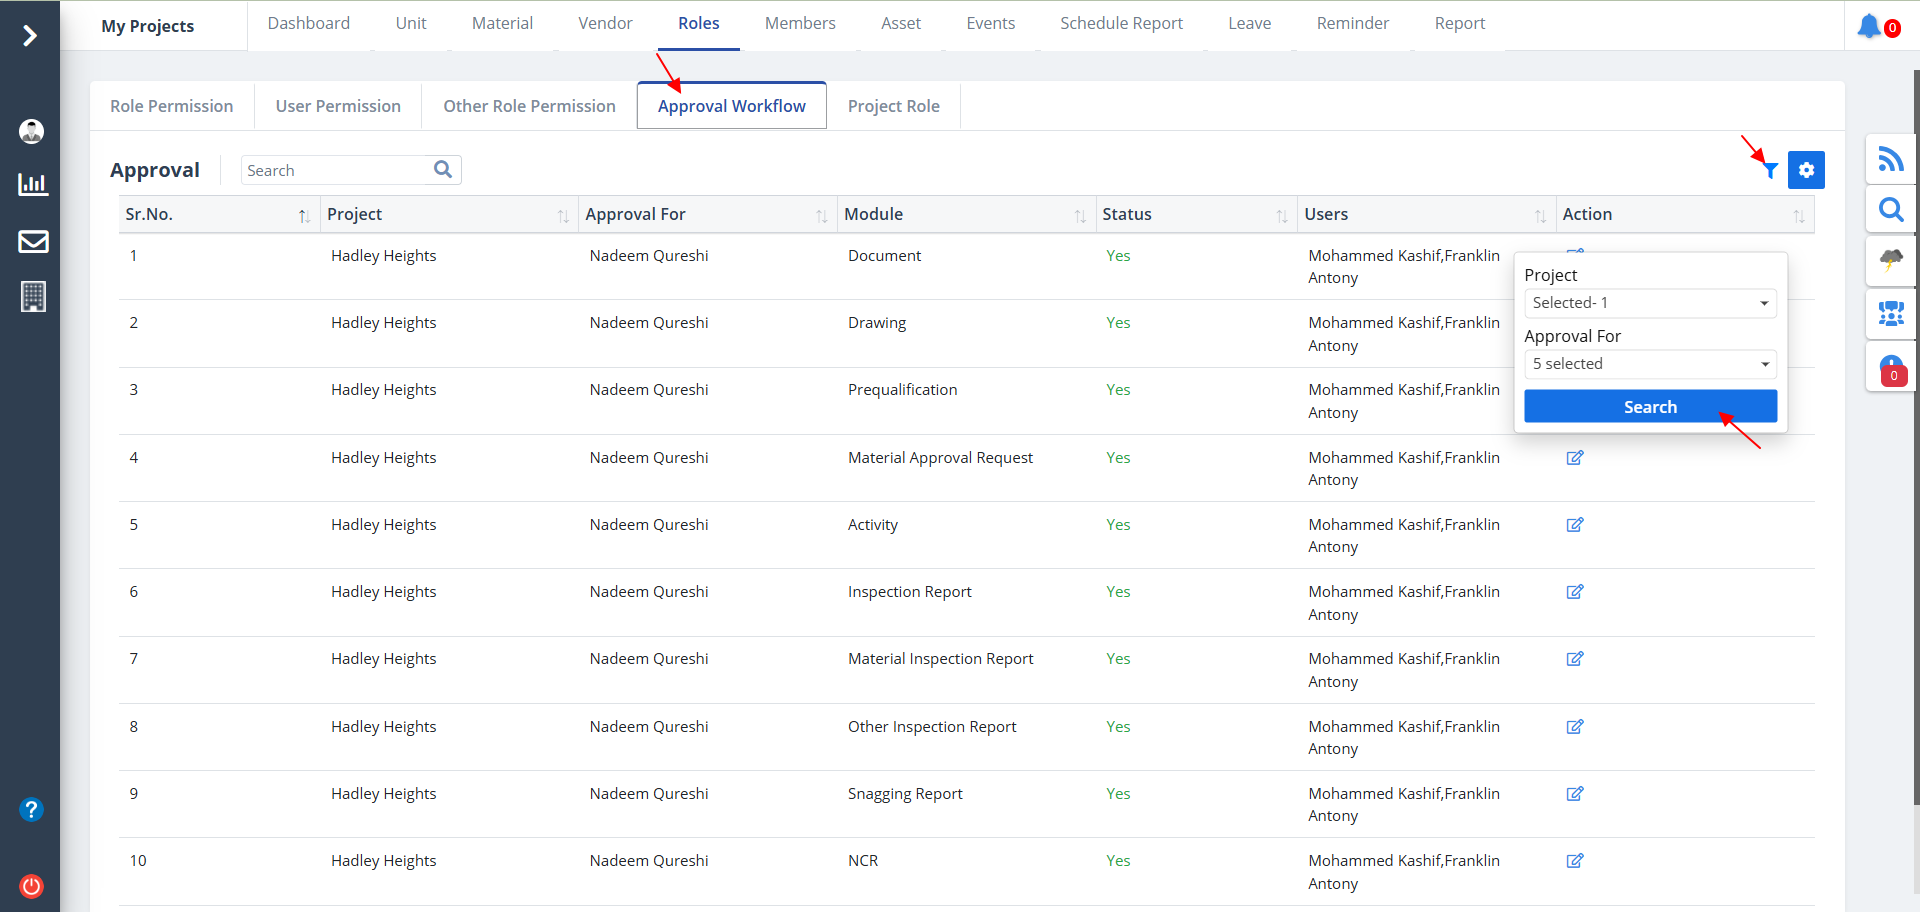
Approval Workflow
- Select the Approval Workflow tab.
- The approvals of all the modules along with their statuses, projects and the users will be shown.
- You can use the Filter button over here to filter data based on project and approval for. Click on Search once done.
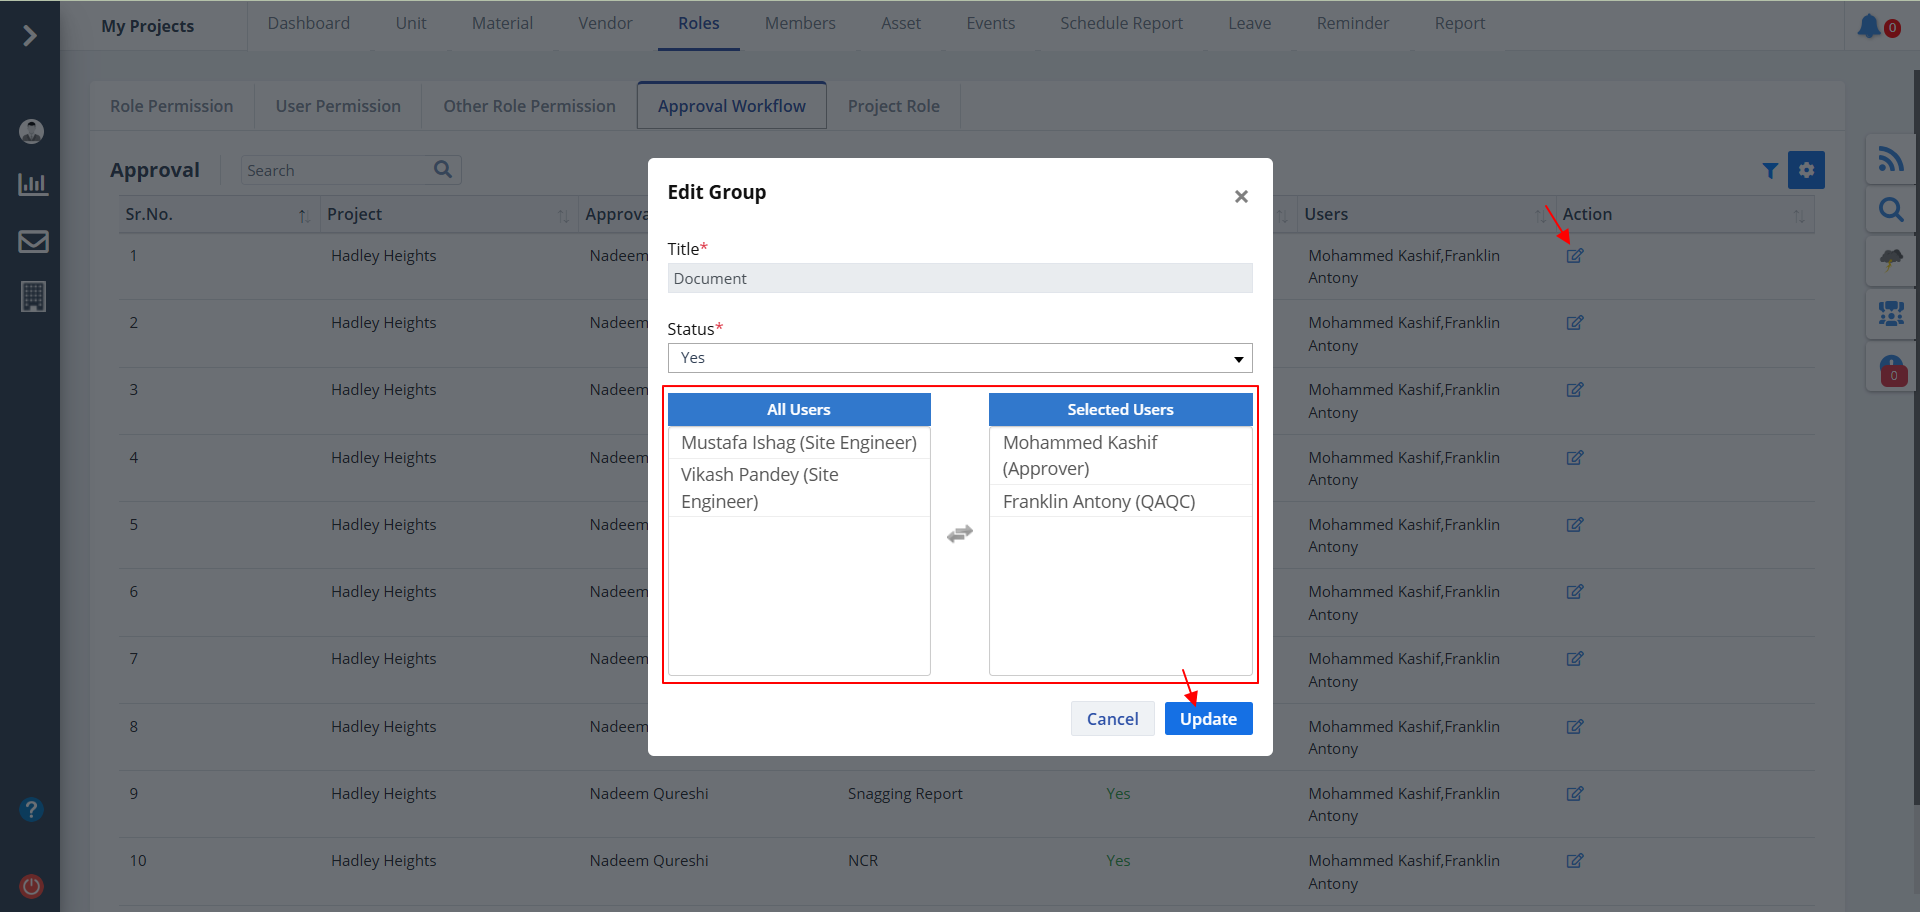
- If you want to edit a workflow use the Action column, click on Edit as shown.
- Refer 2nd image. You can can change the users list by dragging and dropping the respective users.
- Ultimately click on Update.
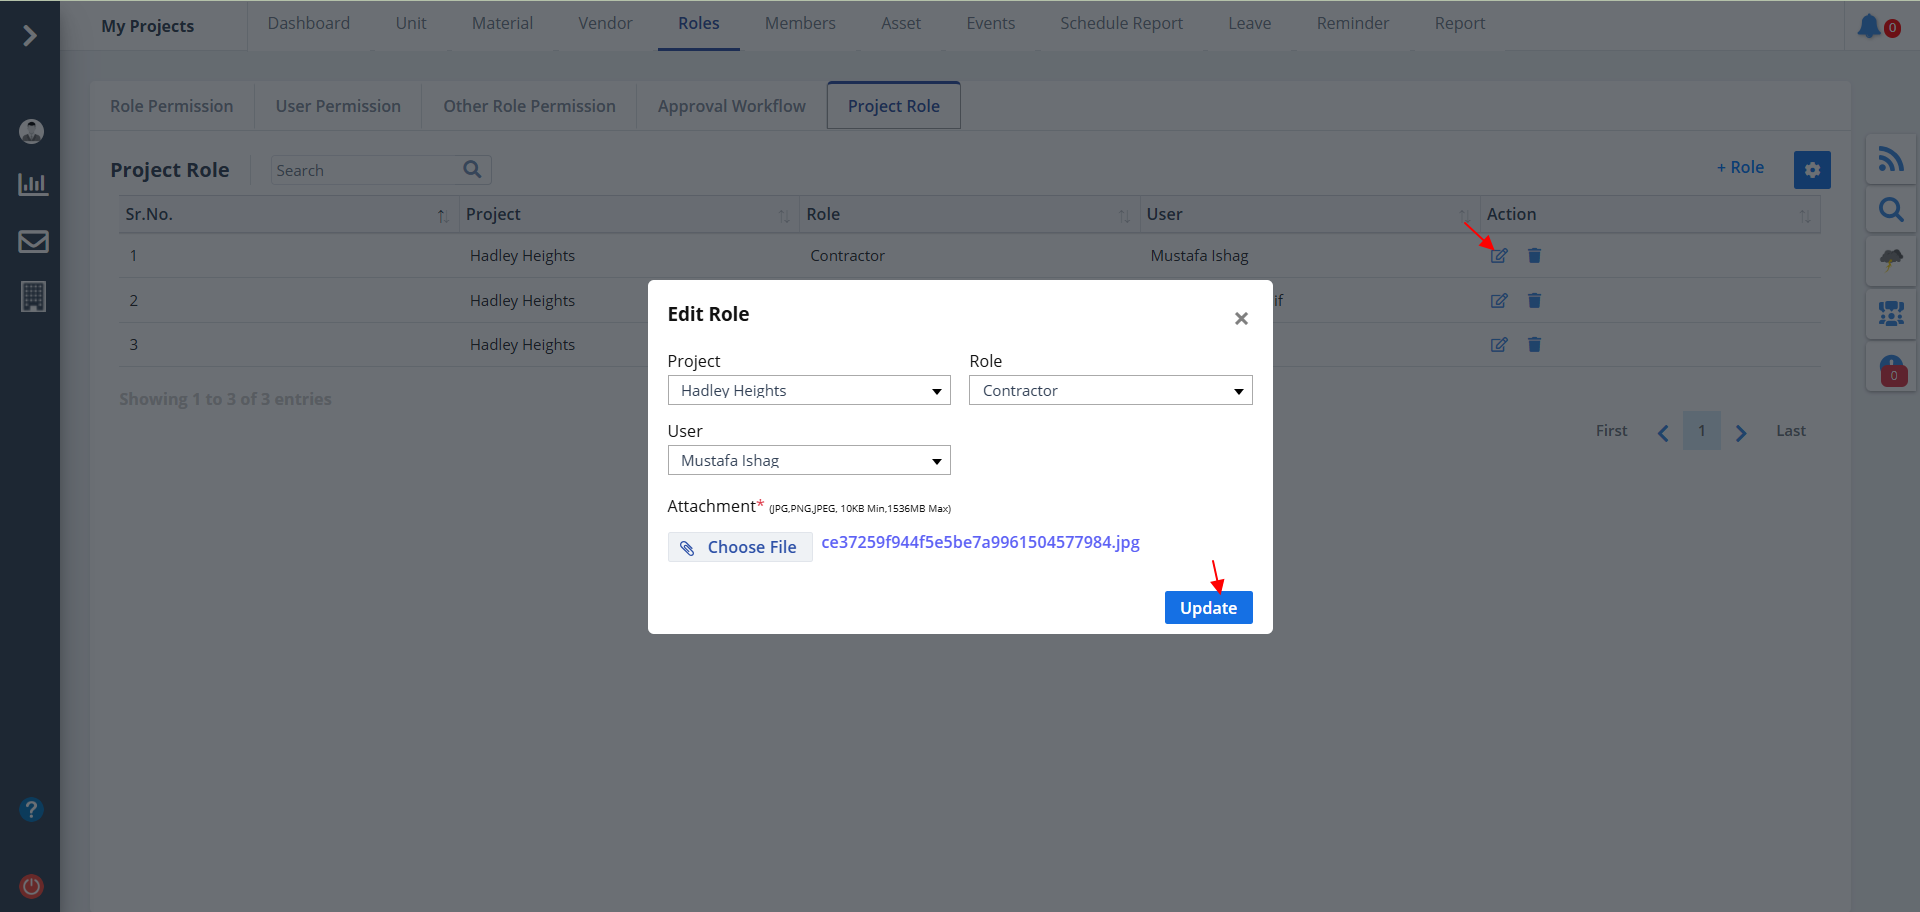
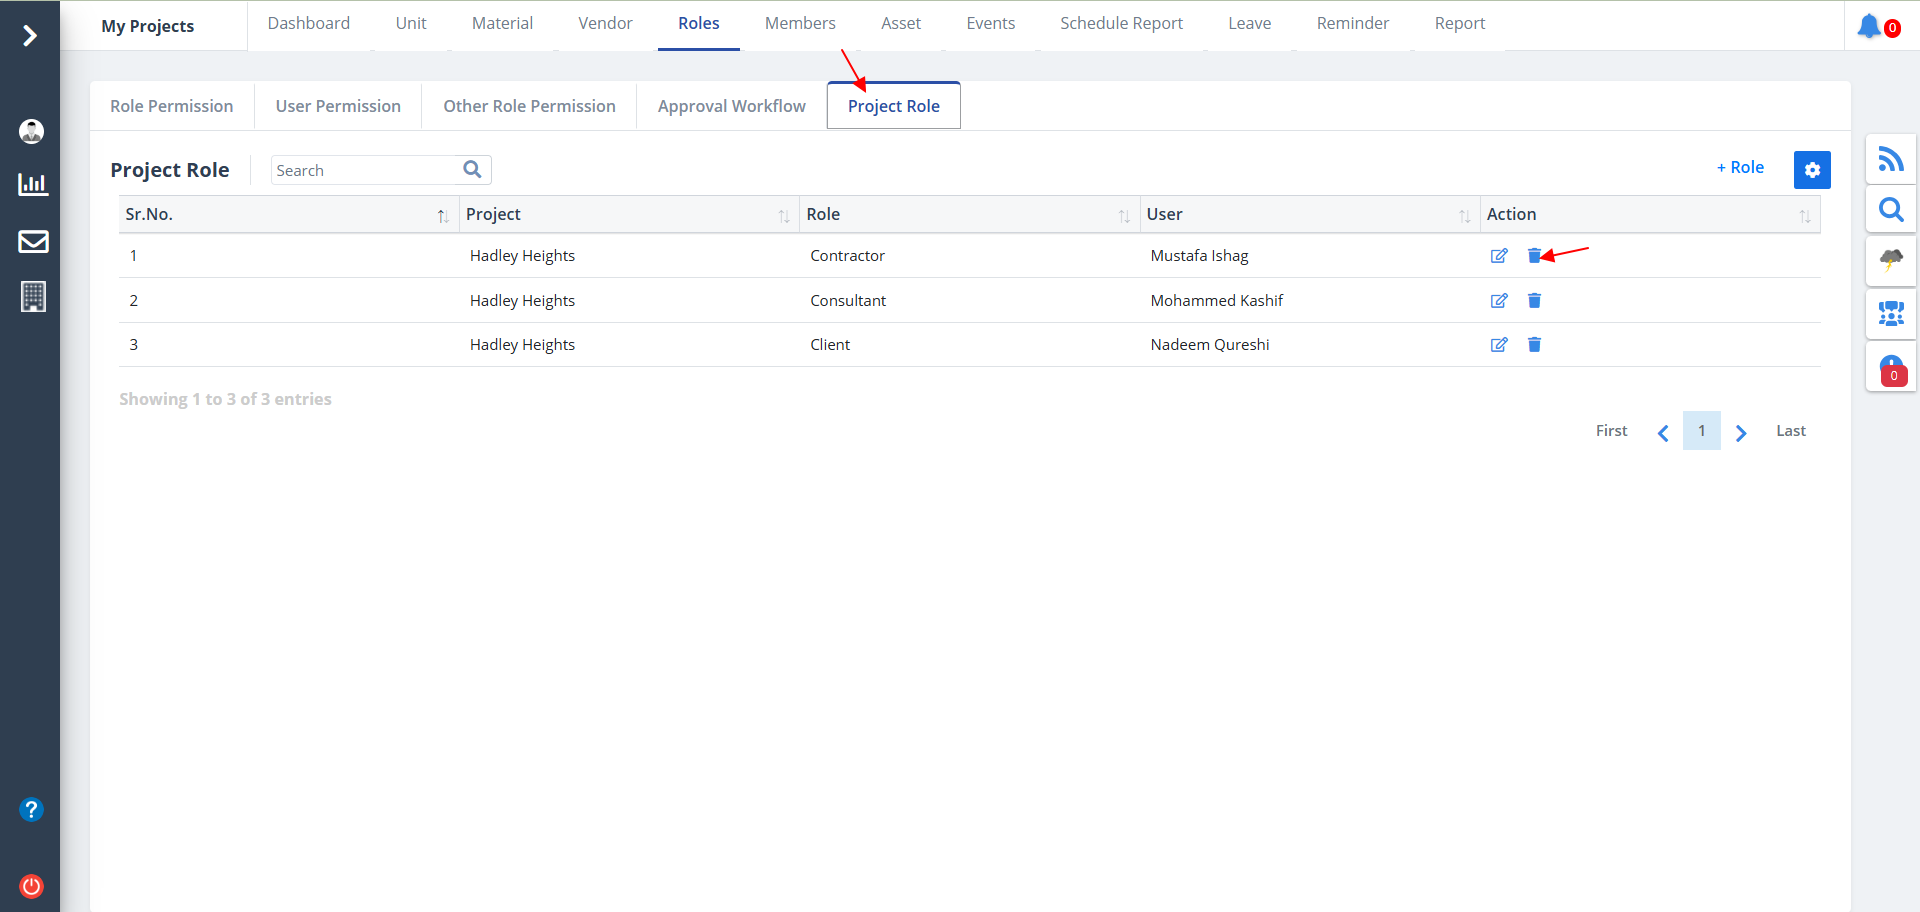
Project Role
- Select the last tab ,i.e. Project Role
- This will show the users with their role and assigned projects.
- To delete a particular record, just click on Delete as shown.
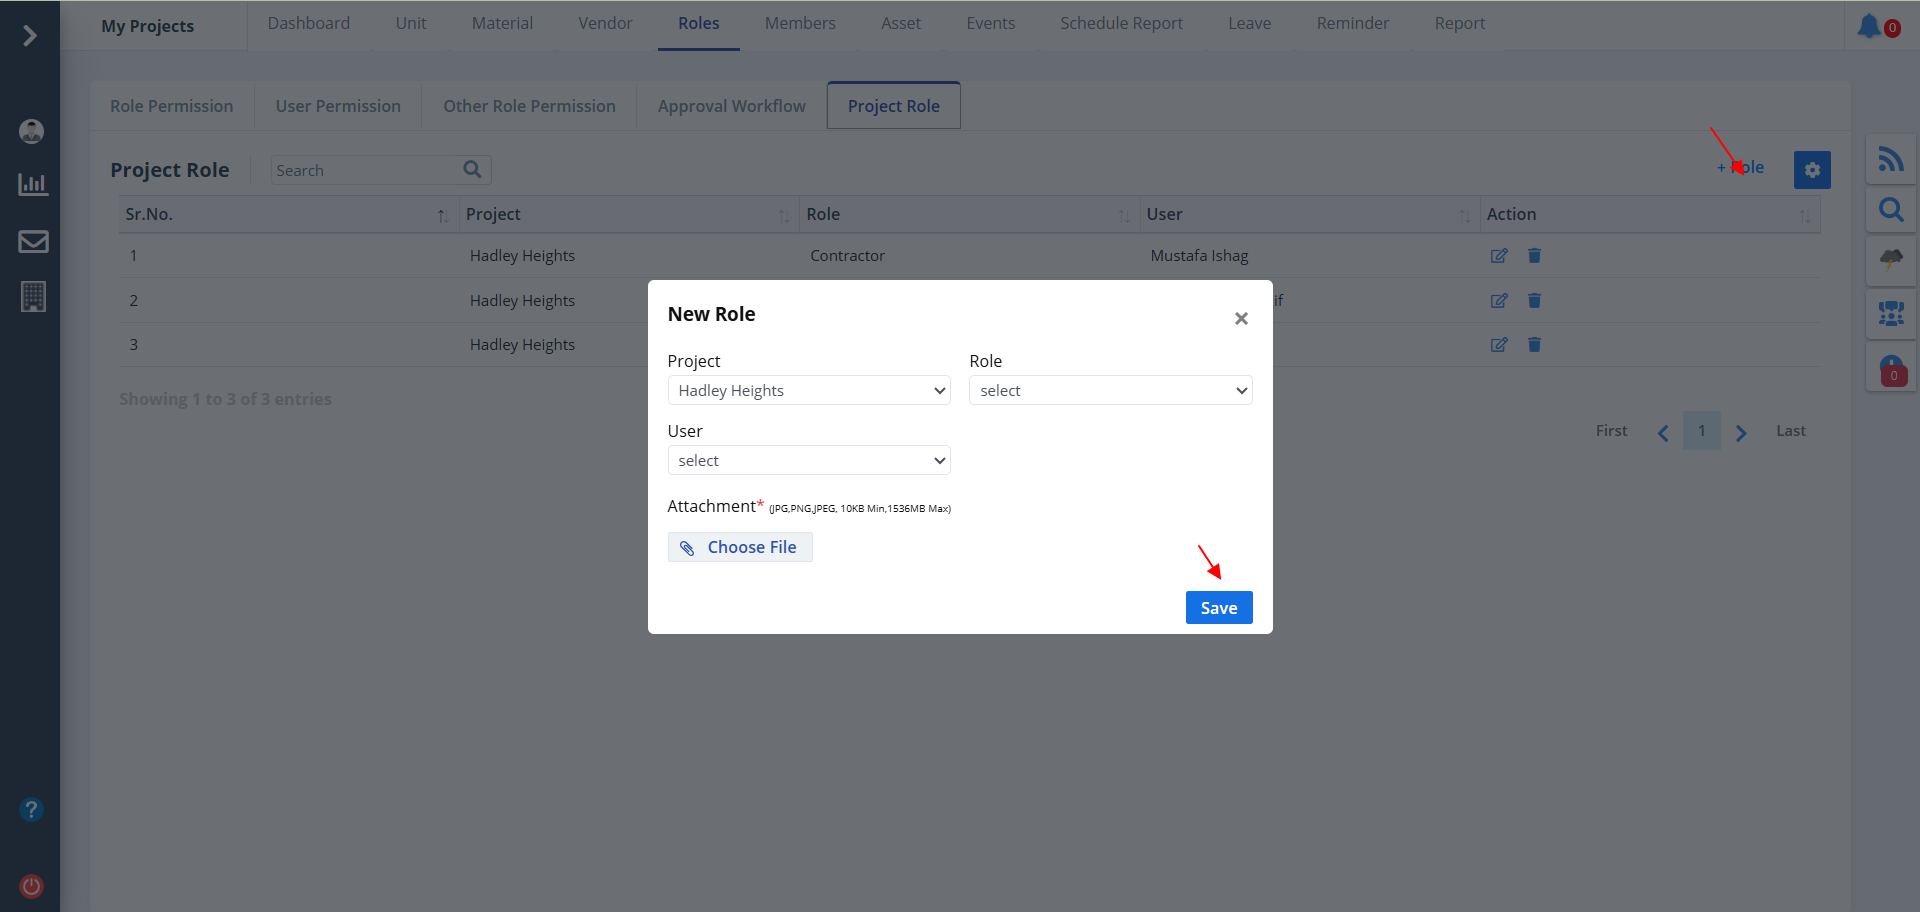
- To add a new role for a project, click on New Role.
- Select project first. Now you will be able to select role and user.
- Click on Save thereafter.
- You can also Edit a project's role, just by clicking Edit.
- Modify data as per your choice and click on Update.